Apify
Getting Started with Apify
The Apify modules allow you to monitor and run actors and tasks, or fetch dataset items in your Apify account.
Prerequisites
- An Apify account
In order to use Apify with Integromat, it is necessary to have an Apify account. If you do not have one, you can create an Apify account at my.apify.com.
Connecting Apify to Integromat
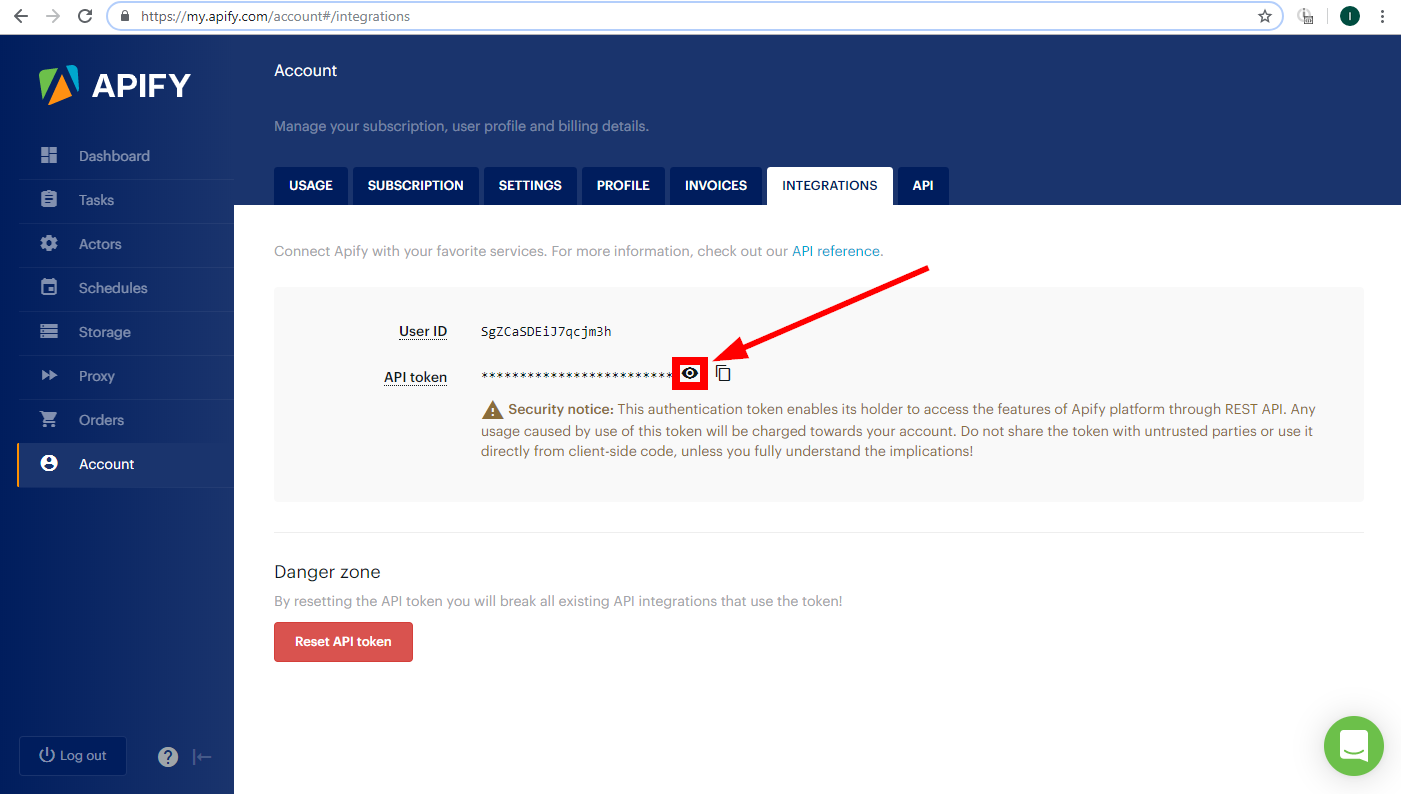
To connect your Apify account to Integromat you need to obtain the User ID and the API Token for triggers/webhooks or just API Token for actions and searches.
1. Log in to your Apify account.
2. Go to Account settings.
3. Open the Integrations tab.
4. Click on the eye icon to show the API Token.
5. Go to Integromat and open the Create a connection dialog of the desired Apify module.
6. Insert the User ID and the API token into the respective fields and click the Continue button.
The connection is now established and you can proceed with the setting up of the module.
Triggers
Watch Actor Runs
Triggers when a selected actor run is finished.
| Webhook name | Enter the desired name for the webhook. E.g. Finished Web Scraper Run. |
| Connection | Establish a connection to your Apify account. |
| Actor | Select the Actor you want to monitor for finished runs. |
Watch Task Runs
Triggers when a selected task run is finished.
| Webhook name | Enter the desired name for the webhook. E.g. Finished Web Scraper Run. |
| Connection | Establish a connection to your Apify account. |
| Actor | Select the Actor you want to monitor for finished runs. |
Actions
Run a Task
Runs a selected actor task.
| Connection | Establish a connection to your Apify account. |
| Task | Select or map the task you want to run. |
| Run synchronously | Integromat will wait until the task run is finished. Beware that the maximum timeout for the run is 120 seconds. |
| Input JSON overrides |
Here you can enter a JSON object to override the task input configuration. Only the provided fields will be overridden, the rest will be left unchanged. You can see the JSON task input configuration when you switch from Editor to Raw display of the input configuration.
|

Run an Actor
Runs a selected actor.
| Connection | Establish a connection to your Apify account. |
| Actor | Select or map the ID of the actor you want to run. |
| Run synchronously | Integromat will wait until the task run is finished. Beware that the maximum timeout for the run is 120 seconds. |
| Input JSON |
Here you can enter a JSON object to override the actor default configuration. Only the provided fields will be overridden, the rest will be left unchanged. You can see the JSON actor input configuration when you switch from Editor to Raw display of the input configuration.
|
| Build |
Specify the actor build to run. It can be either a build tag or build number. By default, the run uses the build specified in the default run configuration for the actor (typically 'latest'). |
| Timeout |
Enter the timeout for the run in seconds. By default, the run uses a timeout specified in the default run configuration for the actor. |
| Memory |
Select or enter memory limit for the run, in megabytes. By default, the run uses a memory limit specified in the default run configuration for the actor. |
Searches
Get Dataset Items
Retrieves items from a dataset.
| Connection | Establish a connection to your Apify account. |
| Dataset ID | Enter the ID of the dataset you want to retrieve items from. |
| Data transformation |
Select a type of data transformation.
|
| Format | Select the format of the dataset items. |
| Limit | Set the maximum number of items Integromat will return during one execution cycle. |
| Offset | Enter the number of items to skip. |
For more detailed information about the rest of the module functions, please refer to the APIFY Docs.


