Bubble

Getting started with Bubble
To begin using any of the Bubble modules, you need to first connect your Bubble account to Integromat. If you do not have a Bubble account yet, you can create one on bubble.is.
https://www.loom.com/share/cb04283e8fc040d98af41ddd9d38dc75
To connect your Bubble app to Integromat, watch the above video or follow the steps below.
Step 1: Create a Data Type called mytable
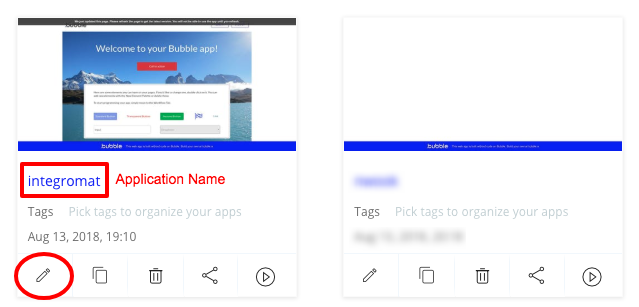
- Visit the Bubble homepage where you can see all your applications and choose the one you want to connect to Integromat.
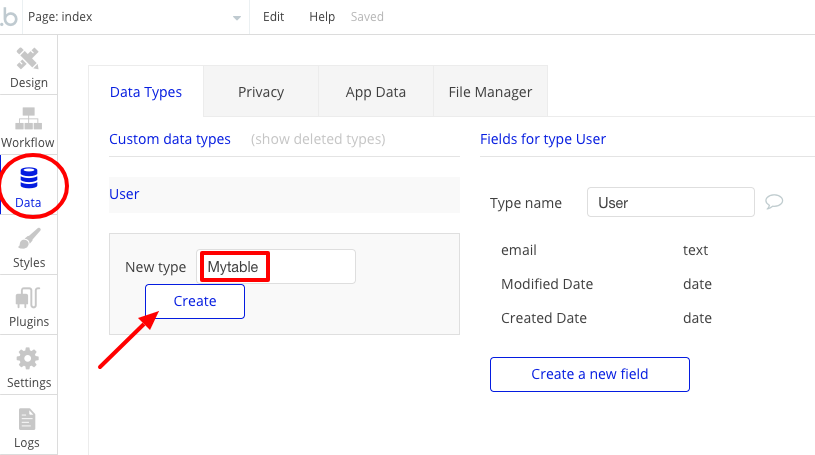
- Click the Data tab and under Data Types, enter mytable alongside New type and click the Create button as shown below:
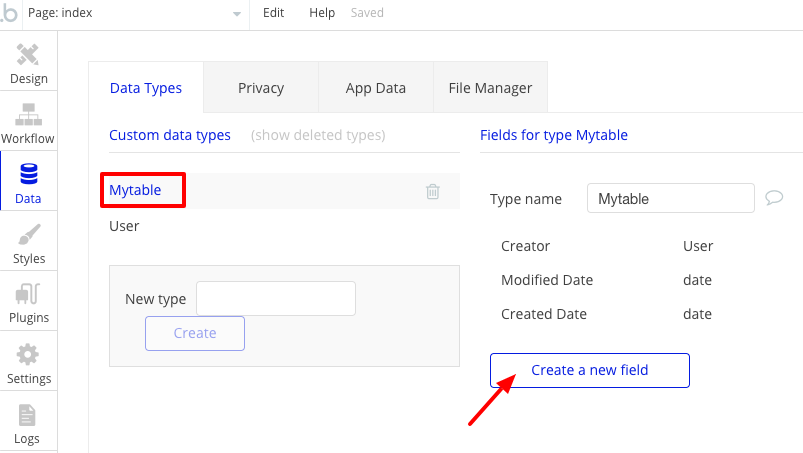
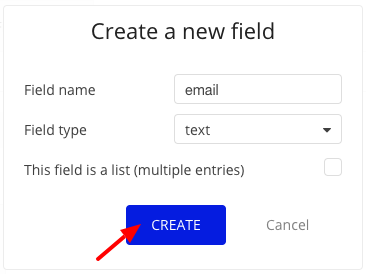
Step 2: Next, with Mytable selected as the data type, click on Create a new field, enter 'email' as the field name and choose text as the type:
Step 3: Under the App Data tab, click All mytables and create a record with your email by clicking the New entry button:

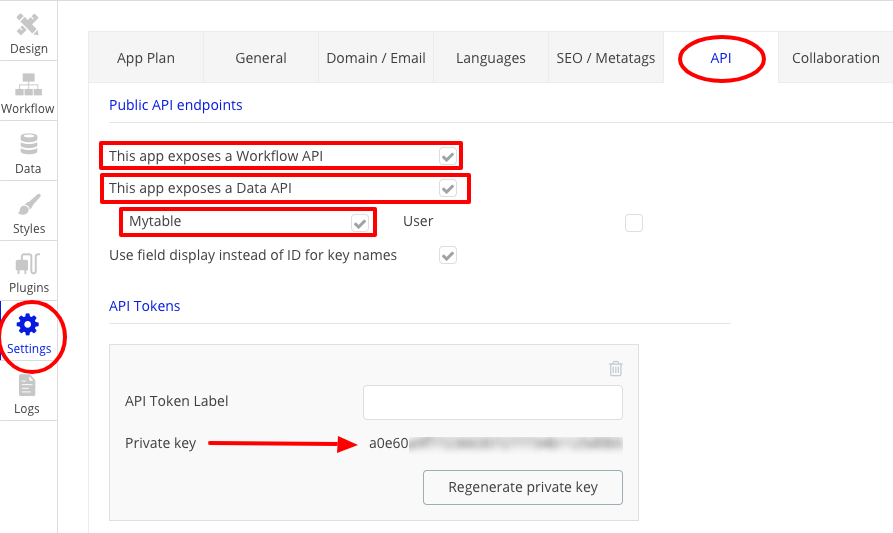
Step 4: Expose the API endpoints and the Data Type and copy your Private Key:
Click the Settings tab and under API, select the checkboxes as shown. Please note that you must select the mytable checkbox along with the Workflow API and Data API endpoints as shown below. Copy the Private Key to your clipboard as you will need it in the next step.
Step 5: Head over to your Integromat Scenario to add the Bubble connection.
- Select the Watch data things module as the trigger

- Click on Add and enter required values as follows:
| Connection name | Enter a name for the connection. |
| Domain Type | Select whether you want to use the Application Domain or Custom Domain. Then fill the field below accordingly. |
| Application Name | Enter the Bubble application name. <applicationName>.bubbleapps.io |
| Custom Domain URL | Enter the URL of your custom domain you are using for Bubble. |
| API Token | Enter the Private Key obtained in step 4. |
| Environment | Select whether you want to connect to Development (version-test) or Released (live) version. |
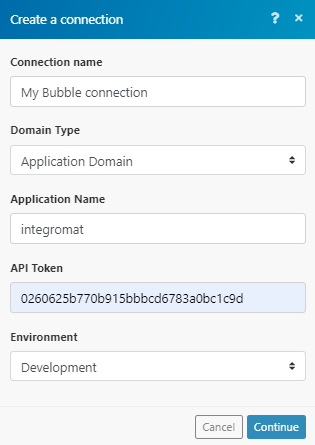
Click on Continue to complete the connection and proceed to build your scenario.
Please Note: If you need to access any Data Type from an Integromat Scenario, it is mandatory to expose that Data Type on Bubble as shown in Step 4 above.
Additional Resources:


