Drip
The Drip modules allow you to watch, create, update, list, and/or delete accounts, broadcasts, campaigns, conversions, events, forms, orders, subscribers, workflow in your Drip account.
Prerequisites
- A Drip account
In order to use Drip with Integromat, it is necessary to have a Drip account. If you do not have one, you can create a Drip account at https://www.getdrip.com/signup/basic.
Connecting Drip to Integromat
1. Go to Integromat and open the Drip module's Create a connection dialog.
2. Enter the Connection name and click Continue.
3. Confirm the dialog by clicking the Authorize button.
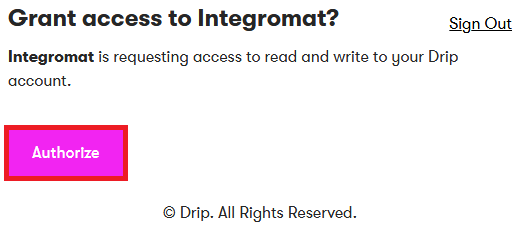
The connection has been established.
Campaigns
Activate a Campaign
Activates a selected campaign.
| Connection | Establish a connection to your Drip account. |
| Account | Select the account whose campaign you want to activate. |
| Campaign | Select the campaign you want to activate. |
Fetch a Campaign
Fetches a campaign linked to an account.
| Connection | Establish a connection to your Drip account. |
| Account | Select the account whose campaign you want to fetch. |
| Campaign | Select the campaign you want to fetch. |
Subscribe Someone to a Campaign
Subscribes a given email to a campaign.
| Connection | Establish a connection to your Drip account. |
| Account | Select the account to whose campaign you want to add the subscriber. |
| Campaign | Select the campaign to which you want to add the subscriber. |
| Subscriber's email | Enter the email address of the subscriber. |
| Timezone | Select the timezone of the subscriber you are adding to the campaign. |
| Double Opt In | Select Yes if you want to send a confirmation email to the subscriber:
|
| Custom Fields | Add the custom fields:
|
| Tags | Add the tags which help to filter the user. For example, customer. |
| Reactivate If Removed | Select Yes if you want to re-subscribe the user if removed from the campaign:
|
| Prospect | Select Yes if you want to add the score to the subscriber:
|
| Base Lead Source | Enter the starting base score value for the subscriber. The default value of the score is 30. |
List Campaigns
Retrieves a list of campaigns linked to an account.
| Connection | Establish a connection to your Drip account. |
| Account | Select the account whose campaign you want to list. |
| Limit | The maximum number of campaigns Integromat should return during one scenario execution cycle. |
List Campaign Subscriptions
Retrieves a list of all campaign subscriptions.
| Connection | Establish a connection to your Drip account. |
| Account | Select the account whose campaign subscriptions you want to list. |
| Subscriber ID | Select the Subscriber ID whose subscriptions you want to list |
| Limit | The maximum number of campaign subscriptions Integromat should return during one scenario execution cycle. |
List Everyone Subscribed to a Campaign
Retrieves a list of everyone subscribed to a selected campaign.
| Connection | Establish a connection to your Drip account. |
| Account | Select the account whose campaign subscribers you want to list. |
| Campaign | Select the campaign whose subscribers you want to list. |
| Limit | The maximum number of subscribers Integromat should return during one scenario execution cycle. |
| Status | Select the status of the subscribers:
|
| Sort | Select the option to sort the subscribers:
|
| Direction | Select the direction to sort the results of subscribers:
|
Pause a Campaign
Pauses a selected campaign.
| Connection | Establish a connection to your Drip account. |
| Account | Select the account whose campaign you want to pause. |
| Campaign | Select the campaign you want to pause. |
Remove a Subscriber from Campaigns
Removes a subscriber from one or all campaigns.
| Connection | Establish a connection to your Drip account. |
| Account | Select the account whose campaign's subscriber you want to remove. |
| Campaign | Select the campaign whose subscriber you want to remove. |
| Subscriber's Email | Enter the email address of the subscriber you want to remove. |
Watch Subscribers in the Campaigns
Triggers when a new email is subscribed to the campaign.
| Connection | Establish a connection to your Drip account. |
| Account | Select the account whose campaign's subscribers you want to watch. |
| Campaign | Select the campaign whose subscribers you want to watch. |
| Limit | The maximum number of subscribers Integromat should return during one scenario execution cycle. |
| Status | Select the status of the subscriber:
|
Subscribers, Tags, and Custom Fields
Create/Update a Subscriber
Creates or updates a subscriber.
| Connection | Establish a connection to your Drip account. |
| Subscriber's Email | Enter the email address of the subscriber you want to create or update. |
| Account | Select the account to which you want to create or update the subscriber. |
| Custom Fields | Add the custom fields:
|
| Tags | Add the tags which help to filter the user. For example, customer. |
| Tags to Remove | Add the tags you want to remove from the subscriber account. |
| Timezone | Select the timezone of the subscriber. |
| Prospect | Select Yes if you want to add the score to the subscriber:
|
| Base lead source | Enter the starting base score value for the subscriber. The default value of the score is 30. |
Fetch a Subscriber
Fetches a subscriber.
| Connection | Establish a connection to your Drip account. |
| Subscriber's Email | Enter the email address of the subscriber whose details you want to fetch. |
| Account | Select the account of the subscriber. |
Fetch a User
Fetches an authenticated user.
| Connection | Establish a connection to your Drip account. |
Update a Subscriber
Updates a subscriber.
| Connection | Establish a connection to your Drip account. |
| Subscriber's Email | Enter the email address of the subscriber you want to update. |
| Account | Select the account of the subscriber you want to update. |
| Custom Fields | Add the custom fields:
|
| Tags | Add the tags which help to filter the user. For example, customer. |
| Tags to Remove |
Add the tags you want to remove from the subscriber account. |
| New Email |
Enter a new email address of the subscriber. |
| Timezone |
Select the timezone of the subscriber. For example, |
| Prospect | Select Yes if you want to add the score to the subscriber:
|
| Base Lead Source | Enter the starting base score value for the subscriber. The default value of the score is 30. |
Delete a Subscriber
Deletes a subscriber.
| Connection | Establish a connection to your Drip account. |
| Subscriber's Email | Enter the email address of the subscriber you want to delete. |
| Account | Select the account of the subscriber you want to delete. |
Unsubscribe from All Mailings
Unsubscribes a subscriber from all mailings.
| Connection | Establish a connection to your Drip account. |
| Account | Select the account of the subscriber you want to unsubscribe from all the mailings. |
| Subscriber's Email | Enter the email address of the subscriber you want to unsubscribe from all the mailings. |
Tag a Subscriber
Tags a subscriber.
| Connection | Establish a connection to your Drip account. |
| Subscriber's Email | Enter the email address of the subscriber you want to tag. |
| Account | Select the account of the subscriber. |
| Tag | Select the tag you want to add to the subscriber. |
Remove a Subscriber Tag
Removes a subscriber tag.
| Connection | Establish a connection to your Drip account. |
| Subscriber's Email | Enter the email address of the subscriber whose tag you want to remove. |
| Account | Select the account of the subscriber. |
| Tag | Select the tag you want to remove from the susbcriber. |
List Subscribers
Retrieves a list of all subscribers.
| Connection | Establish a connection to your Drip account. |
| Account | Select the account whose subscribers you want to list. |
| Tags | Add the tags to filter the subscribers you want to list. For example, customer. |
| Limit | The maximum number of subscribers Integromat should return during one scenario execution cycle. |
| Status |
Select the status of the subscribers you want to list:
|
List Tags
Retrieves a list of all tags used in an account.
| Connection | Establish a connection to your Drip account. |
| Account | Select the account whose tags you want to list. |
List Custom Fields
Retrieves a list of all custom fields.
| Connection | Establish a connection to your Drip account. |
| Account | Select the account whose custom fields you want to list. |
Watch Subscribers
Triggers when a new subscriber is added.
| Connection | Establish a connection to your Drip account. |
| Account | Select the account whose subscribers you want to watch. |
| Tags | Add the tags which help to filter the subscriber you want to watch. For example, customer. |
| Limit | The maximum number of subscribers Integromat should return during one scenario execution cycle. |
| Status | Select the status of the subscribers:
|
Workflows
Activate a Workflow
Activates a selected workflow.
| Connection | Establish a connection to your Drip account. |
| Account | Select the account whose workflows you want to activate. |
| Workflow | Select the workflow you want to activate. |
Pause a Workflow
Pauses a selected workflow.
| Connection | Establish a connection to your Drip account. |
| Account | Select the account whose workflow you want to pause. |
| Workflow | Select the workflow you want to pause. |
Fetch a Workflow
Fetches a workflow.
| Connection | Establish a connection to your Drip account. |
| Account | Select the account whose workflow you want to fetch. |
| Workflow | Select the workflow you want to fetch. |
Remove Someone from a Workflow
Removes a subscriber from a workflow.
| Connection | Establish a connection to your Drip account. |
| Account | Select the account whose workflow subscriber you want to remove. |
| Workflow | Select the workflow whose subscriber you want to remove. |
| Subscriber's Email | Enter the email address of the subscriber you want to remove from the workflow. |
Start Someone on a Workflow
Adds a subscriber to a workflow.
Note: If the workflow is not active, the subscriber will not be added to the workflow.
| Connection | Establish a connection to your Drip account. |
| Account | Select the account to whose workflow you want to add a subscriber. |
| Workflow | Select the workflow to add the subscriber. |
| Subscriber's Email | Enter the email address of the subscriber you want to add to the workflow. |
| Timezone | Select the timezone of the subscriber. |
| Custom Fields | Add the custom fields:
|
| Tags | Add the tags which help to filter the user. For example, customer. |
| Prospect | Select Yes if you want to add the score to the subscriber:
|
List Workflows
Retrieves a list of all workflows.
| Connection | Establish a connection to your Drip account. |
| Account | Select the account whose workflows you want to list. |
| Limit | The maximum number of workflows Integromat should return during one scenario execution cycle. |
| Status | Select the status of the workflows:
|
List Workflow Triggers
Retrieves a list of all workflow triggers.
| Connection | Establish a connection to your Drip account. |
| Account | Select the account whose workflow triggers you want to list. |
| Workflow | Select the workflow whose triggers you want to list. |
Accounts
Fetch an Account
Fetches an account.
| Connection | Establish a connection to your Drip account. |
| Account | Select the account whose details you want to fetch. |
List Accounts
Retrieves a list of all accounts.
| Connection | Establish a connection to your Drip account. |
Events
List Events in an Account
Retrieves a list of all events linked to an account.
| Connection | Establish a connection to your Drip account. |
| Account | Select the account whose events you want to list. |
Record an Event
Pushes an event to the Drip.
Notes: You can configure actions to be fired in the Drip on the event.
| Connection | Establish a connection to your Drip account. |
| Account | Select the account whose events you want to record. |
| Subscriber's Email | Enter the email address of the subscriber whose events you want to record. |
| Action | Select the action of the event you want to record. |
| Prospect | Select Yes if you want to add the score to the subscriber:
|
| Properties | Add the properties:
|
Watch Events
Triggers when there is a new event to process.
| Webhook Name | Enter a name for the webhook. |
| Connection | Establish a connection to your Drip account. |
| Account | Select the account whose events you want to watch. |
| Include Received Email | Select Yes if you want to send a notification to the user whenever a subscriber receives an email:
|
| Events | Select the events you want to watch:
|
Forms
Fetch a Form
Fetches a form.
| Connection | Establish a connection to your Drip account. |
| Account | Select the account whose forms you want to fetch. |
| Form | Select the form whose details you want to fetch. |
List Forms
Retrieves a list of all forms linked to an account.
| Connection | Establish a connection to your Drip account. |
| Account | Select the account whose forms you want to list. |
Orders
Create/Update an Order
Creates or updates an order. If you receive errors, please check the required parameters in the documentation properly. A provider and an order ID are required. Either a person ID or an email must be included.
| Connection | Establish a connection to your Drip account. |
| Account | Select the account whose order you want to create or update. |
| Order ID |
Enter the Order ID you want to update. |
| Provider | Enter the provider from which the order data was received. |
| Action | Select the action for the order:
|
| Enter the email address of the contact for the order. | |
| Person ID | Enter the Person ID associated with the order. |
| Occurred At | Enter the date on which the order created. |
| Order Public ID | Enter the Public ID of the order. |
| Grand Total | Enter the grand total price of the order. |
| Total Discounts | Enter the total discount amount on the order. |
| Total Taxes | Enter the total tax amount applicable on the order. |
| Total Fees | Enter the total fees on the order. |
| Total Shipping | Enter the shipping charges of the order. |
| Currency | Enter the currency applicable for the order. |
| Order URL | Enter the URL of the order. |
| Items | Add the items:
|
| Label | Enter the name on the billing address |
| First Name | Enter the first name of the contact of the billing address. |
| Last Name | Enter the first name of the contact of the billing address. |
| Company | Enter the company name on the billing address. |
| Address 1 | Enter the street name of the billing address. |
| Address 2 | Enter the street name of the billing address. |
| City | Enter the city name. |
| State | Enter the state name. |
| Postal Code | Enter the postal code. |
| Country | Enter the country name. |
| Phone | Enter the phone number of the billing address. |
| Label | Enter the name on the shipping address. |
| First Name | Enter the first name of the contact of the shipping address. |
| Last Name | Enter the last name of the contact of the shipping address. |
| Company | Enter the company name on the shipping address. |
| Address 1 | Enter the street name of the shipping address. |
| City | Enter the city name. |
| State | Enter the state name. |
| Postal Code | Enter the postal code. |
| Country | Enter the country name. |
| Phone | Enter the phone number of the shipping address. |
Other
List Broadcasts
Retrieves a list of all broadcasts.
| Connection | Establish a connection to your Drip account. |
| Account | Select the account whose broadcasts you want to list. |
| Limit | The maximum number of broadcasts Integromat should return during one scenario execution cycle. |
| Status | Select the status of the broadcasts you want to list:
|
List Conversions
Retrieves a list of all conversions.
| Connection | Establish a connection to your Drip account. |
| Account | Select the account whose conversions you want to list. |
| Status | Select the status of the conversion you want to list:
|
List Webhooks
Retrieves a list of all webhooks.
| Connection | Establish a connection to your Drip account. |
| Account | Select the account whose webhooks you want to list. |
Generating your own Client ID and Client Secret values
When creating a connection, you can display the advanced options and you will be requested to enter your Client ID and Client Secret. To get these values, you need to register your application (Integromat) under your user settings in Drip.
To do this, go to https://www.getdrip.com/user/applications. Enter a name for your new application and click the Create Application button.

In the form that appears type https://www.integromat.com/oauth/cb/app in the Callback URL field and click Save.
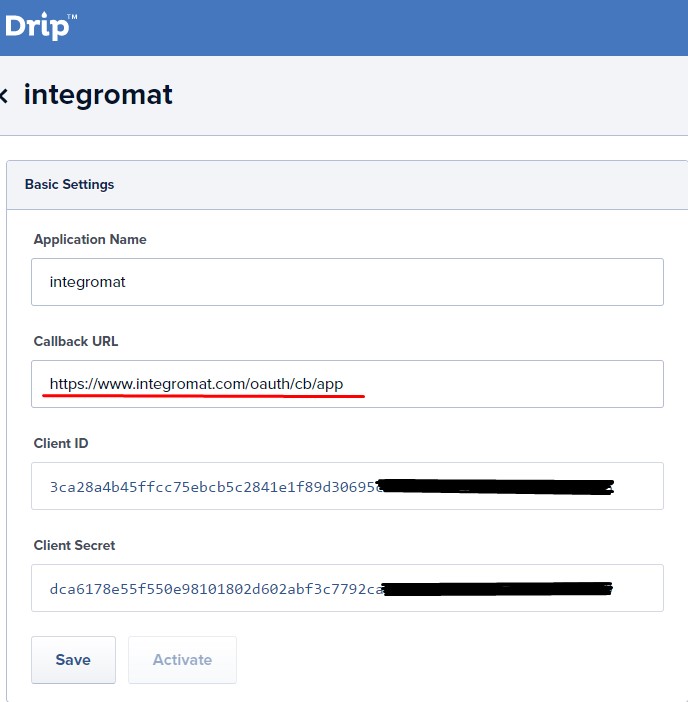
Go back to applications and activate your newly created application. Clicking the Edit button will display the requested Client ID and Client Secret.

Copy these values to Integromat and click the Continue(Save) button.


