Flow Control
Repeater
Repeater is used in cases where you wish to repeat a task a given number of times. Let us assume you would like to send five emails with subjects "Hello 1", "Hello 2", ... "Hello 5". This could be accomplished with connecting Email > Send me an email module after the Repeater module:
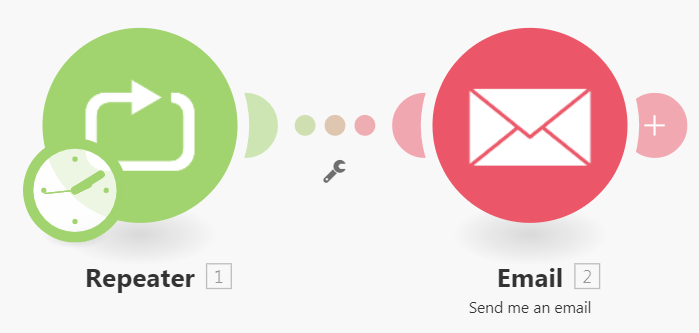
With modules configured as follows:
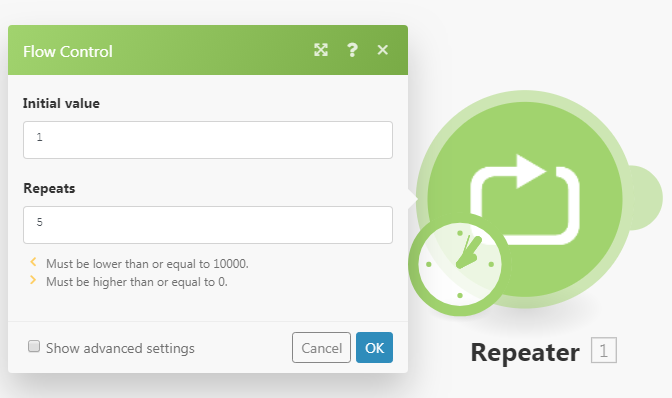
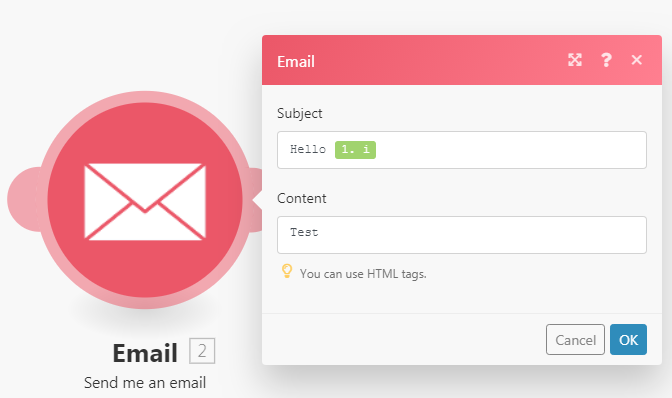
You can imagine the Repeater module as a generator of bundles outputting one bundle after another. Each bundle contains one item named i of type Number. The initial value of the i item is specified in the Initial value field. The number of repetitions (= number of outputted bundles) is specified in the Repeats field. The value of the i item is increased in each repetition by the value specified in the Step field, which is 1 by default (tick the Show advanced settings checkbox to reveal it).
Iterator
Iterator is a special type of module that converts an array into a series of bundles. Each array item will be outputted as a separate bundle. See Iterator for further details.
Array aggregator
Array aggregator is an aggregator module, which allows to merge several bundles into one single bundle. The following image shows a typical setup of the Array aggregator module.
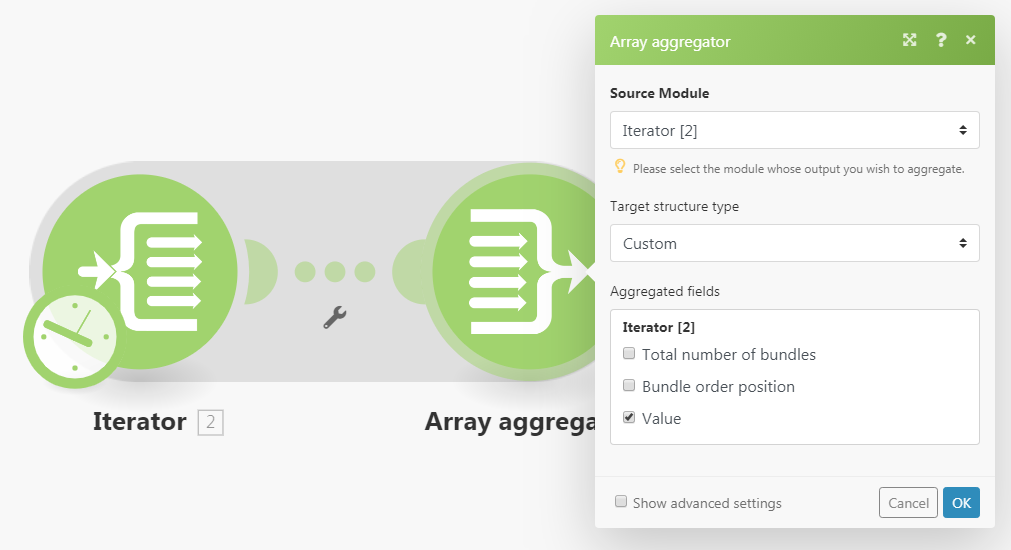
| Source Module | The module from which the bundle aggregation will start. The source module is usually an iterator or a search module that outputs a series of bundles. Once you setup the aggregator's Source Module (and close the aggregator's setup), the route between the source module and the aggregator will be wrapped in a grey area to visualize the start and the end of the aggregation. |
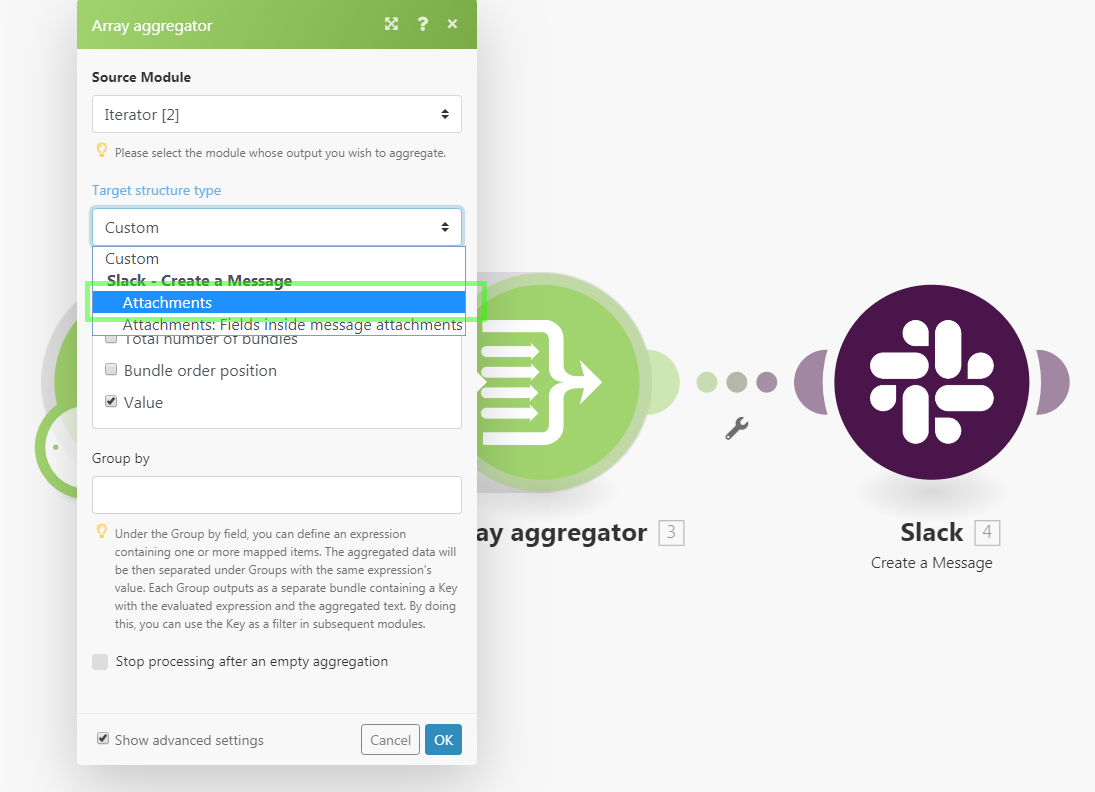
| Target structure type | The target structure into which the data shall be aggregated. The default option is Custom that enables you to choose items that should be aggregated into the Array aggregator's output bundle's Once you connect more modules after the Array aggregator module and get back to the module's setup, the Target structure type dropdown will contain all the following modules and their fields that are of type Array of Collections, like e.g. Attachments field of the Slack > Create a Message module:
The video below explains how the modules connected after an Array aggregator affects the content of Target structure type dropdown:
|
| Group by | The aggregator's output can be split into several groups with the help of the Group by field. The Group by field can contain a formula that is evaluated for each aggregator's input bundle. The aggregator then outputs one bundle per each distinct formula's value. Each bundle contains two items:
|
| Stop processing after an empty aggregation | By default, the aggregator outputs the result of the aggregation even in case no bundles reached the aggregator (e.g. because they have been all filtered out on their way). If the Stop processing after an empty aggregation option is enabled, the aggregator will not produce any output bundle in this case and the flow will stop. |
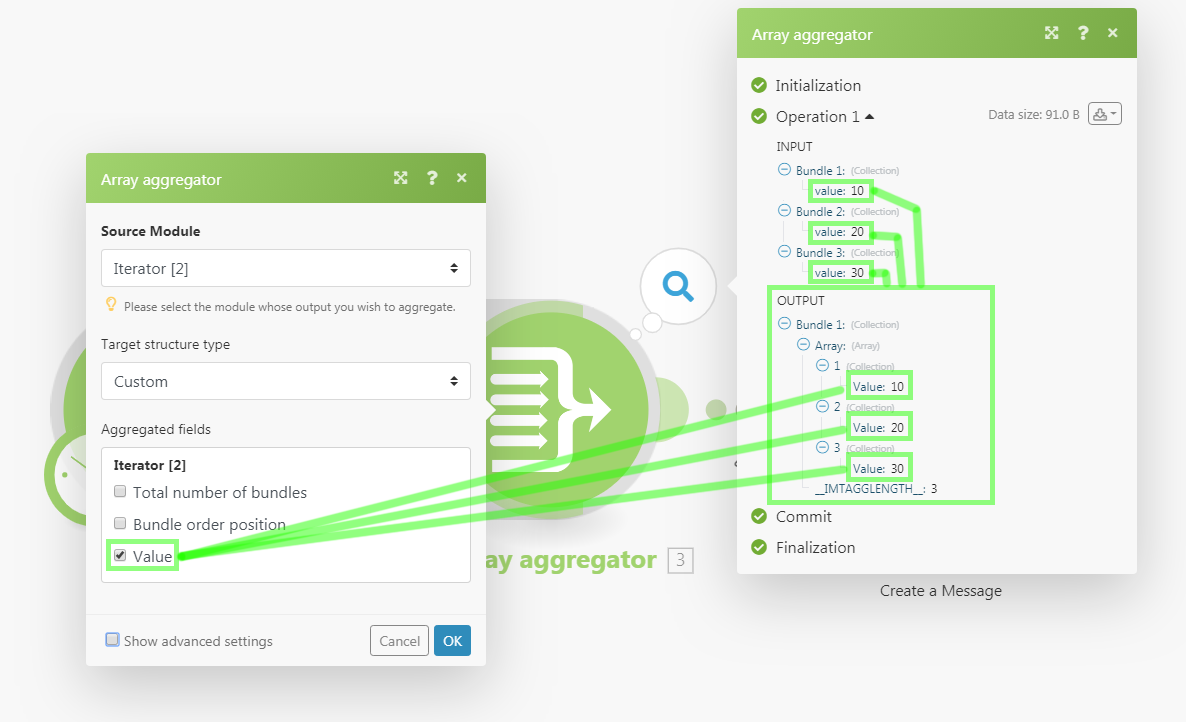
If you need to access items from bundles outputted from the source module and any other modules between the source module and the aggregator module, make sure to include them in the Aggregated fields field in the setup of the Array aggregator module.
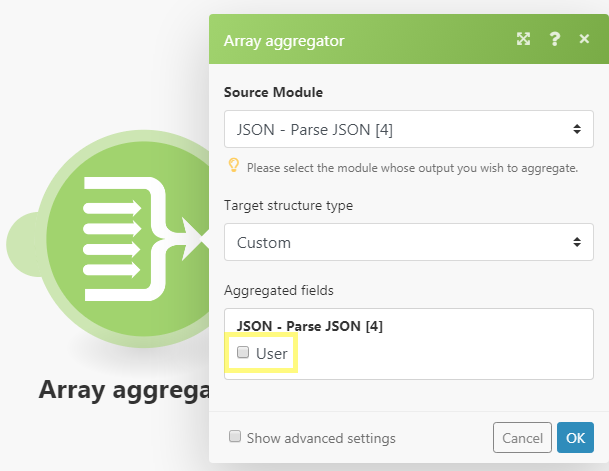
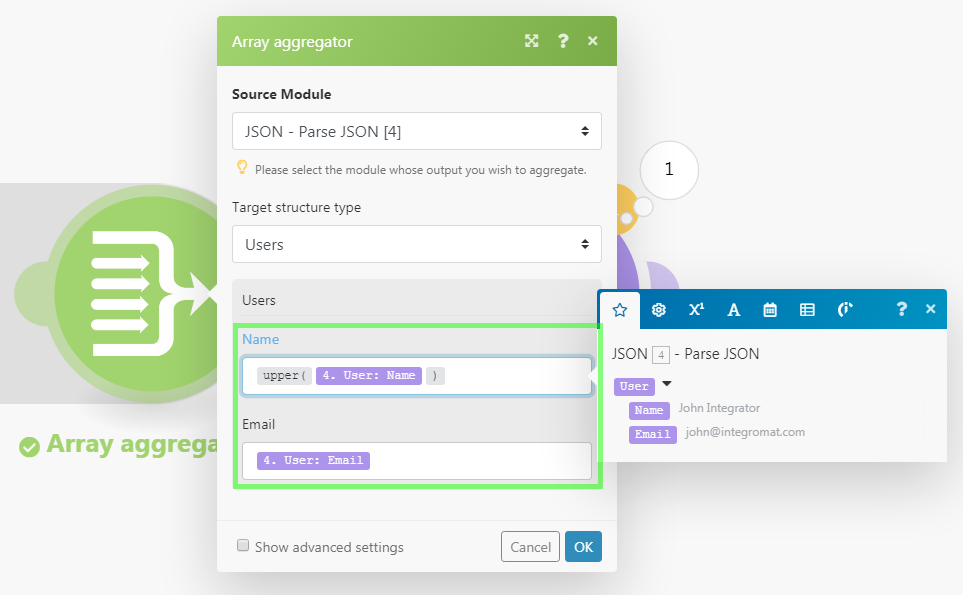
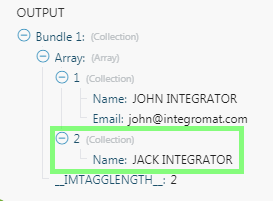
If items are nested (i.e. contained in a collection item) they currently cannot be easily selected in the Array aggregator's Aggregated fields field. For example, if bundles contain collection item User with two items Name and Email:
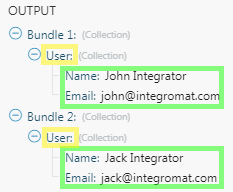
Then only the User collection item can be selected:
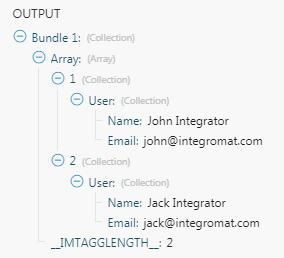
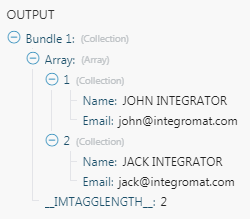
This setup will produce the following output:
Customizing the output
If you wish to fully customize the Array aggregator's output structure, proceed as follows:
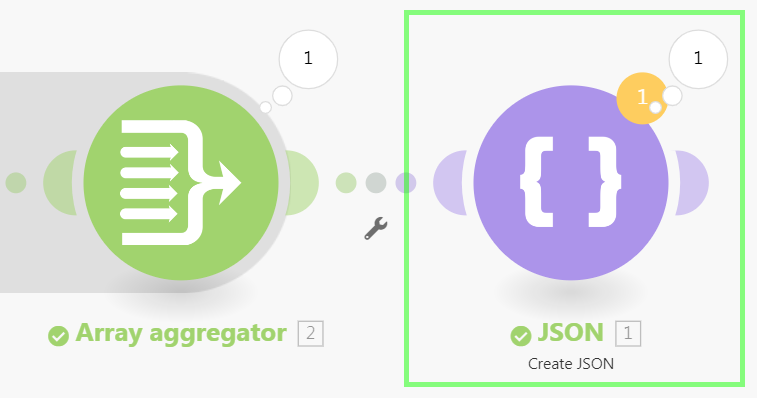
- Insert the JSON > Create JSON module after the Array aggregator module:
- Open the JSON > Create JSON module's setup.
- Setup a Data structure for the items you want to be outputted from the Array aggregator. The Data structure should be an array of collections and the collections should contain the items you want to include in the output. Here is a sample Data structure with two text items
NameandEmail: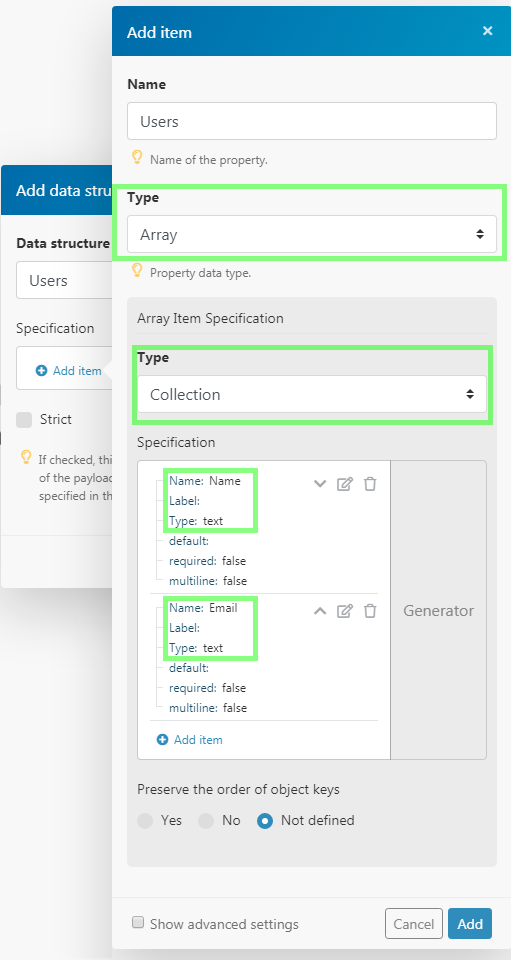
- Open the Array aggregator module's setup.
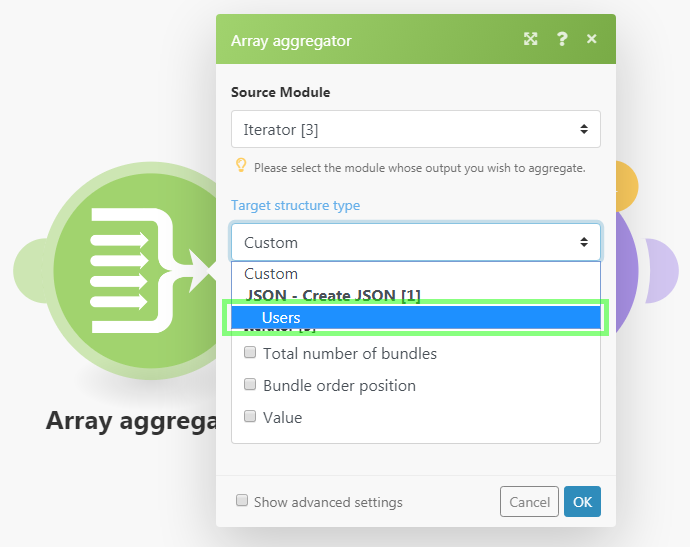
- In the Target structure type field, choose the JSON > Create JSON module's array field:
- Fields corresponding to the Data structure created in step 3 will appear in the setup of the Array aggregator module. Map any items into the fields as you see fit. You can now easily map nested items using the mapping panel and even use formulas:
- The Array aggregator module's output will now look like this:
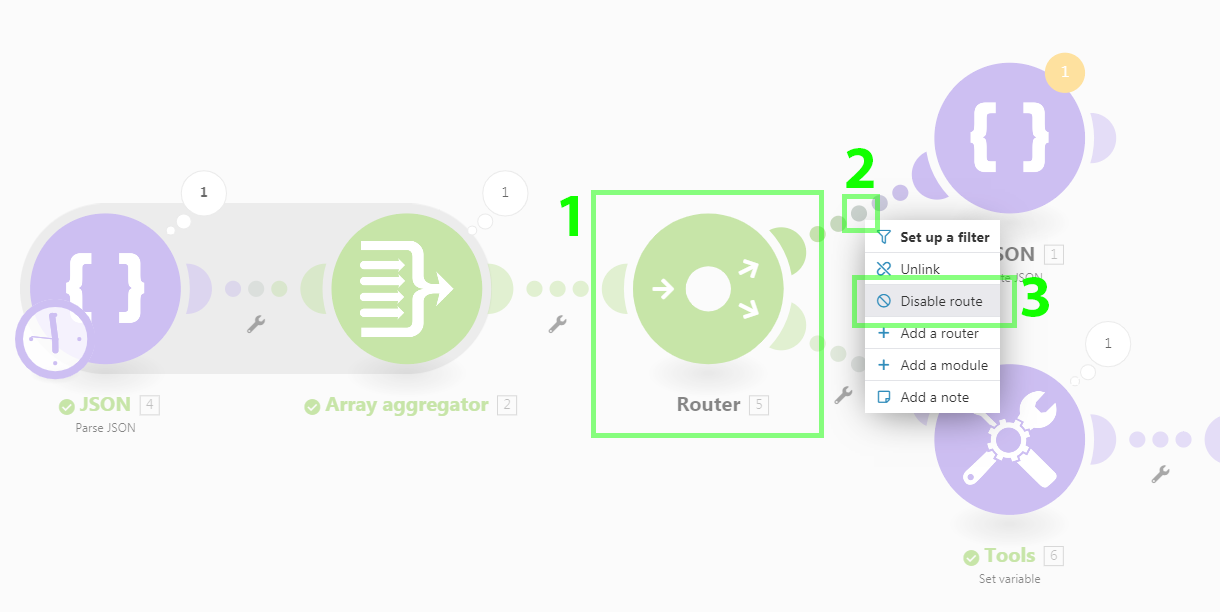
If you wish to save the operation performed by the dummy JSON > Create JSON module, just put it on a disabled route after a Router:
If you wish to conditionally omit an item from the module's output, use a formula that evaluates to ignore keyword:
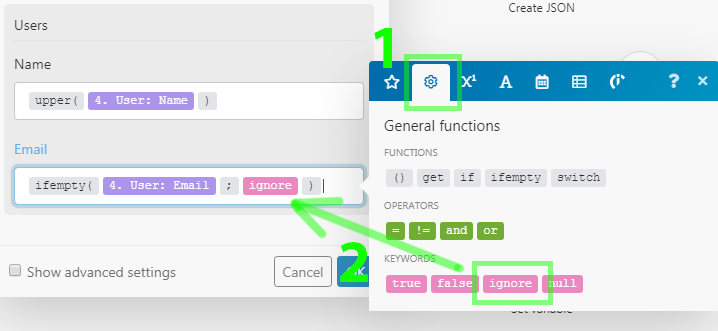
If the 4. User: Email is empty then the Email item will be completely omitted from the output:
Learn when to use an Array Aggregator in your scenarios
The video below is module 2 of the 3 part lesson titled Iterator and Array Aggregator. It is a continuation of module 1 (video link) and using a sample scenario, explains when to use an Array aggregator and what to do with the output.


