Citrix ShareFile
The Citrix File Share modules allow you to create, update, and deliver folders and upload a file in your Citrix File Share account.
Prerequisites
- A Citrix File Share account
In order to use Citrix File Share with Integromat, it is necessary to have a Citrix File Share account. If you do not have one, you can create a Citrix File Share account at https://www.sharefile.com/.
Connecting Citrix File Share to Integromat
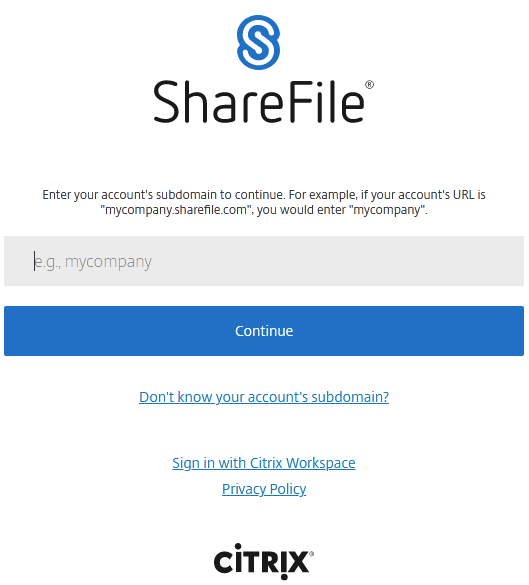
To connect your Citrix File Share account to Integromat, you need to obtain your Sub domain name.
1. Go to Integromat and open the Citrix File Share module's Create a connection dialog.
2. In the Connection name field, enter a name for the connection and click Continue.
3. Enter your account subdomain. For example, if your account URL is www.xyz.sharefile.com then your subdomain is xyz. Click Continue.
4. Authenticate the account by entering your Email Address and Password. Click Sign In.

The connection has been established.
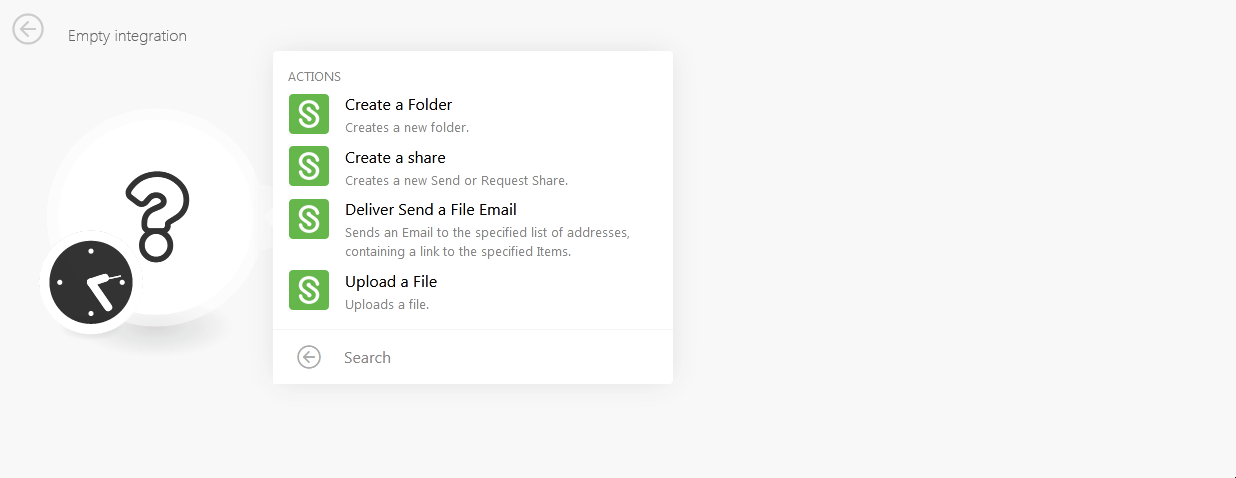
Actions
Create a Folder
Creates a new folder.
| Connection | Establish a connection to your Citrix File Share account. |
| Folder | Select the parent folder where you want to create a folder. |
| Folder Name | Enter a name for the folder. |
| Overwrite | When selected, gives access to overwrite the folder. |
Create a Share
Creates a new Send or Request Share.
| Connection | Establish a connection to your Citrix File Share account. |
| Type | Select the type of share you want to create:
|
| Folder |
Select the folder for which you want to create the share. |
| Items to Share |
Add the items to share: Item ID Enter the Item ID. |
| Recipients |
Add the recipients: Type Select the type by which you want to add the recipients. User ID Enter the User ID of the recipient Enter the email address of the recipient. |
| Title | Enter a name for the share items. |
| Expiration date | Enter the date on which the share items expire. Once expired, recipients cannot download the share items. |
| Max downloads | The maximum number of times each recipient is allowed to download Share items. |
Deliver Send a File Email
Sends an email to the specified list of addresses, containing a link to the specified items.
| Connection | Establish a connection to your Citrix File Share account. |
| Items to share |
Add the items to share: Item ID Enter the Item ID. You can add multiple items. |
| Add the email address to whom you deliver send a file. | |
| Subject | Enter the subject line of the email. |
| Body | Enter the message to include in the email. |
| Expires In | Enter the number of days after which the access to this Share expires. |
| Maximum Downloads | The maximum number of times each recipient can download the Share items. |
Upload a File
Uploads a file.
| Connection | Establish a connection to your Citrix File Share account. |
| Folder | Select the folder to which you want to upload the file. |
| File name | Enter the file name. For example, sample.doc
|
| File Content | Enter the file data to the field or map the source of the file. |
| Overwrite | When selected, gives access to overwrite the file with another one. |
| Suppress Module Output | Select this option if you are experiencing any timeout error when uploading a file. |
Generating Client ID and Client Secret
You can connect Citrix Share File to Integromat using your Client ID and Client Secret.
To generate a Client ID and Client Secret:
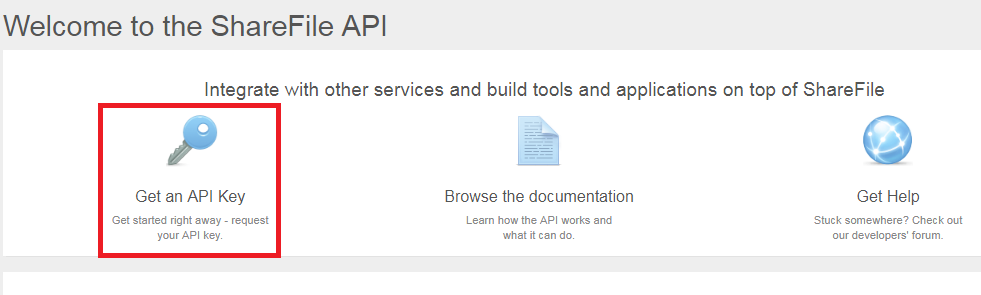
1. Go to https://api.sharefile.com/ and log into your account.
2. Click Get an API Key.
3. In the Application Name field, enter the application to which you want to connect. For example, Integromat.
In the Redirect URI field, enter the URL where the client is redirected to after successful authentication. This is optional.
If you do not want to enter Redirect URI, select the checkbox, I don't know or will not use a Redirect URI which generates a random Redirect URI.
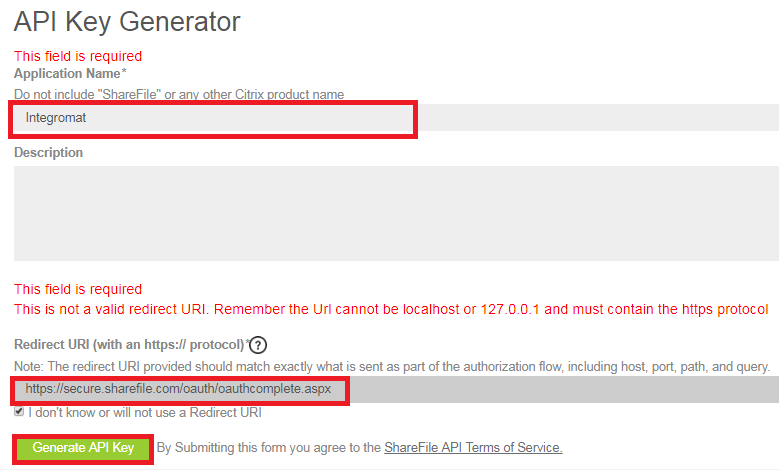
The Client ID and Client Secret successfully generates.

Copy the Client ID and Client Secret to your clipboard. See Connecting Citrix File Share to Integromat to establish a connection with Integromat.


