Typeform
Getting Started with Typeform
The Typeform modules allow you to monitor and retrieve submitted responses and response files, or to create, retrieve, and delete forms and webhooks in your Typeform account.
Prerequisites
- A Typeform account
In order to use Typeform with Integromat, it is necessary to have a Typeform account. If you do not have one, you can create a Typeform account at admin.typeform.com/signup.
Connecting Typeform to Integromat
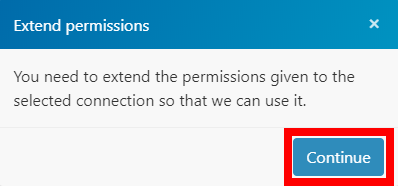
To connect your Typeform account to Integromat follow the general instructions for Connecting to services.
After you click the Continue button, Integromat will redirect you to the Typeform website where you will be prompted to grant Integromat access to your account.
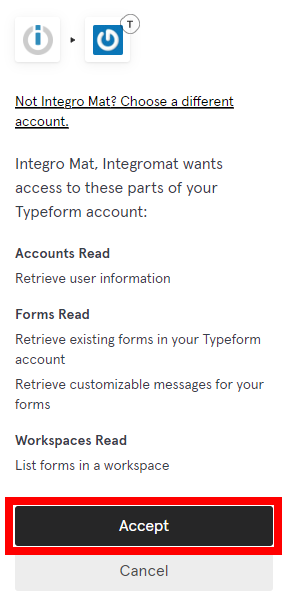
Confirm the dialog by clicking the Accept button.
Responses
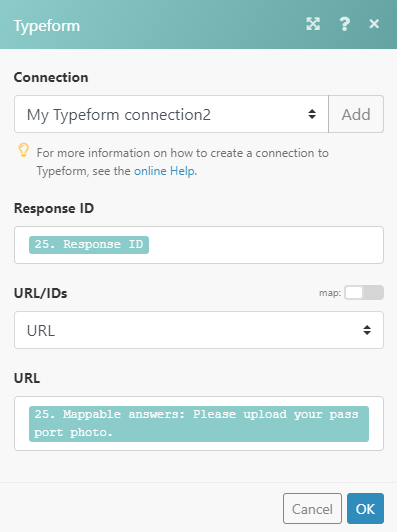
Get a Response File
Retrieves a file uploaded by the form submitter as a response to the answer.
| Connection | Establish a connection to your Typeform account. |
| Response ID | Enter (map) the ID of the response you want to retrieve the file from. You can map it from the previous modules, e.g. Watch Responses (not the webhook!) or List forms module. |
| URL/IDs | Select whether you want to enter (map) the URL or enter IDs manually.
Mapped fields: |
List Responses
Returns all responses from a specified form by the selected filter settings.
| Connection | Establish a connection to your Typeform account. |
| Limit | Enter the maximum number of responses Integromat will return during one execution. |
| Form ID | Select or map (Form ID) the form you want the returned responses for. |
| Fields | Add fields (select from the menu or map the Field ID) you want to filter the results by. Only responses that contain the specified fields will be returned. |
| Completed | Select the Yes option to return only forms that were submitted. |
| Query | Enter the text string to return only responses that contain the entered text. |
| Since | Enter the date and time to filter the results to responses submitted since the specified date and time. The list of supported date and time formats. |
| Until | Enter the date and time to filter the results to responses submitted until the specified date and time. The list of supported date and time formats. |
Watch Responses
Returns response details when the specified form is submitted.
| Connection | Establish a connection to your Typeform account. |
| Limit | Enter the maximum number of responses Integromat will return during one execution. |
| Form ID | Select or map (Form ID) the form you want the returned responses for. |
| Fields | Add fields (select from the menu or map the Field ID) you want to filter the results by. Only responses that contain the specified fields will be returned. |
| Completed | Select the Yes option to return only forms that were submitted. |
| Query | Enter the text string to return only responses that contain the entered text. |
Watch Responses (Instant Trigger)
Triggers immediately when the form is submitted.
| Webhook name | Enter the name of the webhook, e.g. Customer survey submitted. |
| Connection | Establish a connection to your Typeform account. |
| Form ID | Select the form you want to receive responses for. |
| Enabled | Enable this option to send the form responses from Typeform to Integromat immediately. |
Forms
Create a Form
Allows you to create a form.
| Connection | Establish a connection to your Typeform account. |
| Title | Enter the form's name. |
| Language | Select the language you want to use for the form. |
| Is public | Select the Yes option to set the form as publicly available. |
| Progress bar | Select whether to show percentage or proportion as the progress bar (in the bottom-right corner of the form). |
| Show progress bar | Select the Yes option to show the progress bar in the form. |
| Show typeform branding | Select the No option to hide the Typeform branding ("Powered by Typeform"). Hiding the branding is available only for PRO+ accounts. |
| Allow indexing | Enable this option to allow search engines to index your Typeform and show the URL in the search results. |
| Description | Enter the description that will be displayed under the name when shared on social media or showed as a search result. |
| Image URL | Enter the description that will be displayed under the name when shared on social media or showed as a search result. |
| URL | Enter the URL where the user will be redirected after the form submission. |
| Google Analytics tracking ID | Enter the Google Analytics tracking ID to the form to get the data you need to measure campaigns, improve conversions, and more. |
| Facebook pixel tracking ID | Enter your Facebook pixel ID and get all the data you need to measure and optimize your marketing campaigns. |
| Google Manager ID | Add your own code snippets to Typeforms for conversion tracking, site analytics, retargeting, and more. |
| Notifications – Self | Enable this option to be notified when a user submits the Typeform. |
| Notifications – Respondent | Enable this option to send the notification to the respondent when he or she submits the Typeform. |
| Theme URL | Enter the URL of the theme to be used for the Typeform. If you don't specify a URL for the theme, Typeform applies a new copy of the default theme to the form. |
| Workspace URL | Enter the URL of the workspace to be used for the Typeform. If you don't specify a URL for the workspace, Typeform saves the form in the default workspace. |
| Hidden | Use this field to add hidden fields to the form. |
| Variables – Score | Recall information for keeping score as the users answer each question (for example for quizzes). |
| Variables – Price | Enter the price (number). Recall information for tracking the total price of all the items the users select (for example for shopping carts, donation campaigns, and payment collections). |
| Welcome screen | Add and set up the welcome screen for your form. Title Description Show button Text to display Attachment |
| Thank you screen | Add and set up the Thank you screen for your form. Please see the descriptions of the fields in the Welcome screen section above. Redirect URL Share icons |
| Fields | Add fields (questions) to your form, select the type of the field and specify its properties, validations, and attachments. |
| Logic | Add and specify Logic Jump objects to be used in the form. |
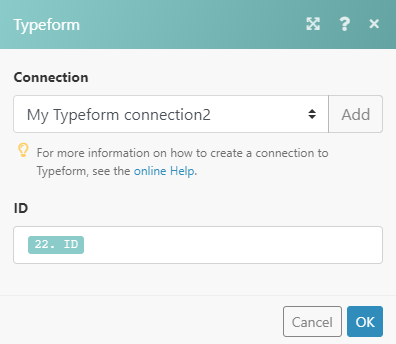
Get a Form
Retrieves form details.
| Connection | Establish a connection to your Typeform account. |
| ID | Enter (map) the ID of the form you want to retrieve details about. |
Update a Form
Updates an existing form.
| Connection | Establish a connection to your Typeform account. |
| Form ID | Enter (map) the ID of the form you want to update. |
Please find the descriptions of the fields in the Create a Form section above.
Delete a Form
Deletes a specified form and all of the form's responses.
| Connection | Establish a connection to your Typeform account. |
| ID | Enter (map) the ID of the form you want to delete. |
List Forms
Returns all forms by a specified filter.
| Connection | Establish a connection to your Typeform account. |
| Limit | Enter the maximum number of forms Integromat will return during one execution cycle. |
| Workspace ID | Select or map the workspace you want to list forms from. |
| Search filter | Enter the search term. Forms that contain the entered text will be returned. |
Webhooks
Create/Update a Webhook
Creates or updates a webhook.
| Connection | Establish a connection to your Typeform account. |
| Form ID | Select or map (Form ID) the form you want to create the webhook for. |
| Webhook name | Enter the name of the webhook. |
| Webhook URL | Enter the webhook URL of the webhook you want to update. |
Delete a Webhook
Deletes a webhook.
| Connection | Establish a connection to your Typeform account. |
| Form ID | Select or map (Form ID) the form you want to delete the webhook from. |
| Webhook name | Enter the unique name of the webhook you want to delete. |
Images
Create an Image
Adds an Image to your account.
| Connection | Establish a connection to your Typeform account. |
| Data / URL | Specify whether you want to provide image data or image URL. |
| Source file | Map the file you want to upload from the previous module (e.g. HTTP > Get a File or Dropbox > Get a file), or enter the file name and file data manually. |
| URL |
|
Delete an Image
Deletes an image from your Typeform account.
| Connection | Establish a connection to your Typeform account. |
| ID | Enter (map) the ID of the image you want to delete from your Typeform account. |
List Images
Retrieves details of all images in your account.
| Connection | Establish a connection to your Typeform account. |
| Limit | Set the maximum number of images Integromat will return during one execution cycle. |
Other
Make an API Call
Allows you to perform a custom API call.
| Connection | Establish a connection to your Typeform account. |
| URL | Enter a path relative to For the list of available endpoints, refer to the Typeform API Documentation. |
| Method | Select the HTTP method you want to use: GET POST PUT PATCH DELETE |
| Headers | Enter the desired request headers. You don't have to add authorization headers; we already did that for you. |
| Query string | Enter the request query string. |
| Body | Enter the body content for your API call. |
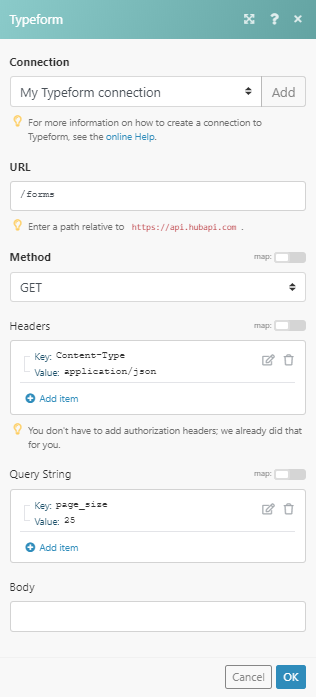
Example of Use - List Forms
The following API call returns forms in your Typeform account:
URL: /forms
Method:
GET
Query String:
Key:page_size
Value: 25
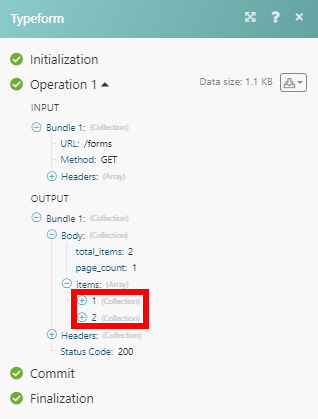
Matches of the search can be found in the module's Output under Bundle > Body > items.
In our example, 2 forms were returned: