Replacing Google Sheets legacy Modules with New Modules
A majority of Integromat apps rely on external services, particularly on their APIs (Application Programming Interfaces). As the services evolve, so do their APIs. New API versions are being regularly released and legacy versions are getting deprecated and eventually shut down.
We closely follow releases of new API versions and implement new app versions based on the latest APIs.
To keep your scenarios running even after the shutdown of a legacy API, make sure to replace all the legacy (old) modules with new modules.
Here is a step by step guide:
Step 1: Choose one of your legacy scenarios that is using legacy modules, and clone it as a new scenario.
- Go to the scenario diagram.
- Open the Options drop-down menu in the top-right corner and select the Clone option.
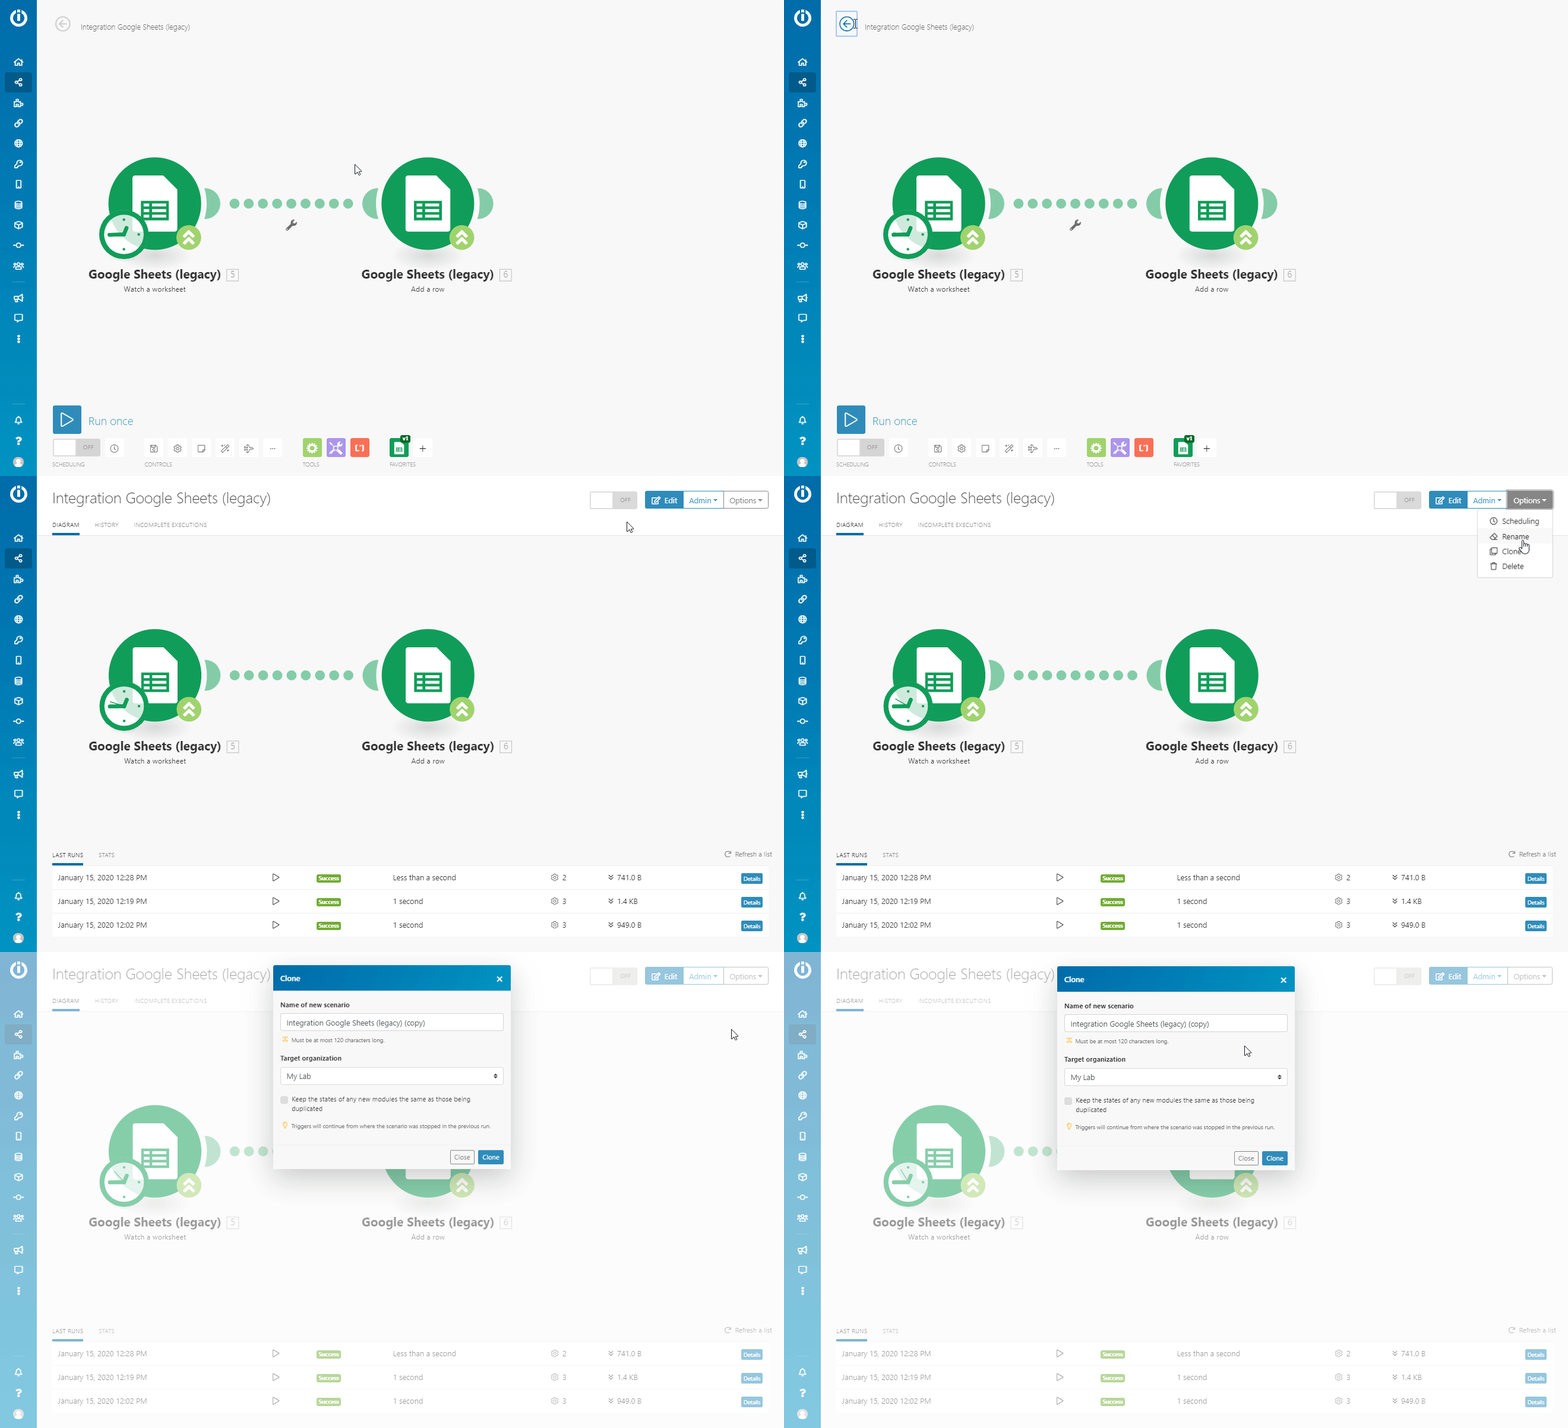
- Change the name to distinguish between the legacy scenario and the new scenario and click the Clone button.
- The new scenario (still with the legacy modules) is created.
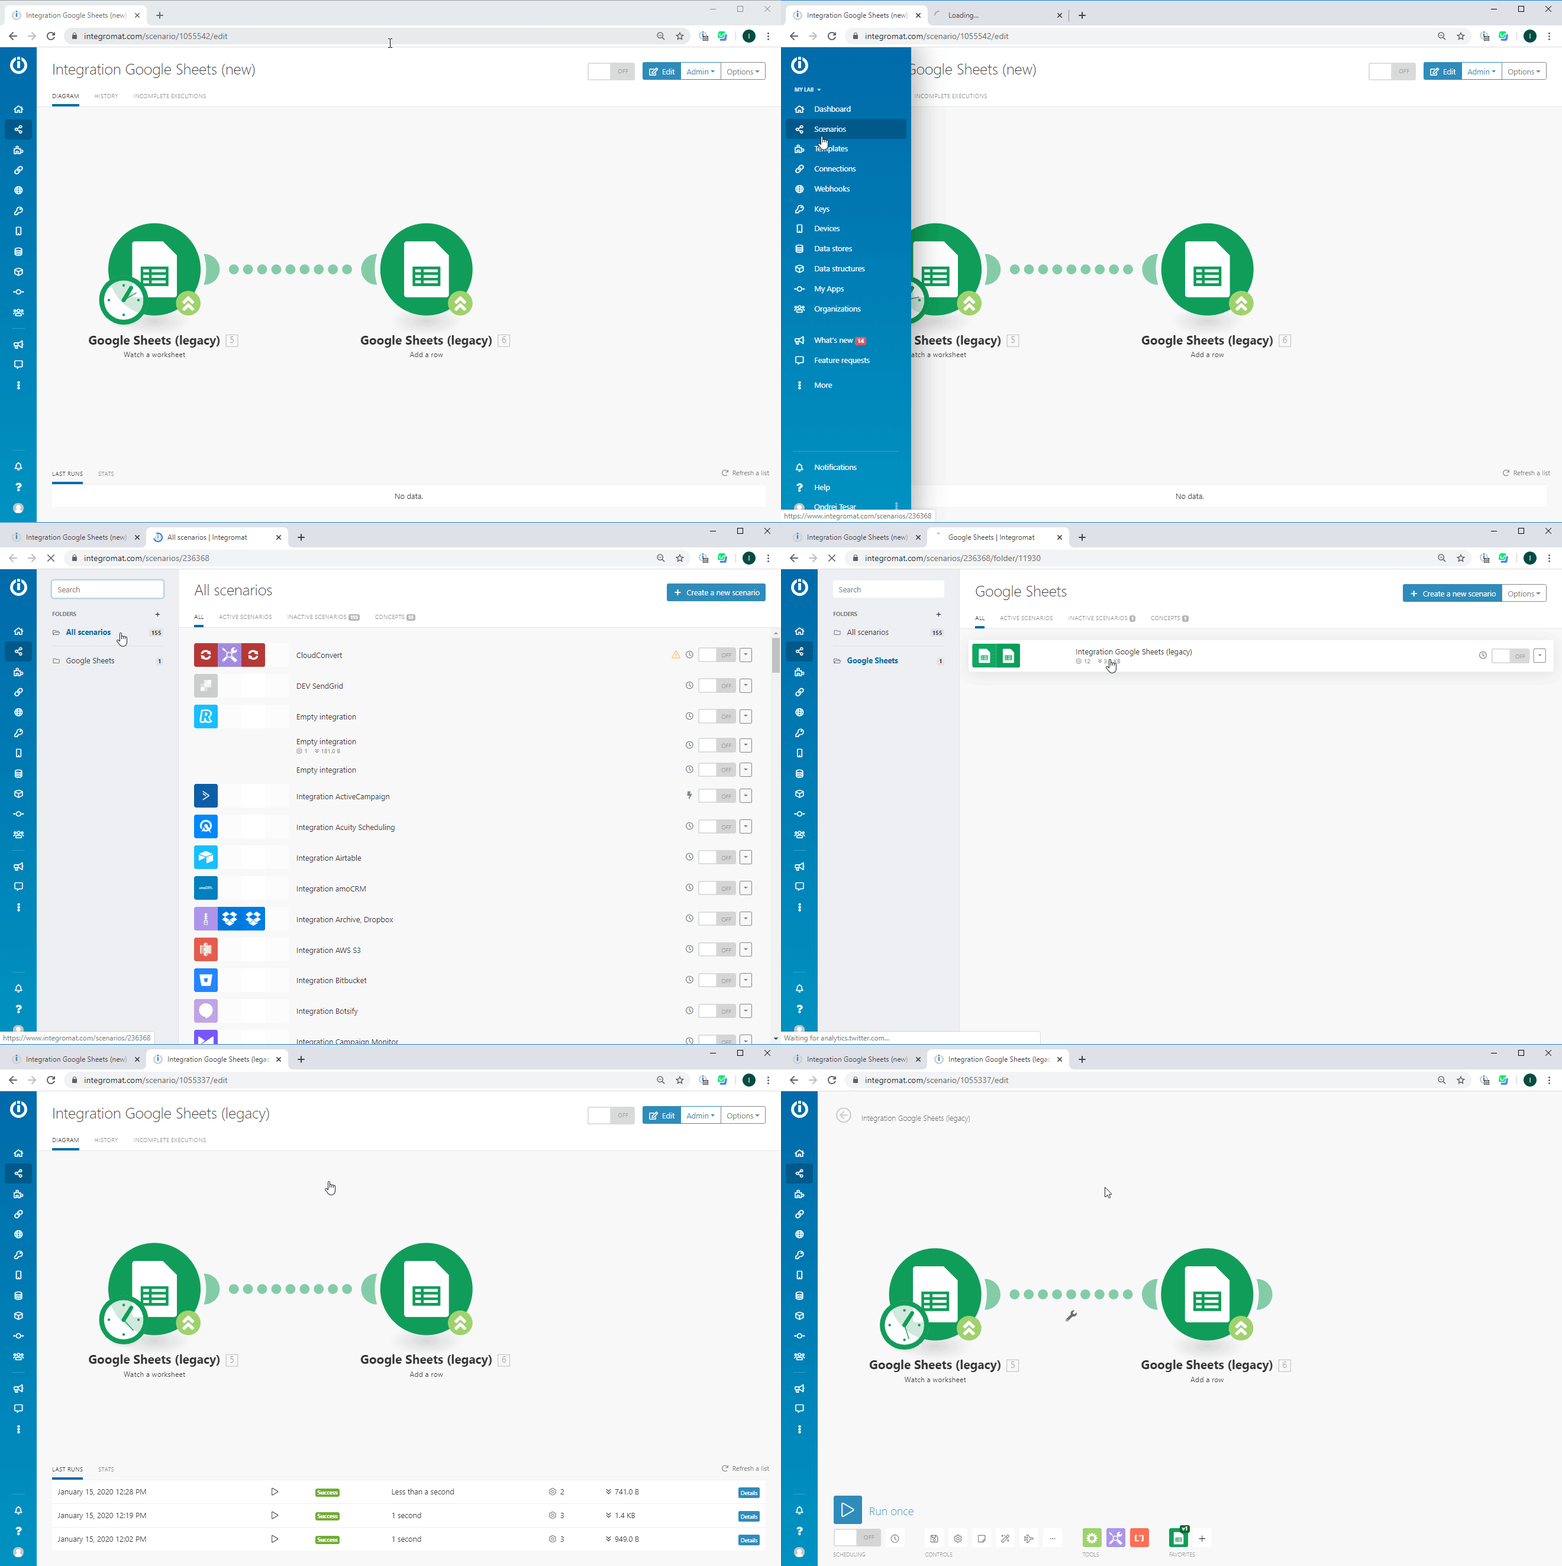
Step 2: Have the legacy scenario and the new scenario open in two web browser tabs/windows to easily switch between them.
This step will make your copy-paste job faster and easier.
- Open Scenarios in a new browser tab.
- Open your legacy scenario.
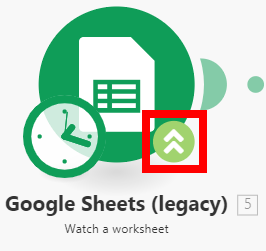
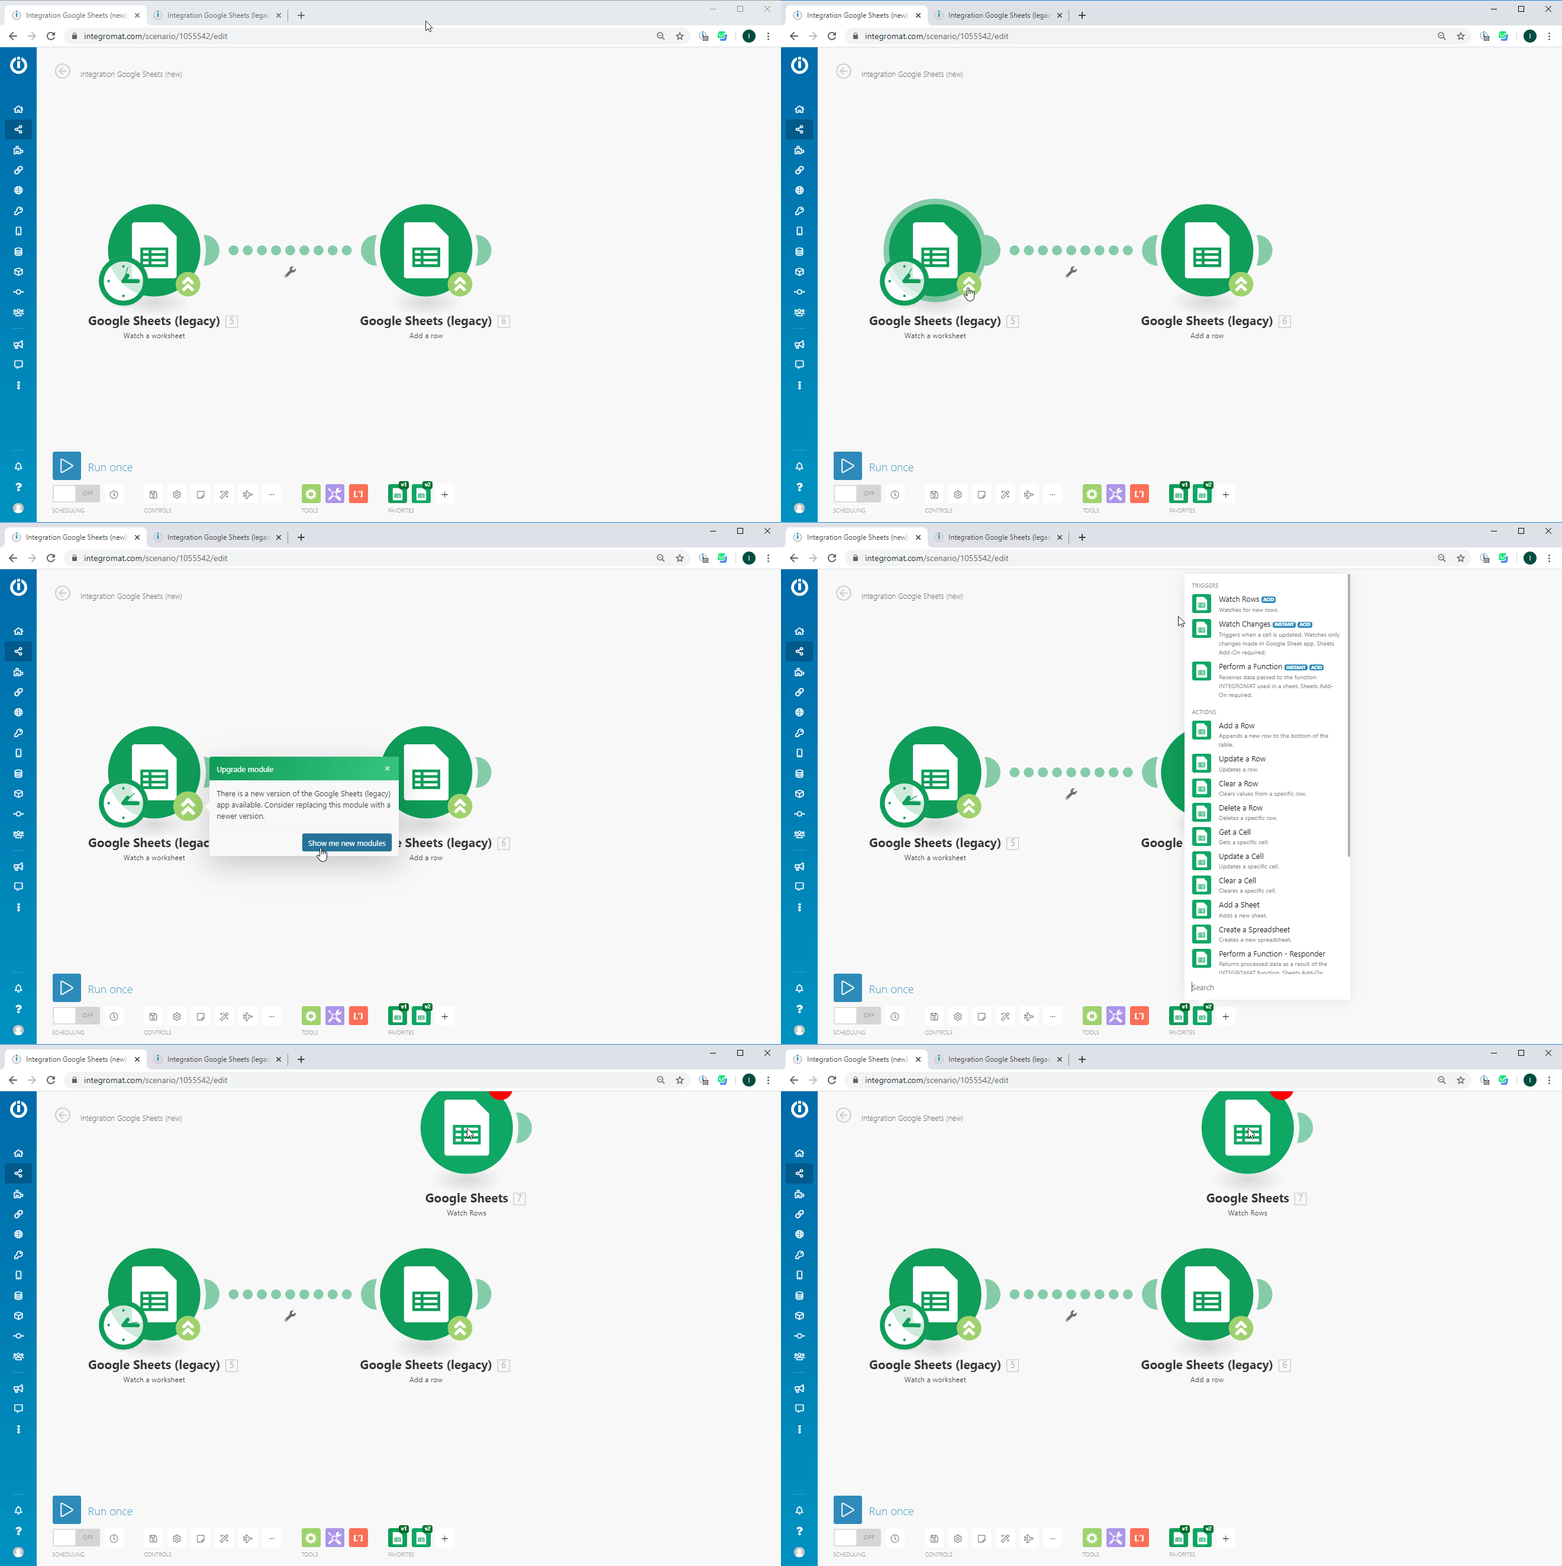
Step 3: In the new scenario, choose the legacy module and click on the "upgrade" arrows.
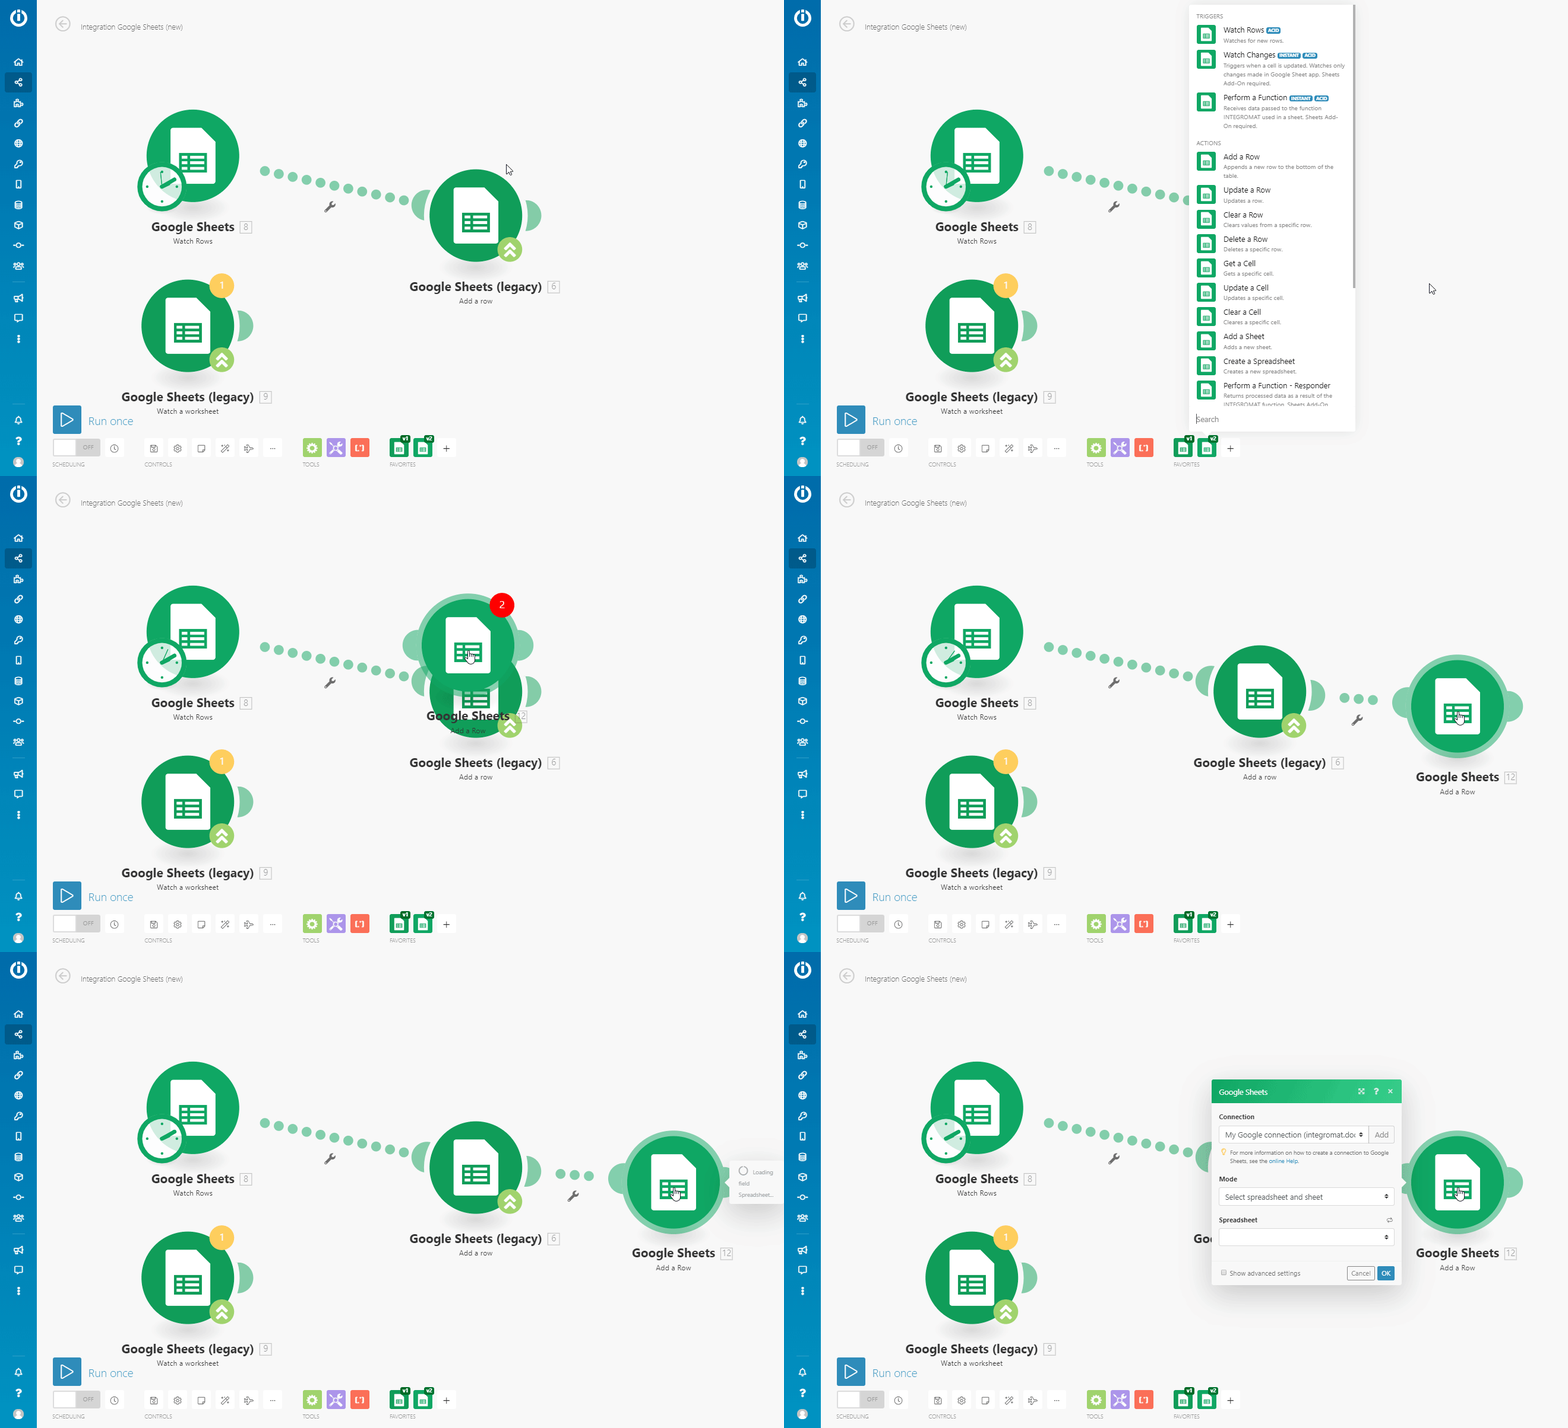
Step 4: Choose the corresponding new module from the list of modules.
The new module is placed in the scenario (not connected).
For Google Sheets, check this table to find a new counterpart of your legacy module:
| Legacy Module | New Module |
| Add a Row | Add a Row |
| Update a Row | Update a Row |
| Delete a Row | Delete a Row |
| Select Rows | Search Rows |
| Update a Cell | Update a Cell |
| Add a Worksheet | Add a Sheet |
| Get a Cell | Get a Cell |
| Watch a Worksheet | Watch Rows |
| List Worksheets | List Sheets |
| Delete a Worksheet | Delete a Sheet |
Step 5: Drag and drop the new module and connect it after the legacy module.
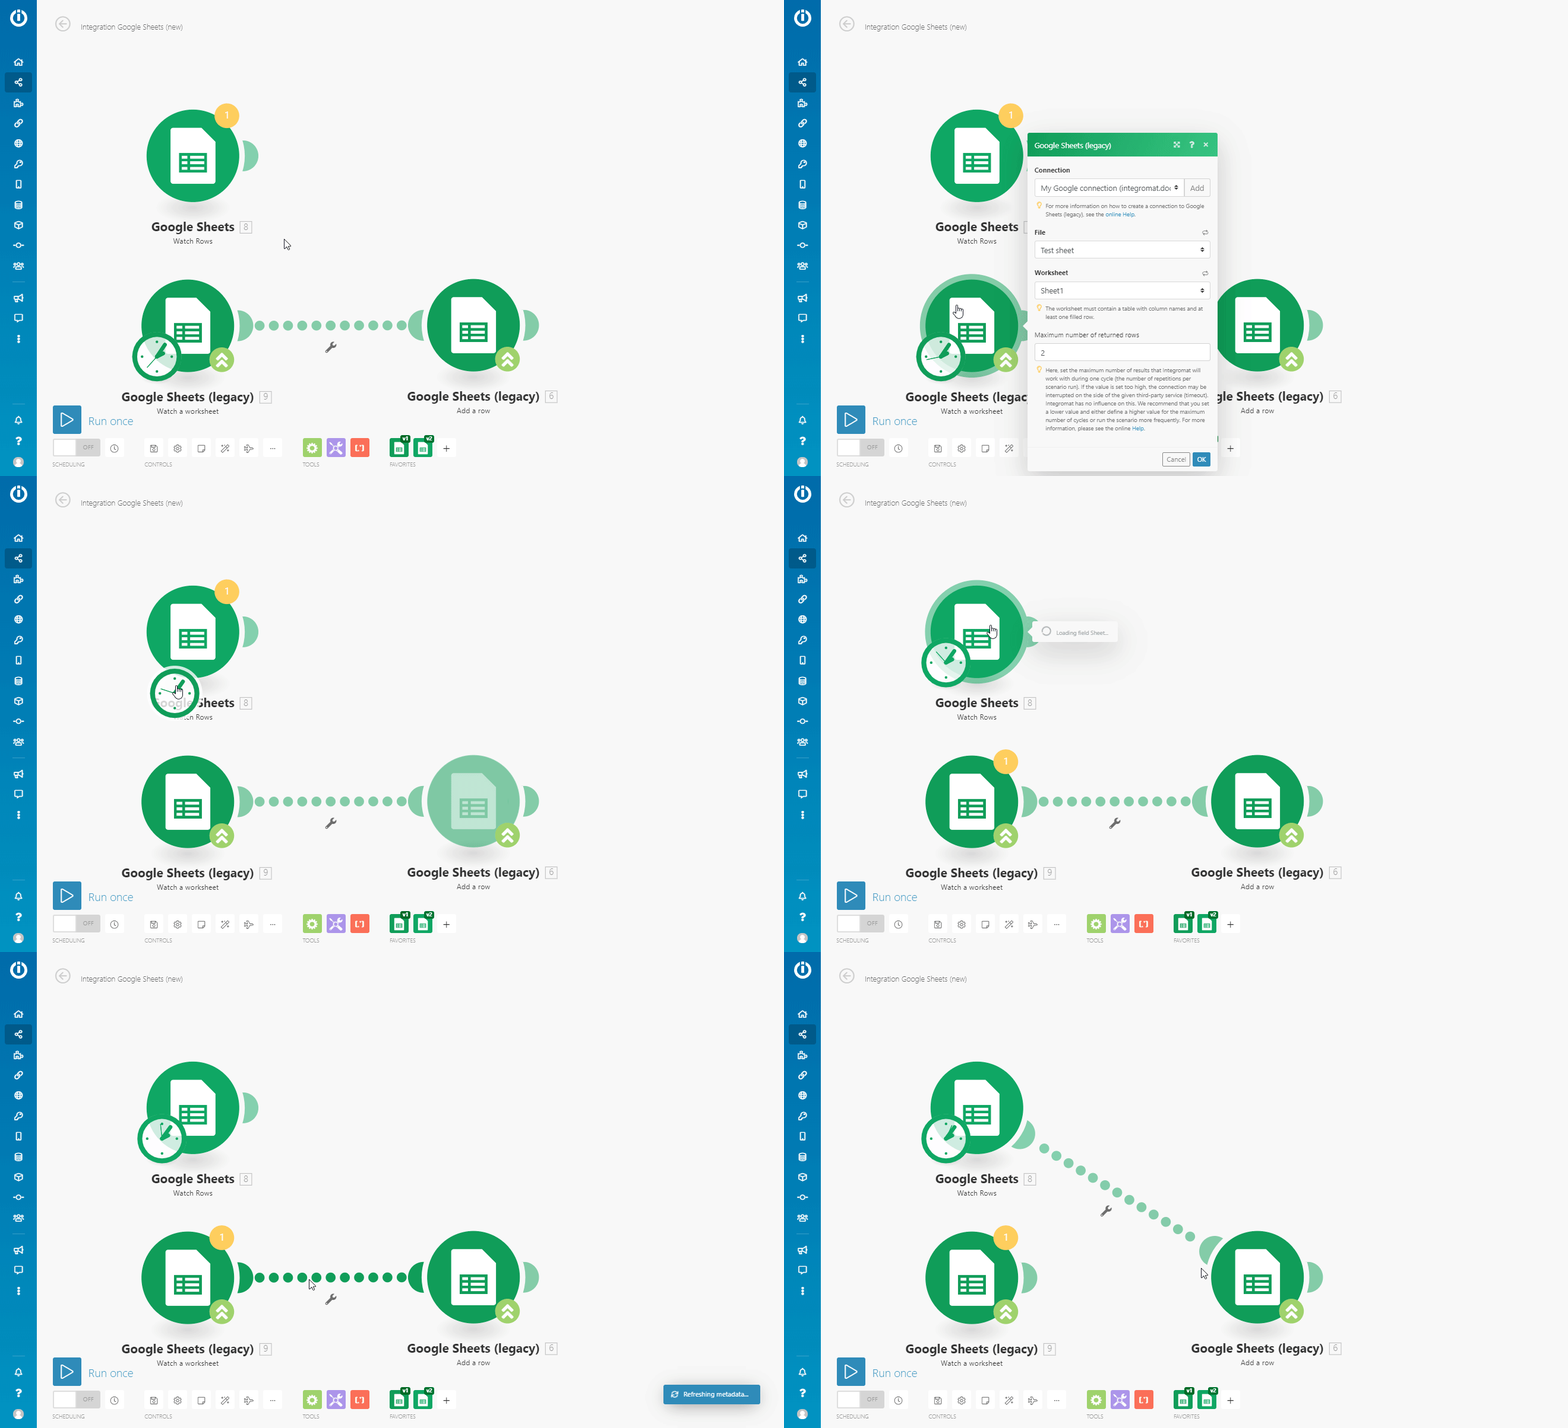
For triggers:
- Set the new module values in the same way as the legacy module values.
- Replace the legacy module with the new module.
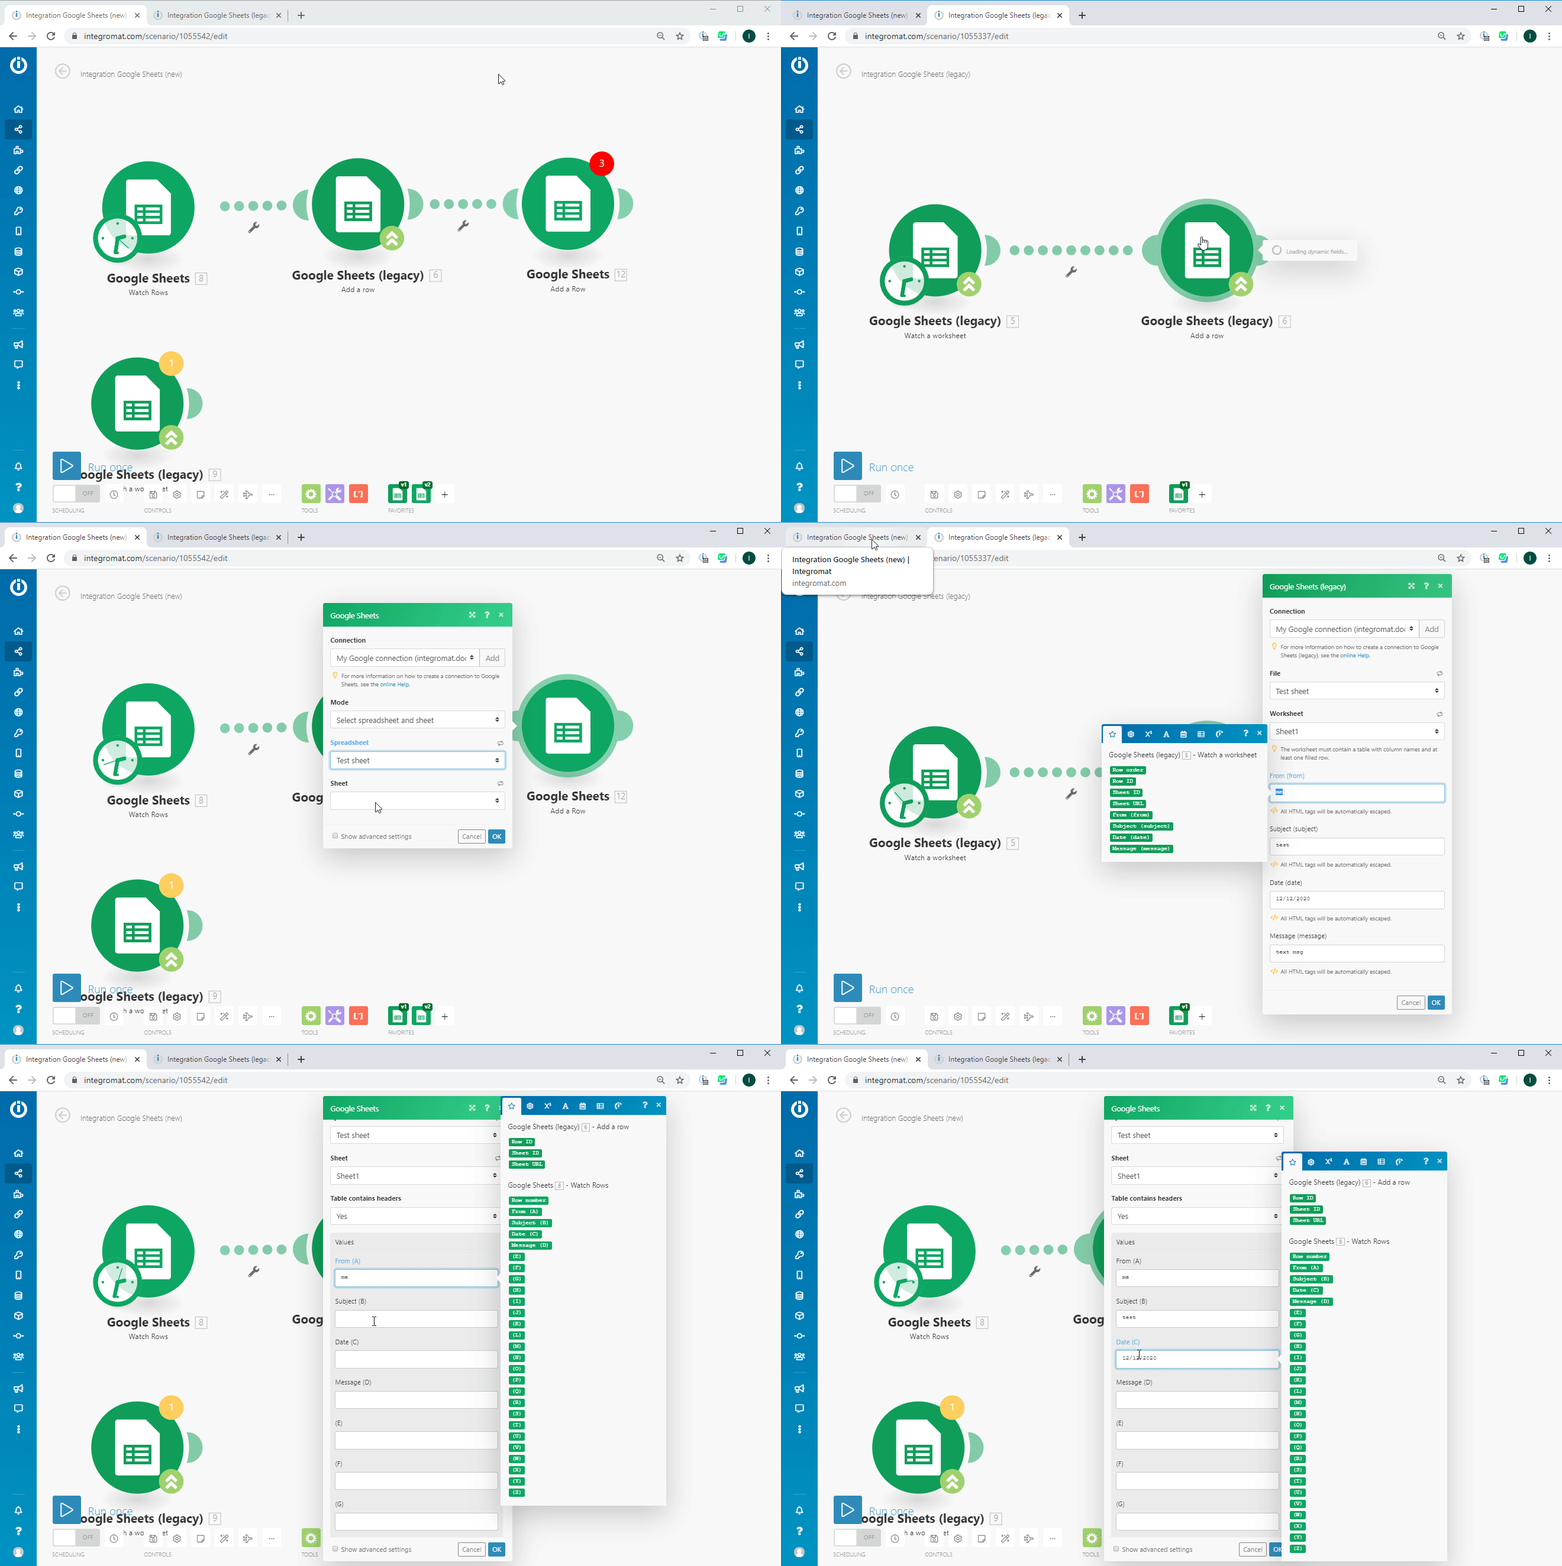
Step 6: Copy and paste the module's values from the legacy module to the new one.
- Open the configuration of the new module.
- Switch to the tab with the legacy scenario and open the configuration of the legacy module.
- Copy and paste the content of each field from the legacy module to the new module by switching between the legacy scenario and the new scenario. If any items are missing in the mapping panel, please refer to our online documentation.
Repeat for every legacy module in the new scenario.
Step 7: Replace items that are mapped from the legacy module
- In the new scenario, choose a module that uses the output from a legacy module and open its configuration.
- For the fields of the proceeding module, replace the legacy items outputted from the legacy module with corresponding new items outputted from the corresponding new module.
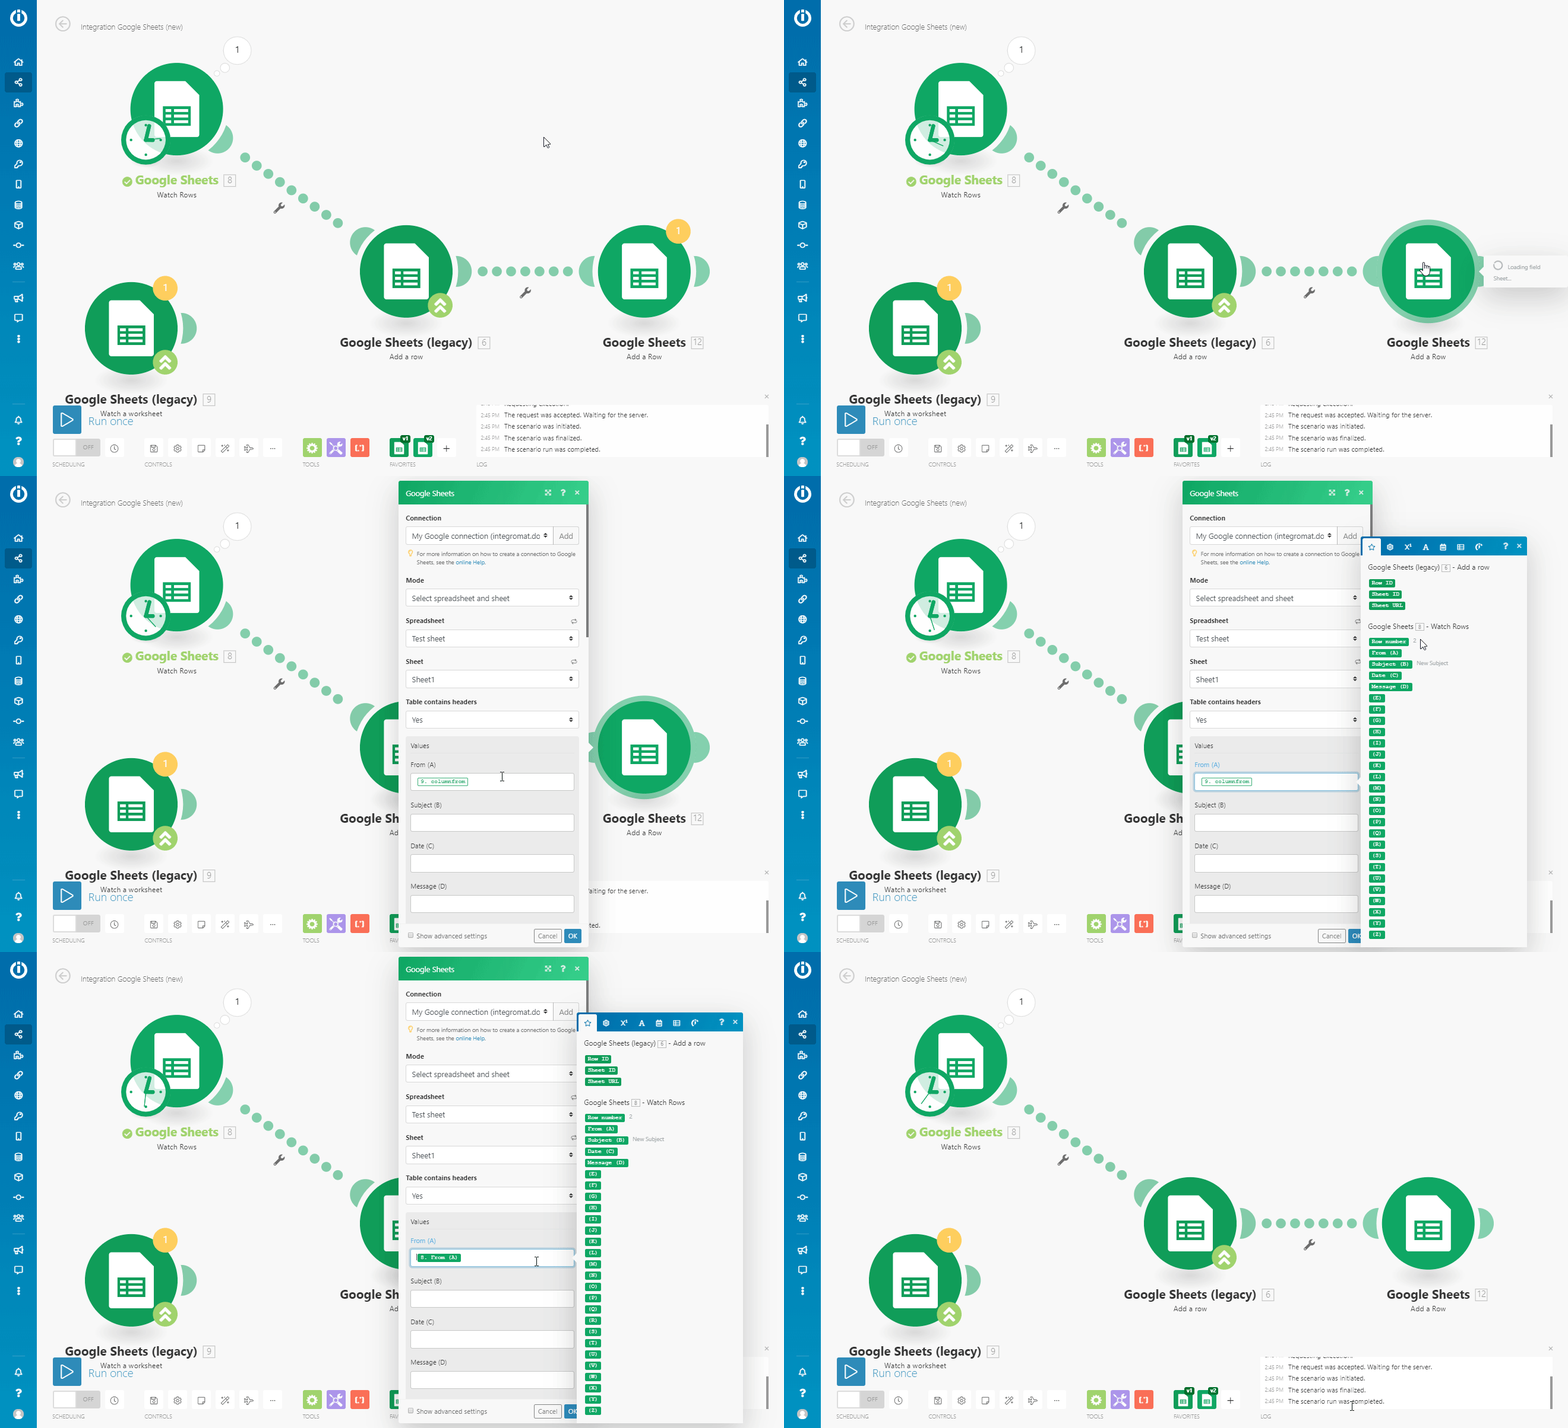
Repeat for every module that uses the output from the legacy module.
Step 8: Replace items that are mapped from legacy modules in filters
- In the new scenario, choose a filter that uses the output from a legacy module and open its configuration.
- For the conditions of the proceeding filter, replace the legacy items outputted from the legacy module with the corresponding new items outputted from the corresponding new module.
Repeat for every filter that uses the output from a legacy module.
Remove all the legacy modules from your scenario.
Repeat for every scenario using legacy modules.
Adding New Google Sheets Modules to a Google Sheets Scenario with the Integromat DevTool
- Add the Integromat DevTool extension to your Chrome browser.
- Open your Google Sheets (legacy) scenario.
- Press Control+Shift+I (Windows) or Command+Option+I (Mac) on your keyboard to open Chrome Developer Tools.
- Go to the Integromat tab.
- Open Tools.
- Click on the Migrate GS tile.
- Click the Run button.

New Google Sheets modules are placed in your scenario. Proceed to enter the values from the legacy modules to the new modules as described in steps above.


