Email (legacy)
Version Legacy
Getting started with Email
With the above modules, you can download emails via IMAP, send emails via SMTP, create new drafts, move and copy emails from one folder to another folder, mark emails as read or unread, and delete emails.
Connecting Email to Integromat
IMAP connection settings

The IMAP connection allows you to access your mailbox remotely and read or manipulate messages in your mailbox. The IMAP connection is used by most of the Email modules. In order to create a connection, follow the general instructions for Connecting to services. Before you click the Continue button, select the type of connection you want to establish (IMAP or Google). These are both IMAP connections. However, Google Gmail requires a different type of authorization.
Connecting to Gmail
When choosing the type of connection, select the Google option. After you click the Continue button, Integromat will redirect you to the Google website where you will be prompted to grant Integromat access to your account:
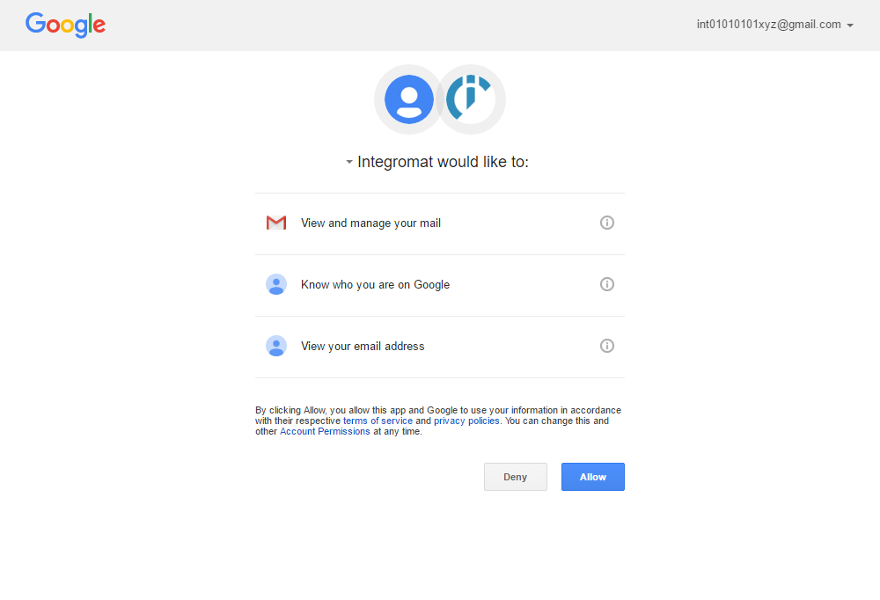
Here, allow access by clicking the Allow button. Afterwards, you will be redirected back to the Integromat administration page. Now, you can create scenarios with the Email modules that require IMAP connection to your Gmail.
Connecting to other mailboxes via IMAP
When choosing the type of connection, select the IMAP option. In the next step, you need to set all the parameters necessary for connecting to your mailbox. The easiest way is to locate your email service provider in the displayed list and select it. When you do this, Integromat will only require you to provide your mailbox password and username. If your provider is not on the list, select the Other option and specify your host, port, and connection security type. To find this information, check the Help section for your mailbox. If you don’t have this information available, contact your email service provider.
SMTP connection settings

A SMTP connection allows Integromat to send emails. In order to create a connection, follow the general instructions for Connecting to services. Before you click the Continue button, select the type of connection you want to establish (SMTP or Google). These are both SMTP connections. However, Google Gmail requires a different type of authorization.
Connecting to Gmail
When choosing a type of connection, select the Google option. After you click the Continue button, Integromat will redirect you to the Google website where you will be prompted to grant Integromat access to your account:
Here, allow the access by clicking the Allow button. Afterwards, you will be redirected back to the Integromat administration page. Now, you can create scenarios with Email modules that require IMAP connection to your Gmail.
Connecting to other mailboxes via SMTP
When choosing the type of connection, select the SMTP option. In the next step, you need to set all the parameters necessary for connecting to your mailbox. The easiest way is to locate your email service provider in the displayed list and select it. When you do this, Integromat will only require you to provide your mailbox username and password. If your provider is not on the list, select the Other option and specify your host, port, and connection security type. To find this information, check the Help section for your mailbox. If you don’t have this information available, contact your email service provider.
The Unique Email ID in IMAP protocol
The Unique Email ID known as 'Email ID (UID)' is the email's identifier. The Email ID is specific for each of the email's folders. Hint: For getting and deleting the same email from the same folder, you can see below:
Getting an email from the 'Inbox' folder

Deleting the email from the 'Inbox' folder

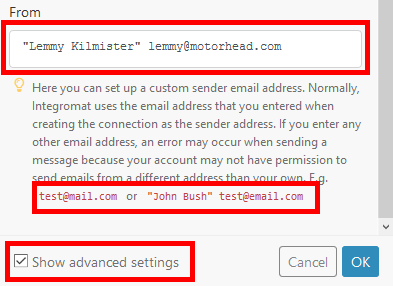
Changing the displayed name of the sender
1. Open the Send an email action advanced settings using the checkbox 
2. Enter the required sender name or email
name@email.com or "Name" name@email.com