How to capture Email and Phone via Webhooks (on Chatfuel), validate them using Regex and store them in a Data Store
Scenario: Capture email and phone via Webhooks, validate them individually by filtering using Regular Expressions (Regex) as match patterns, store the valid entries in a Data Store and respond to invalid entries via Responsive Webhooks.
Note: I have used Chatfuel to illustrate the use case of this tutorial but you can use any app that supports Webhooks or replace the Webhook module with any other app supported by Integromat. Also, it is assumed that you are familiar with Chatfuel, Webhooks, Regular Expressions, and Data Stores. If you’re not, please refer to the following articles:
Chatfuel and Webhooks: How to connect Chatfuel to Airtable
Regular Expressions: Connect Email, Text Parser, and Google Sheets
Data Stores: Typeform + Integromat Data Stores
Level of difficulty: Medium
Implementation Time: Approximately 30 Minutes
----
To get someone to submit their email address or phone number via sales funnels, surveys, or forms is not easy. When a prospect does not see enough value or is not interested in what you have to offer, he or she might drop out. Fair enough. No big deal. You can always try again. But there’s a third scenario which is also highly counter-productive. Fake emails and phone numbers. Nobody likes to sift through and delete emails like testing@123.com or phone numbers like 98765432. It’s a thorough waste of time and not a task for sentient beings.
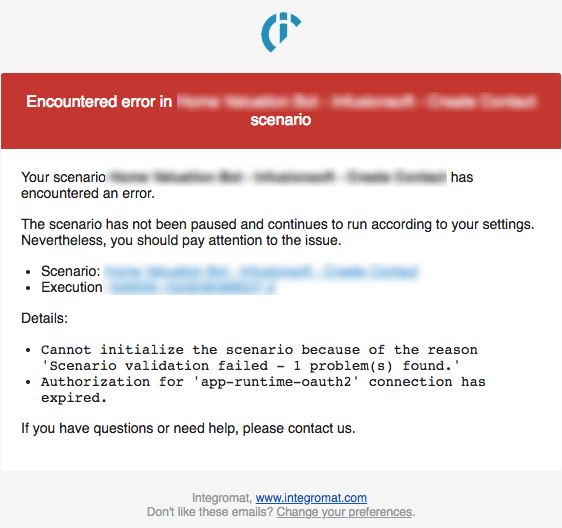
While most apps have inbuilt validation, many are not thorough and leave enough room for an unwanted entry to slip through. Chatfuel’s email validation accepts a@b as a valid email and that is a problem, especially if you’re using a CRM like InfusionSoft to create a new contact with that email address. InfusionSoft’s validation is more thorough and it returns an error on receiving a wrongly formatted email, which can result in your scenario being paused. In such cases, you’ll receive an email from Integromat as below:
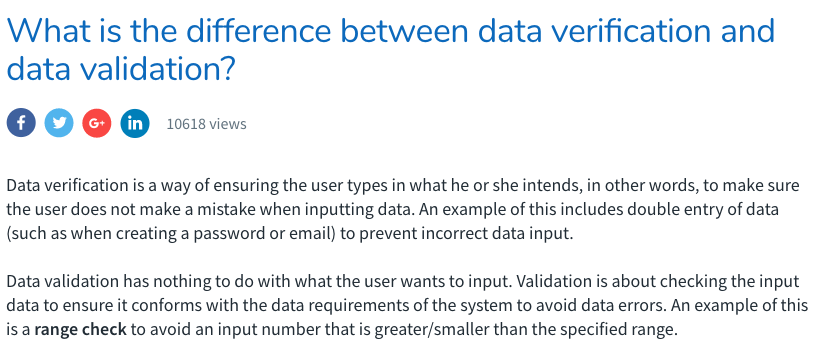
To avoid such errors altogether and ensure that you capture data in a valid format, you can set up filters before passing that data to the next module. Using Regular Expressions as Match Patterns, you can effectively validate email addresses and phone numbers. Do not confuse validation with verification though. This tutorial is to only validate the format of the input and not verify if an email or phone exists or matches previous records.
A simple distinction as in the image below can be found here.
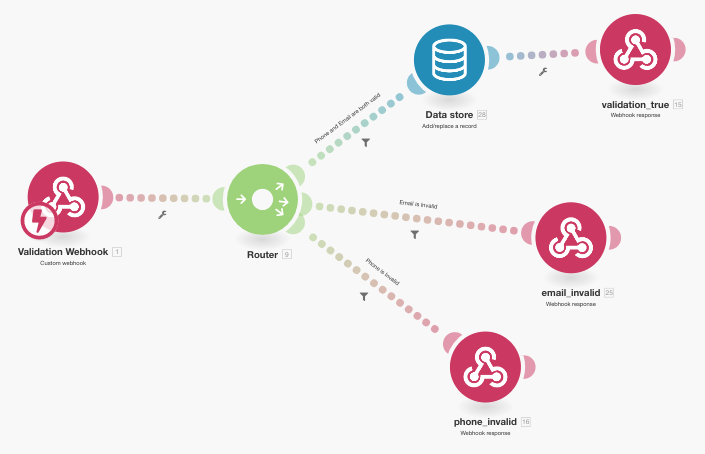
In this tutorial, we will validate an email address followed by a phone number, and if both are valid, we update a record in a Data Store. (Read more about Integromat Data Stores here). You can follow the same process to create a row in a Google Sheet or an Airtable Base. If either the email or the phone is invalid, a Webhook Response is set up to prompt the user to retry. The scenario looks like the one below:
Step 1: Configure a webhook to receive data
Add the Webhook module, select an existing webhook or create a new one, and copy the URL to paste it in the JSON plugin in Chatfuel. If you are new to this, please refer to Step 1 in the Chatfuel Integration tutorial. I have named this module ‘Validation Webhook’.
Step 2: Create the flow in Chatfuel
Now go to Chatfuel to set up the requisite blocks and plugins. To capture data, you can either use the User Input plugin or the newly added User Email and User Phone plugins, whichever you prefer. While you can use this scenario with your existing flow of blocks, I’m going to show the one that I consider neat and easy to comprehend.
We will create the following five blocks (feel free to use your own nomenclature for blocks and attributes):
- email_capture
- email_invalid
- phone_capture
- phone_invalid
- validation_true
The setup for all five blocks are shown below:
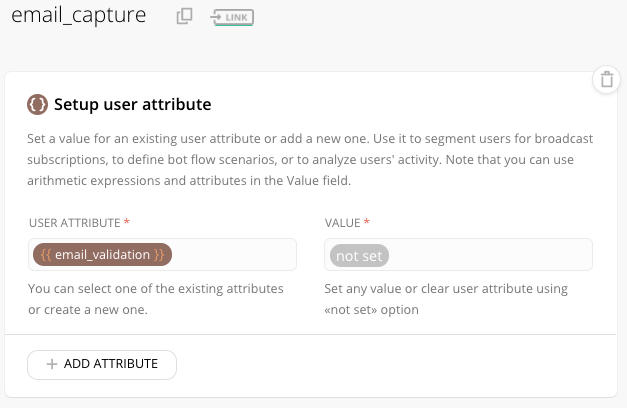
- Block name: email_capture
- Start with a Setup user attribute plugin and create an attribute called ‘email_validation’ with the value ‘not set’
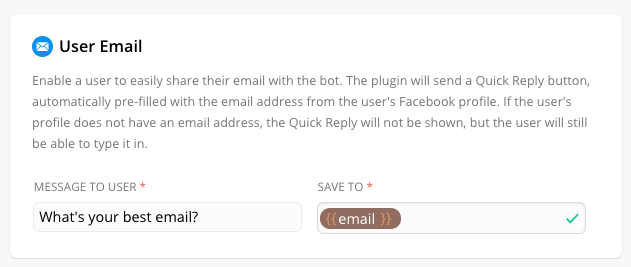
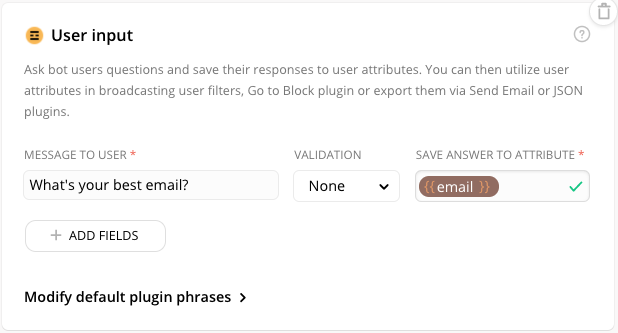
- Add a User Email or User Input plugin and save the input to the ‘email’ attribute (leave the Validation as ‘None’ if using the User Input plugin)
OR
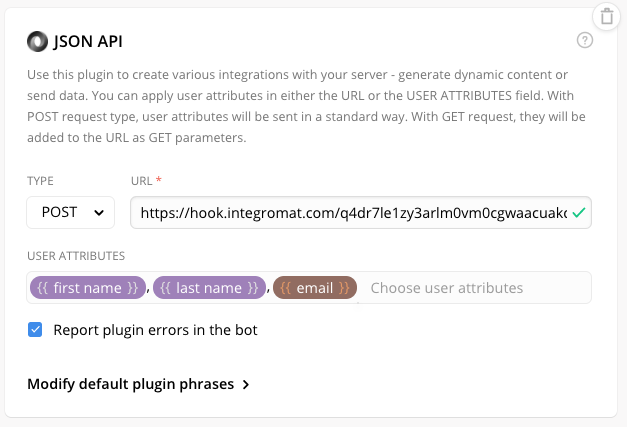
- Add a JSON API plugin, choose POST, paste your Webhook URL and add the attributes {{first name}}, {{last name}} and {{email}}.
- Add a Go to block plugin and redirect to the ‘phone_capture’ block with the following filter:
attribute -> email_validation -> is -> not set

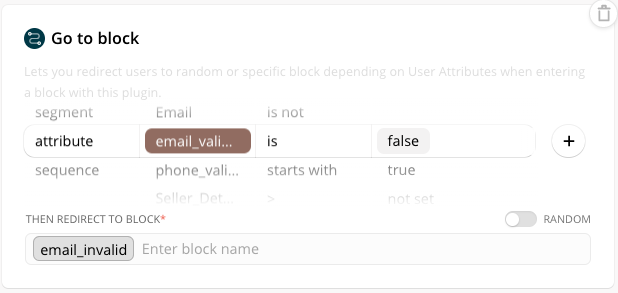
- Add another Go to block plugin and redirect to the ‘email_invalid’ block with the following filter:
attribute -> email_validation -> is -> false
Note: If you’d like to, you may redirect back to the ‘email_capture’ block instead of ‘email_invalid’ and return a message such as “email is invalid, please try again” from the webhook response directly.
- Block name: email_invalid
Clone the ‘email_capture’ block and rename it as above. And add the following text block after the Setup user attribute plugin:
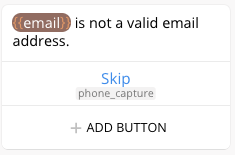
This allows you to show the invalid email that a user had typed in and give an option to skip this step. The rest of the block remains as is.
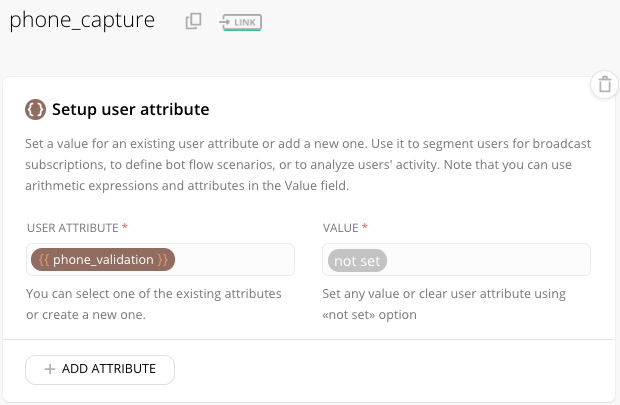
- Block name: phone_capture
- Like the email_capture block, set up a user attribute called ‘phone_validation’ with the value ‘not set’
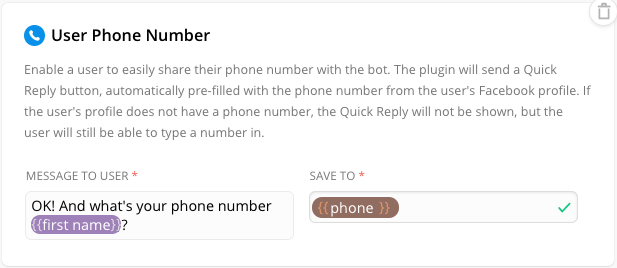
- Add the User Phone or the User Input Plugin (leaving the Validation as ‘None’)
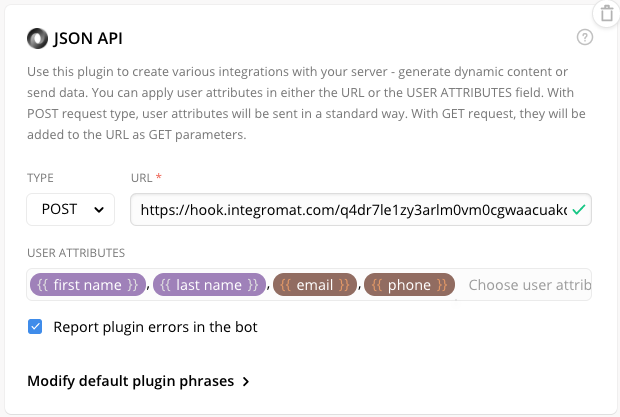
- Setup the JSON plugin with the same Webhook URL as the one in the previous blocks and pass the following attributes:
{{first name}}, {{last name}}, {{email}} and {{phone}}
- Add a Go to block plugin and redirect to the ‘validation_true’ block if phone_validation is “true” AND email_validation is “true”
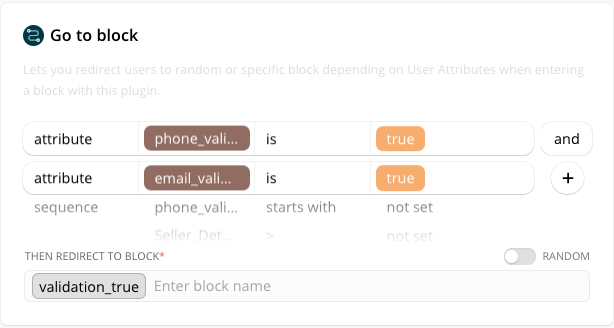
Note: The above attributes are assigned the value ‘true’ via the webhook response when both email and phone are valid (explained later). This scenario will work even if only phone_validation is true.
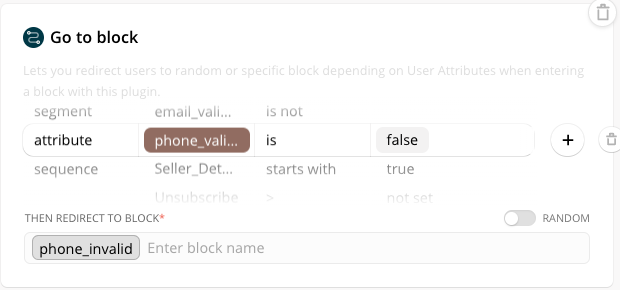
- Setup another Go to block plugin and redirect to ‘phone_invalid’ if phone_validation is “false”.
- Block name: phone_invalid
Clone the ‘phone_capture’ block and rename it as above. And add the following text block after the Setup user attribute plugin:
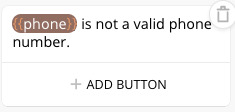
The rest of the block remains the same as before.
- Block name: validation_true
Just add a text block as shown below:
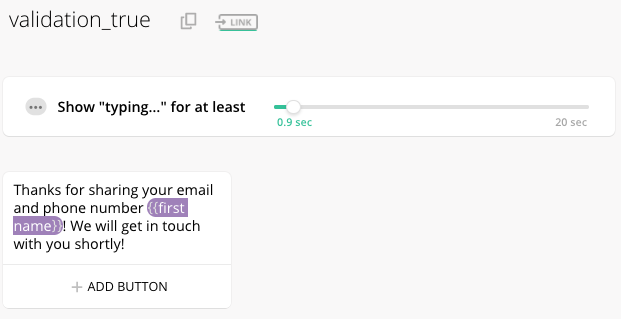
This is the block you will send the user to if both email and phone are valid.
Step 3: Setup the Router module in Integromat
Router is an incredible module that lets you filter data when setting up multiple Actions to a Trigger. It can be found under ‘Flow Control’.
In this scenario, we will use a Router for the following actions:
- Send a response to the Validation Webhook if the email is invalid
- Send a response to the Validation Webhook if the phone is invalid
- Add a row in a Data Store followed by a response to the Validation Webhook if both email and phone are valid
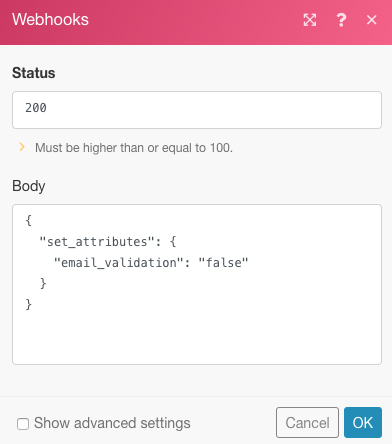
- Add a Webhook response and set up a filter to check if the email is invalid:
- The Body of the webhook response contains the following JSON that assigns the value ‘false’ to the attribute email_validation:
{
"set_attributes":
{
"email_validation": "false"
}
}
- The filter contains the following condition:
email -> Does not match pattern -> ([\w.-]+@[\w.-]+)
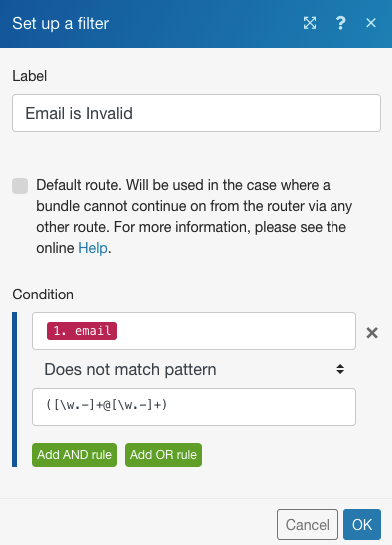
The response is sent if the value of the attribute email does not match the format of the Regular Expression.
You can test the above on https://regex101.com/ by pasting the regex,([\w.-]+@[\w.-]+) under REGULAR EXPRESSION and typing in an email address under TEST STRING. Make sure you choose Javascript as the FLAVOR.
- Similarly, add another route with the Webhook response with a filter to check if the phone is invalid:
- The Body of the webhook assigns the value ‘false’ to the attribute phone_validation:
{
"set_attributes":
{
"phone_validation": "false"
}
}
- The filter contains the following condition:
phone -> Does not match pattern -> ^[+]?\(?(\d{1,3})\)?[\s-]?\(?(\d{3})\)?[\s-]?\d{3}[\s-]?\d{3,4}
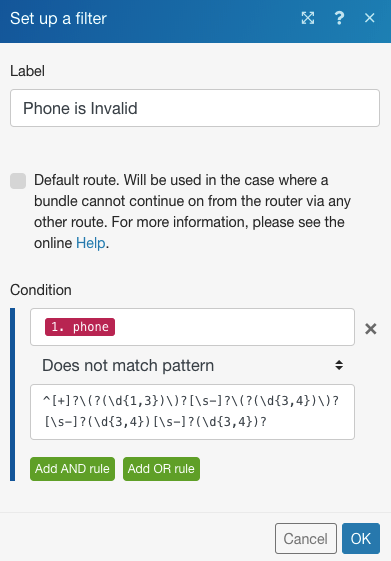
The response is sent if the value of the attribute phone does not match the format of the Regex above.
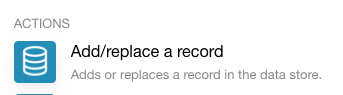
- Add the last route with the Data store module with a filter to check if both email and phone are valid, followed by a Webhook response.
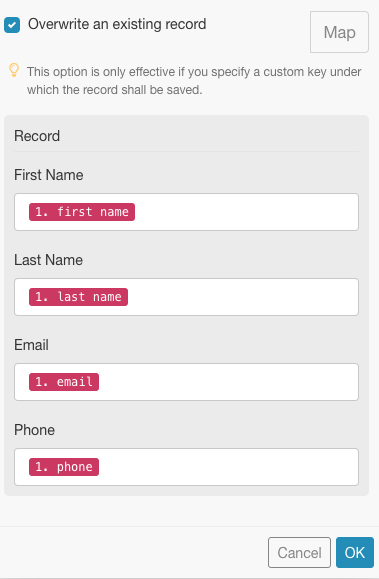
- Under Data store, select Add/replace a row as the Action:
- Create a Data store if you haven’t already and set it up as shown below: (If you’re not familiar with this, please refer to Step 2 in this tutorial)
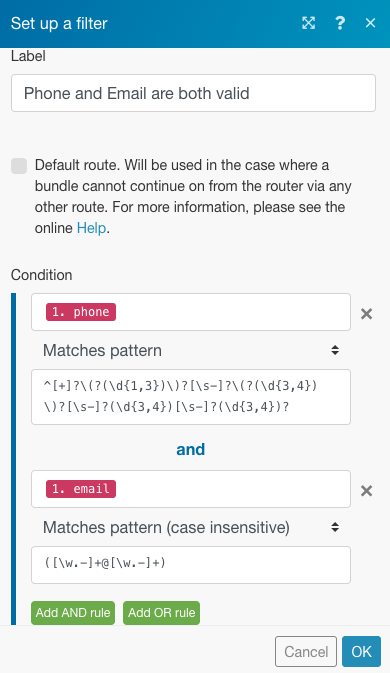
- This is the most important step. Add a filter to check if both email and phone are valid. The filter contains the following condition:
phone -> Matches pattern -> ^[+]?\(?(\d{1,3})\)?[\s-]?\(?(\d{3})\)?[\s-]?\d{3}[\s-]?\d{3,4}
AND
email -> Matches pattern (case insensitive) -> ([\w.-]+@[\w.-]+)
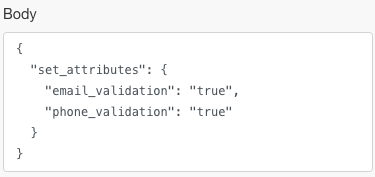
- Lastly, add a webhook response with the following JSON that assigns the value ‘true’ to both email_validation and phone_validation:
{
"set_attributes":
{
"email_validation": "true",
"phone_validation": "true"
}
}
At this point, you must save your scenario and rename the modules to keep the setup clean and toggle the Scheduling switch to ON.
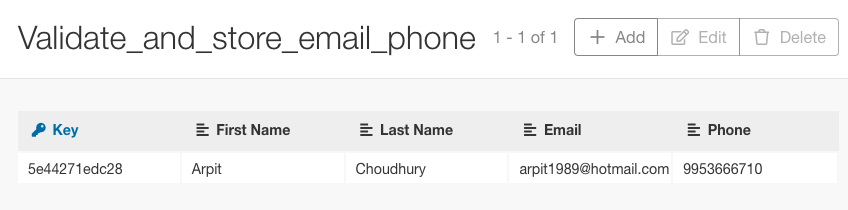
If you have followed the tutorial correctly, your Chatfuel bot is all set to validate emails and phone numbers and store them in a Data store. If both are valid, you should see a new row as below:
Wow! If you’ve got this far, I hope you’ve learned a thing or two. Do leave a comment if you have queries or are stuck somewhere.
Happy Automating!


