How to send a message to a Discord channel via HTTP when a Google Sheet is updated
Scenario: Update data in a Google Sheet to send a message to a Discord channel via the HTTP module. This scenario watches an existing Google Sheet and is triggered when data from a row is modified.
Level of difficulty: Easy
Implementation Time: Approximately 20 Minutes
Prerequisites: The following is needed to set up this scenario:
- A Google Sheet with column names and existing data.
- A Discord account with permission to Manage Webhooks for a text channel.
----
Hey Gamer! Pardon me if you’re not but you must be aware that Discord is designed for gaming communities. Either way, once you’re through with this short tutorial, do leave a response to let me know what you’re using Discord and this integration for.
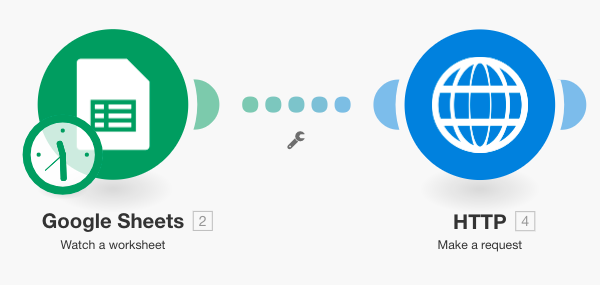
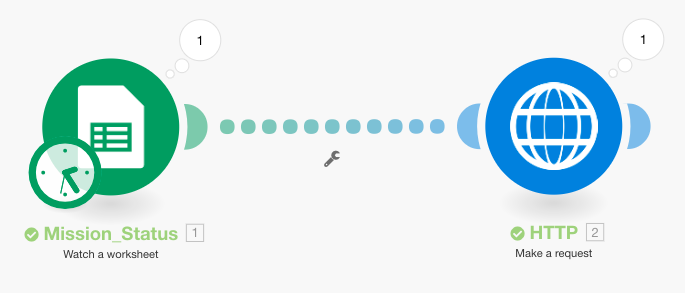
The scenario for this tutorial contains only two modules and looks like this:
Step 1: Configure your Sheet
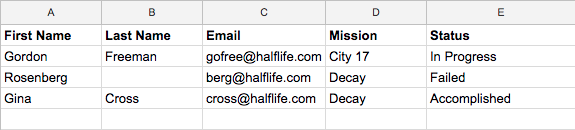
As mentioned under prerequisites, you must have a Google Sheet configured with column names and some sample data. If you don’t, please create one before you proceed. This is what mine looks like:
Step 2: Create a Webhook in your Discord Channel
Discord gives you the ability to create one or more webhooks for each text channel. If you’re not familiar with the process, follow the 3-step instructions below or else, jump to Step 3.
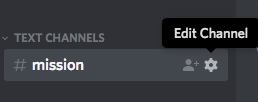
- Under TEXT CHANNELS, click on the settings icon next to the channel name:
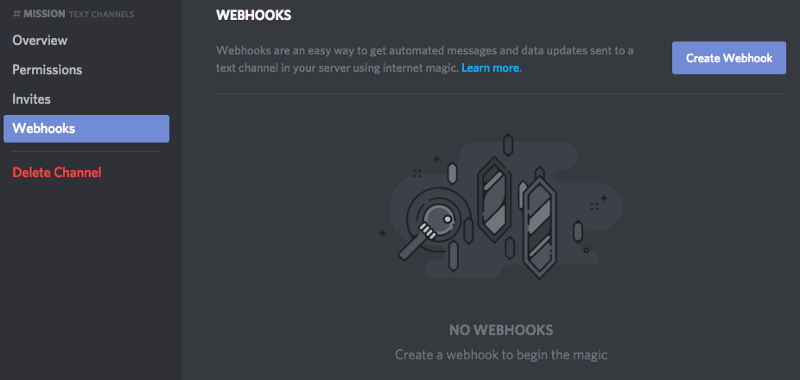
- Head over to the Webhooks tab from the left menu and click on the button labelled Create Webhook:
- Give the Webhook a name, copy the webhook URL and hit Save:
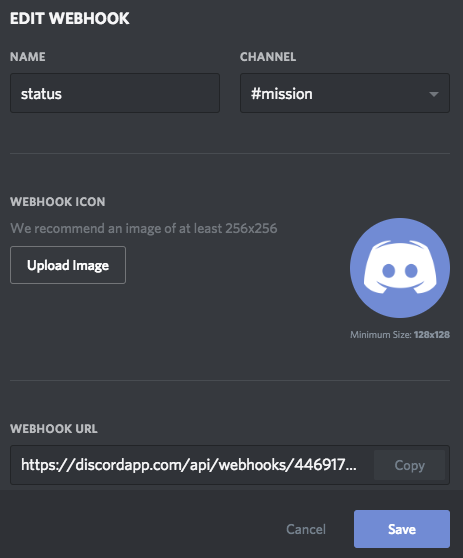
Keep this URL handy, we will need it while setting up the HTTP module in our Integromat scenario.
Step 3:
Head over to your Integromat dashboard to create a new scenario.
- Click on the big question mark to setup Google Sheets as the first module and select Watch a worksheet as the trigger.

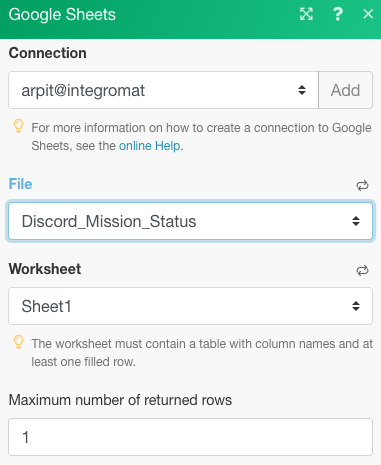
- Choose your Google connection or add a new one followed by selecting a file (the sheet you created earlier) and the worksheet in the file that contains the sample data. Under Maximum number of returned rows, type in the number of messages you’d like to send every time the scenario runs. If you’d like to send a separate message for each updated row, type in 1 as shown below:
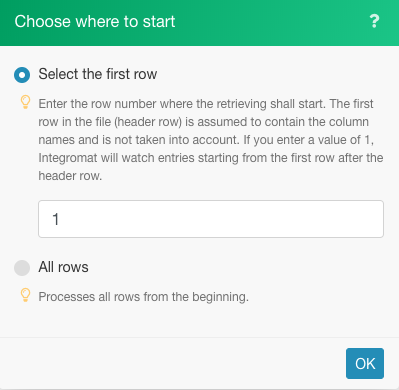
- After pressing OK, you’ll see another dialog box asking you to either enter the row number from which you’d like the module to start looking for updates, or select All rows.
Note that the first row or header row is always assumed to contain the column names. Hence, if you enter 1, entries will be watched starting the row below the header row.
Step 4: Configure the HTTP module as the Action
The HTTP module is the second and the last module in the scenario that performs the action of sending a message to a discord channel.
- Search for the HTTP module and select Make a request as the action:

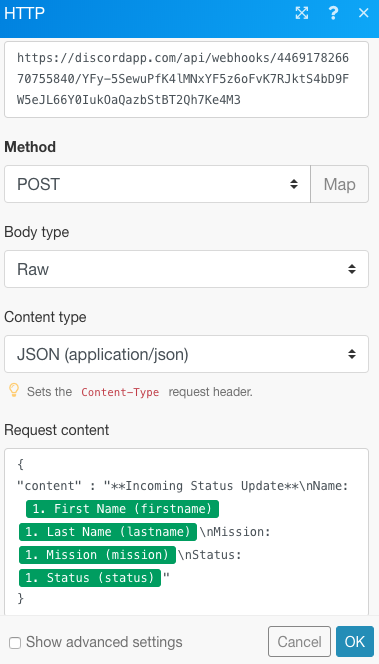
- Under URL, paste the Webhook URL obtained from the Discord channel earlier.
- Under Method, select POST
- Under Body Type, select Raw
- Under Content Type, select JSON (application/json)
- Finally, under Request Content, type in the message to be sent to the channel as a JSON payload as per Discord’s API. To send a message (string), the Field type is “content”, hence the JSON payload should be written as follows:
{
“content” : “Houston, this is a message for Discord”
}
Click here to learn more about executing webhooks on Discord.
Since the trigger is a Google Sheet with columns containing data, we can use the column names to include the contents of each cell in the message that is sent to the channel. We may also use line breaks (\n) in the message. Below is what I have composed:
{
“content” : “**Incoming Status Update**\nName: {{firstname}} {{lastname}}\nMission: {{mission}}\nStatus: {{status}}”
}
- Click on OK to complete the scenario. You must save the scenario and toggle the Scheduling switch to ON.
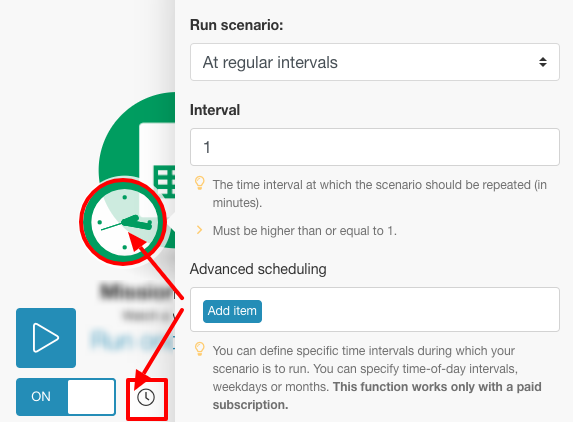
- To define the schedule for the scenario, click on the little clock icon next to the toggle switch or the big clock animation on the Google Sheets module image as shown below:
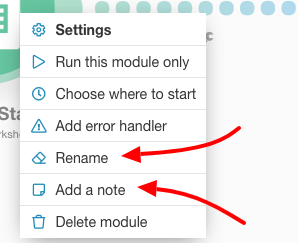
- You may also rename the modules and add notes under each by right-clicking the module image:
That’s it. Now update some data in your sheet and run your module once to make sure everything works fine as shown below:

Hope you were able to implement this scenario with ease.


