Update Google Sheet row with TwitterID and Date after posting it on Twitter
Description
Everytime you create a new tweet in your Google Sheets spreadsheet, Integromat will automatically post your current tweet from your Google sheet to your Twitter account. After that, Integromat will get the TwitterID and the date that the tweet was posted and update a specified Google Sheet row.
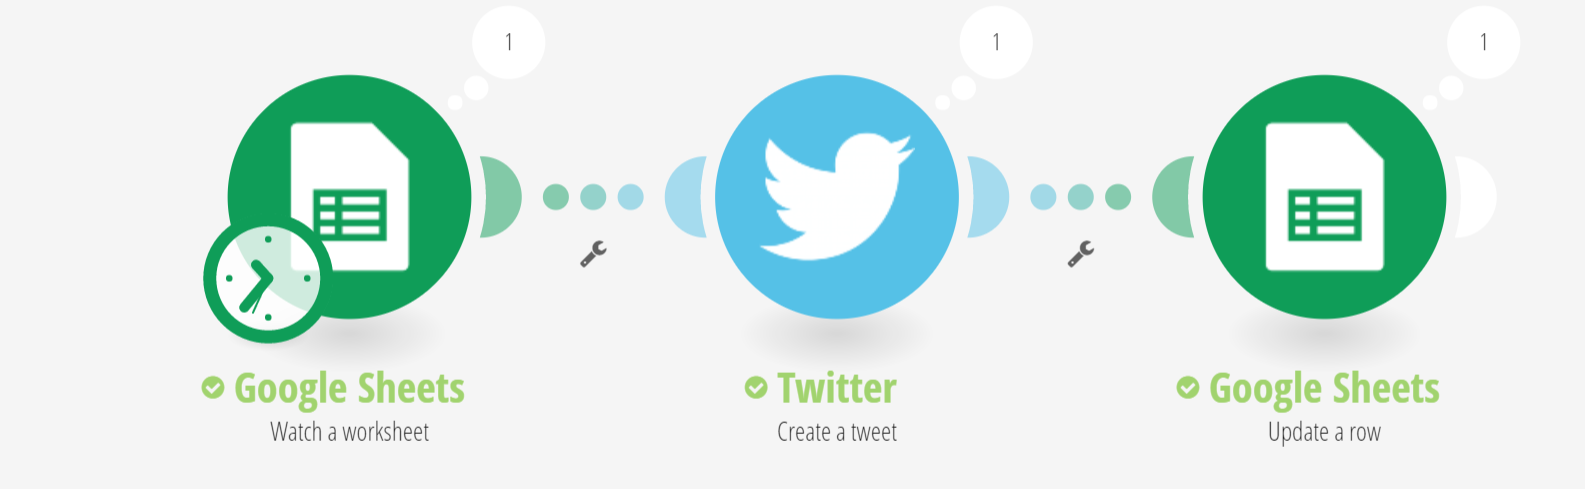
Final Output
Step-by-Step Documentation
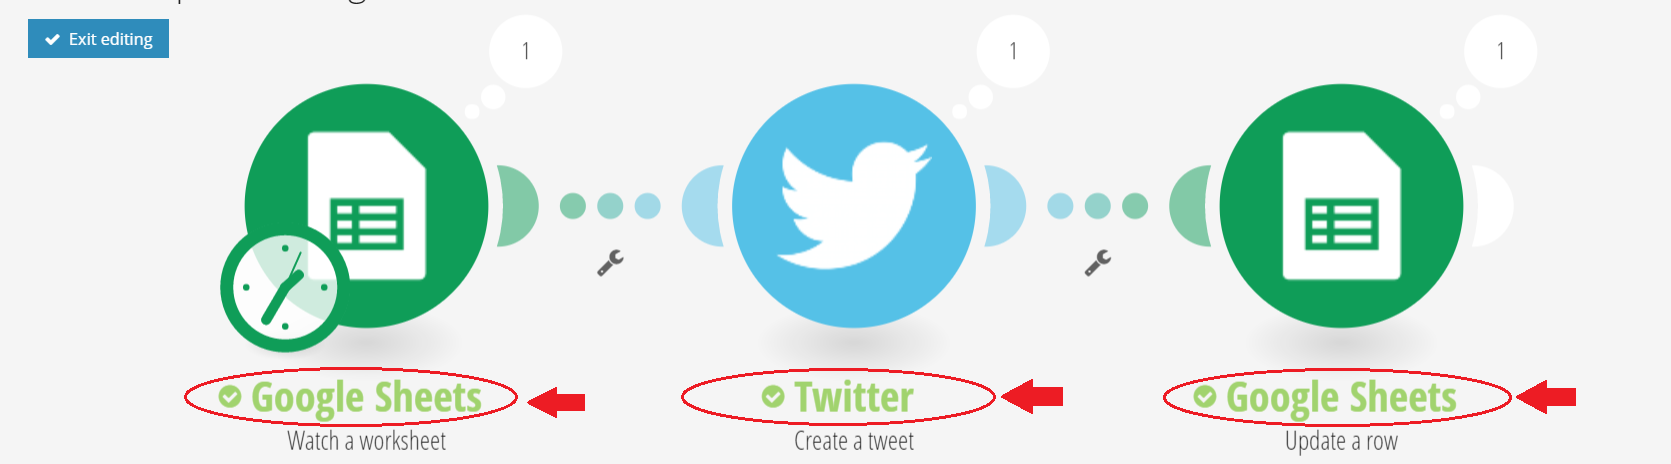
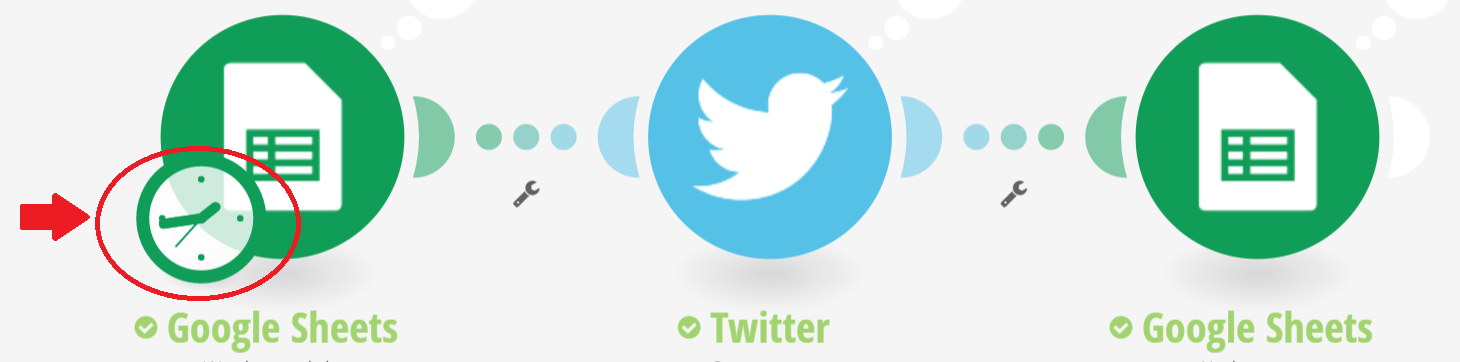
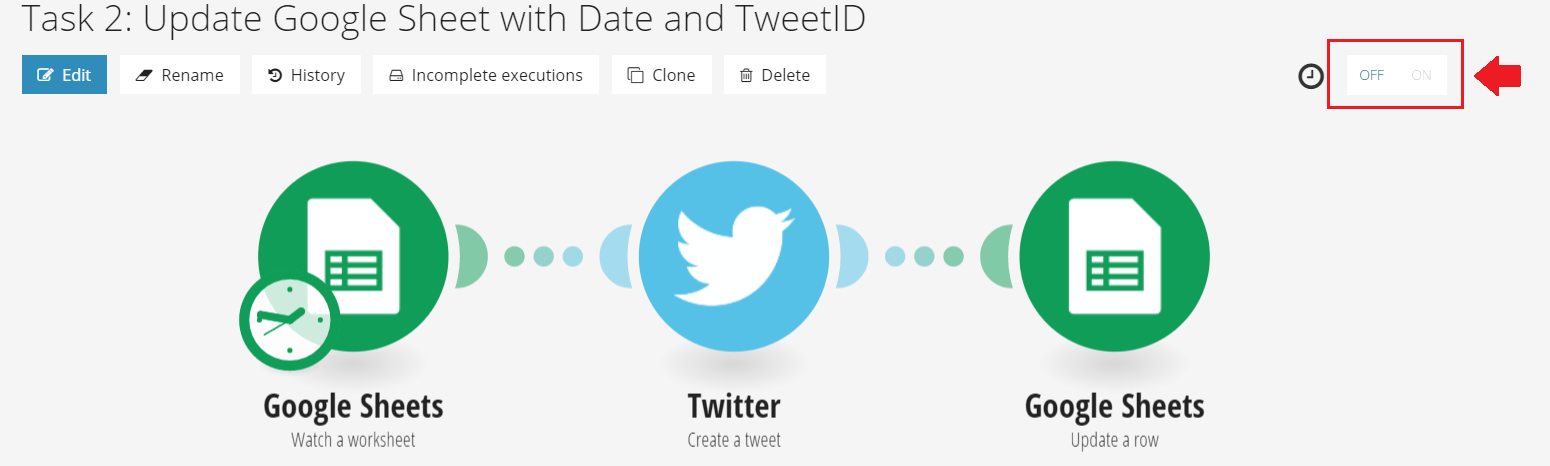
Based on the final output, we can see that there are three modules that are being used for this scenario.
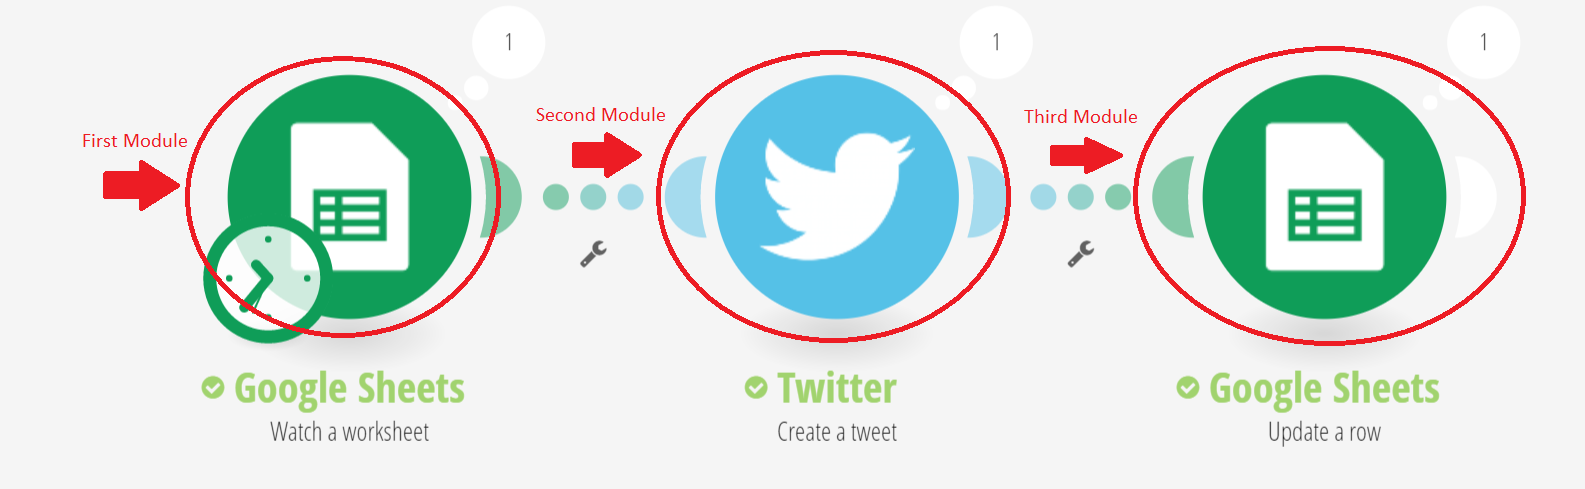
Step 1
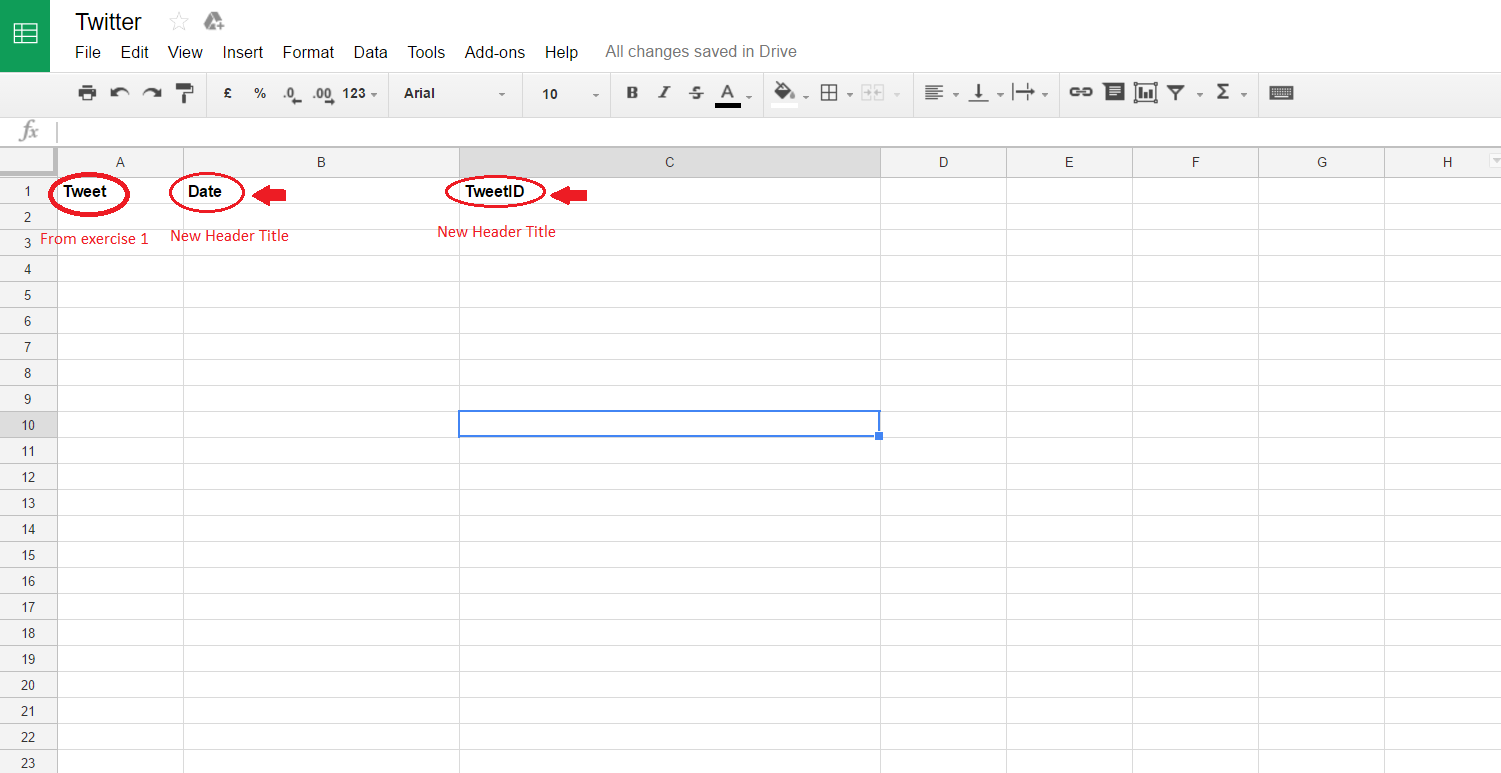
First, based on exercise 1, add two more columns in your Twitter Google Sheet with the header names Date and TweetID.
Step 2
From your first exercise, add another module that updates your Google sheet with the date and the TwitterID after Integromat posts your tweet on your Twitter account.
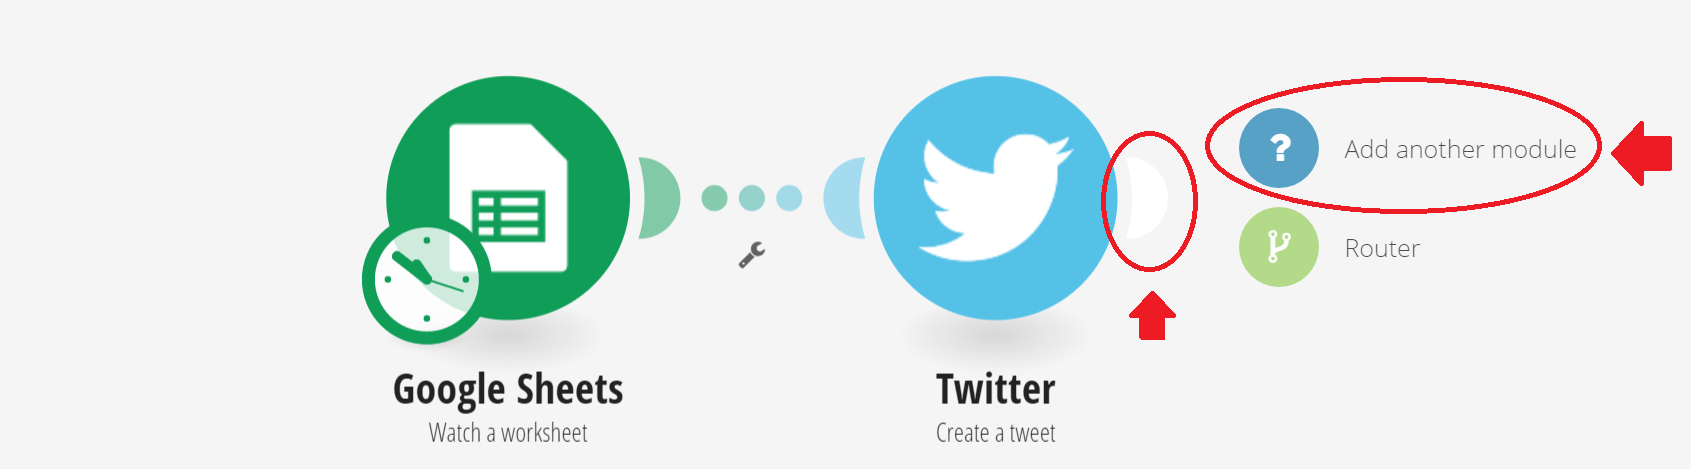
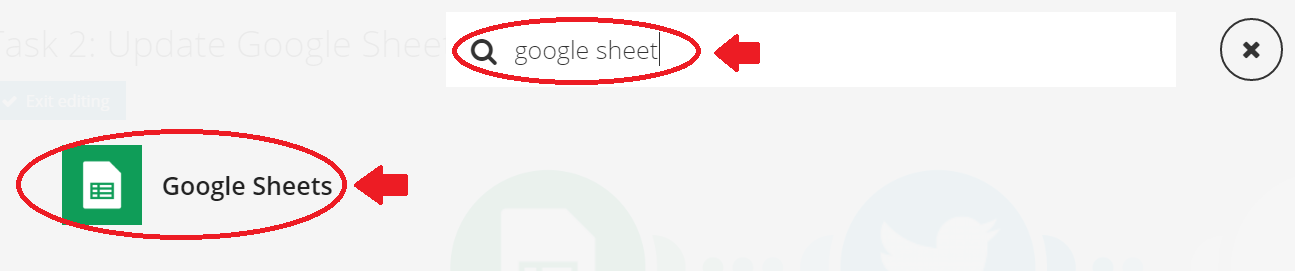
Click on the white field shown in the image below and then two options will appear, click on the Add another module button.
Now, select the app and its corresponding module.
Type, Google Sheets and click on the app as shown below.
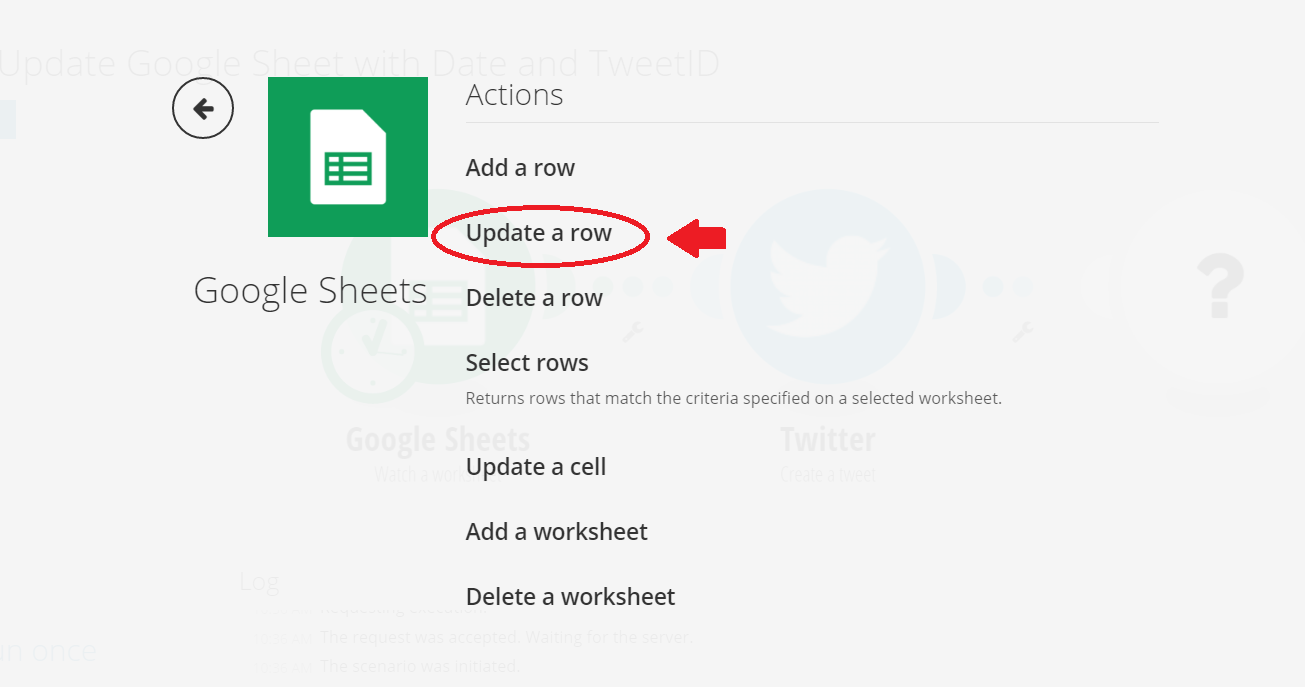
Now, click on the corresponding module Update a row. (This module will update your Tweet Google sheet with the date and TwitterID of your current Twitter post)
Step 3
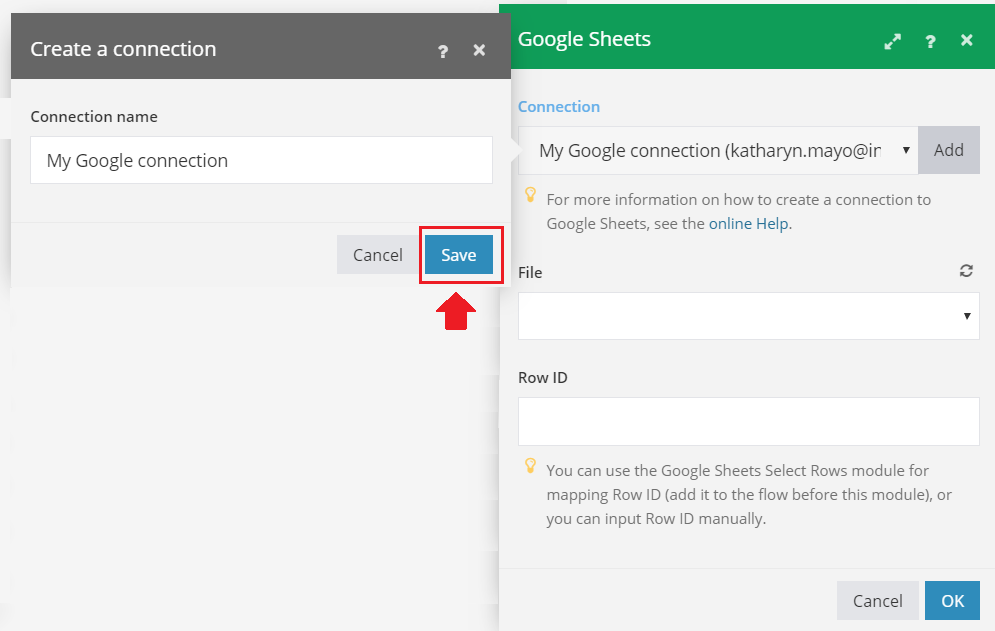
Once you have your new module, a new tab will automatically pop up where you have to configure your Google Sheets settings as we did in exercise 1.
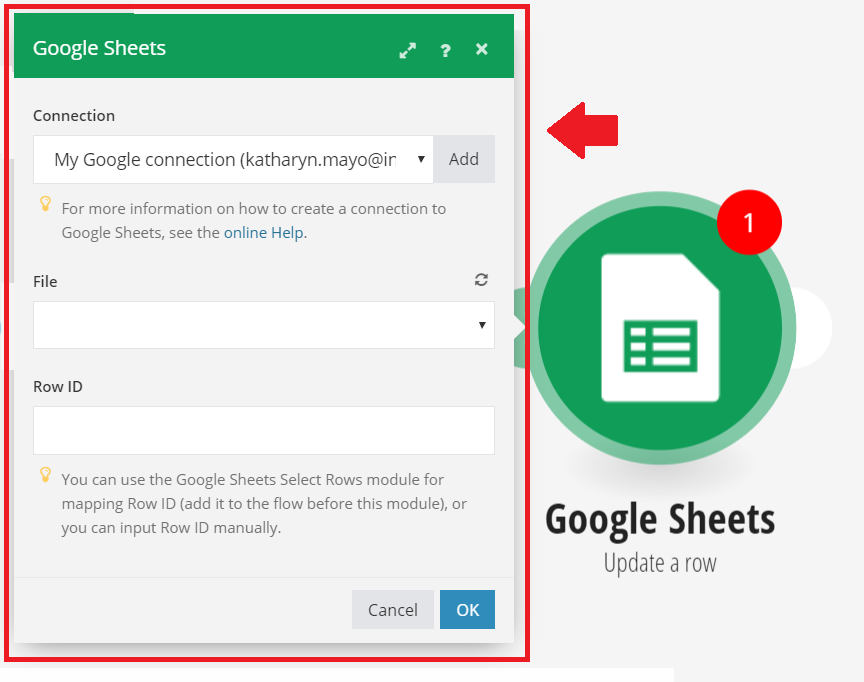
First, click on the Add button and give Integromat access to your Twitter Google Sheet.
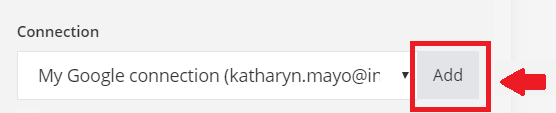
When you click on the Add button it pops up a new window and then click the Save button and then another window will open which is your Google Drive account.
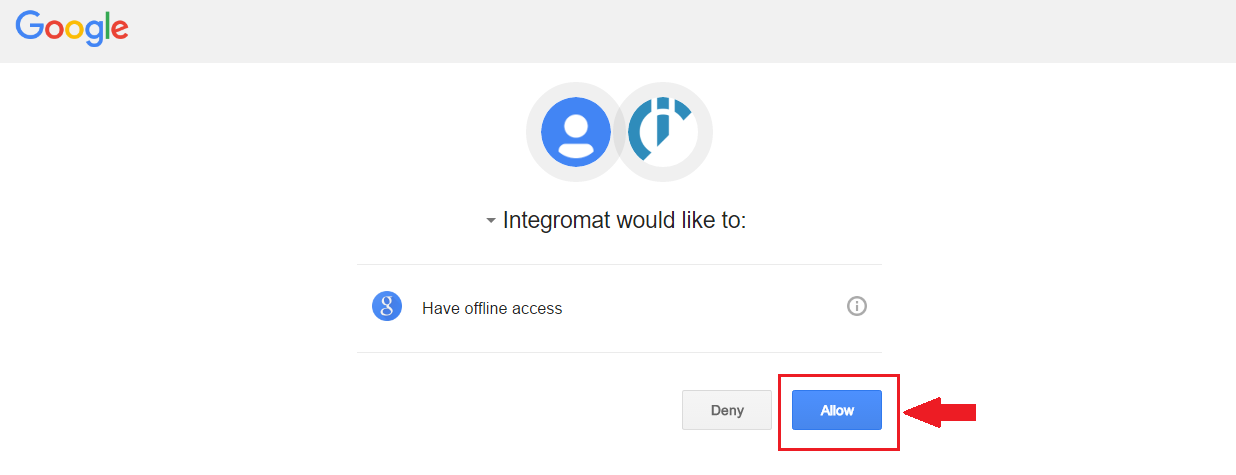
On the newly popped up window click on the Allow button to give Integromat access to your Google Account.
Once that is clicked, go back to your Integromat scenario, and then you have to choose the specific sheet that you want Integromat to choose the tweet from.
In our case, it is the Twitter Google Sheet.
From the File field, a drop down will list all of your sheets available and then choose the Twitter sheet.
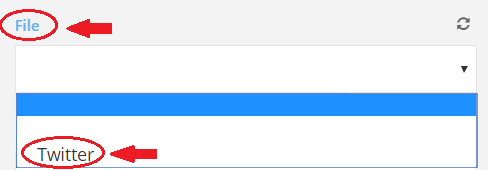
After choosing the Twitter sheet, a few more fields will automatically appear below.
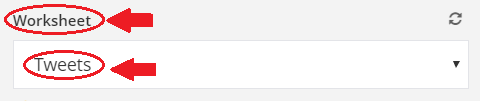
Under the Worksheet field, choose the Tweets sheet because that is where the additional header titles Date and TwitterID are added.
Next, is the listed data inside the Tweet sheet, we have to correspond each specific field, on what data should be added to be updated.
In this case, we want the Date and the TwitterID to be added in the Google Sheet once the current tweet was posted on Twitter.
For the Date(date) field, drag the now variable to the field, that means that Integromat will get the date and time of the status that you have created right now.

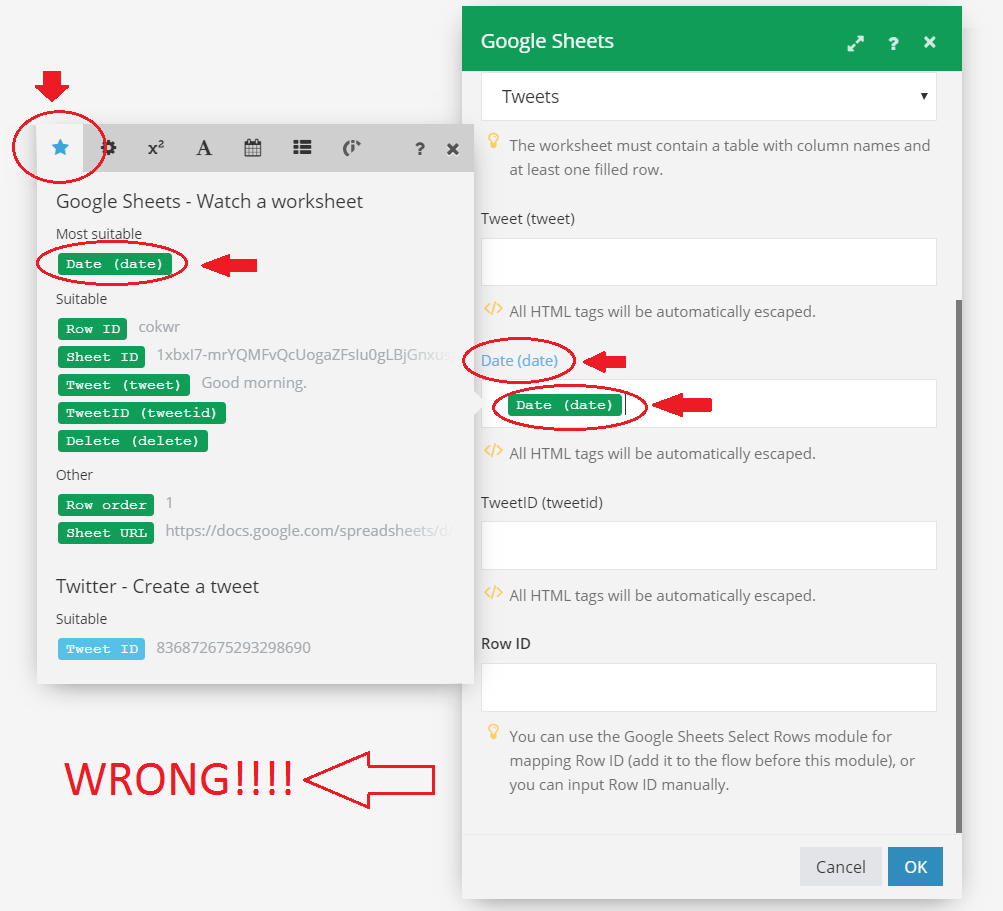
As you can see in the image above, we have chosen the color blue variable now, the blue color stands for the Twitter module, because we want the date of the Tweet to come from Twitter and not from the first Google sheet.
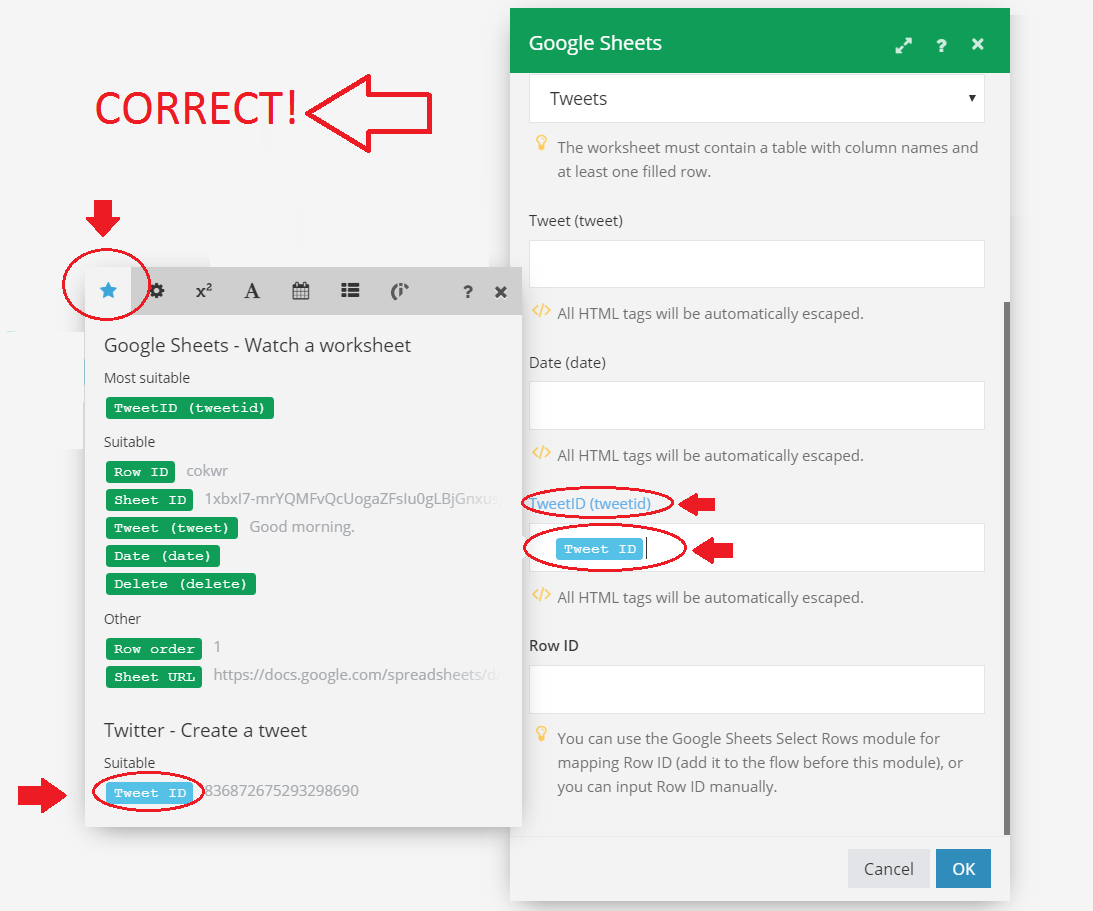
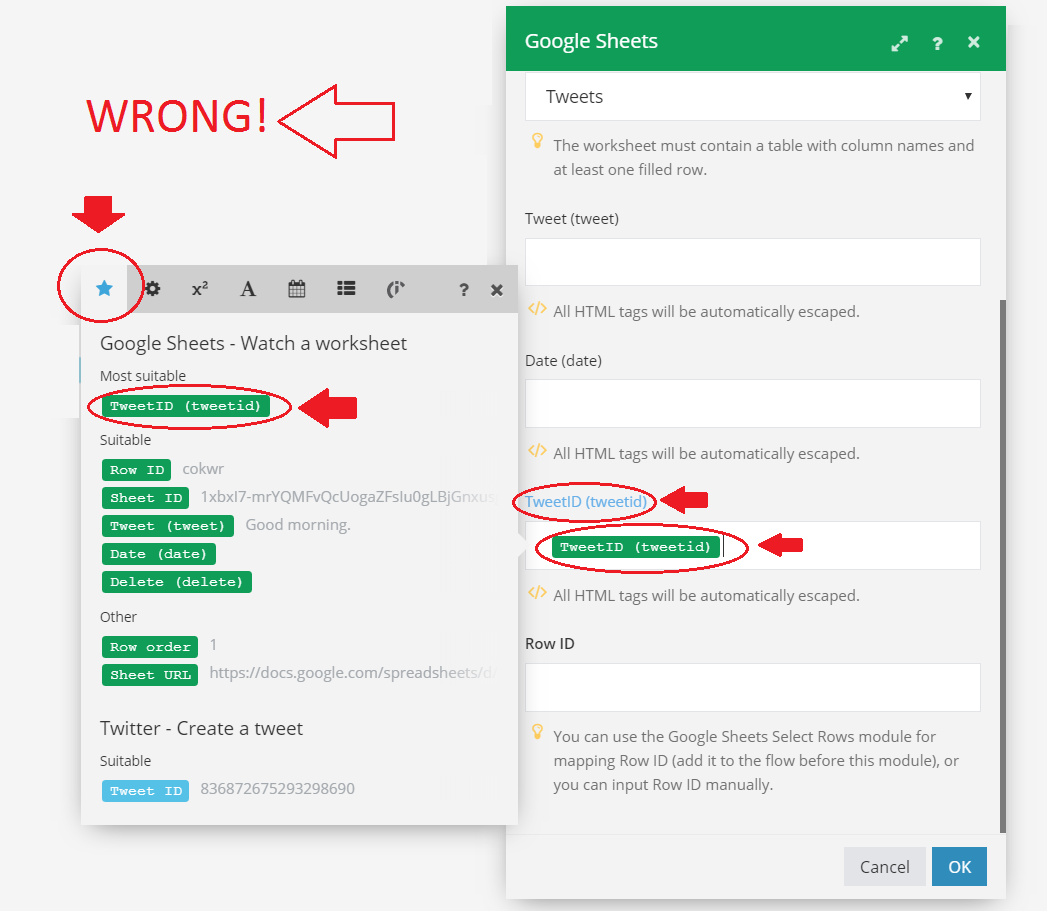
Same goes with the TweetID field, as shown in the image below. We want the TweetID to come from Twitter and not from Google Sheets.
As for the RowID field, we have to get this from the Google Sheet module. Because the last module wants to know which tweet should be updated, so we have to set the row of that specific field.
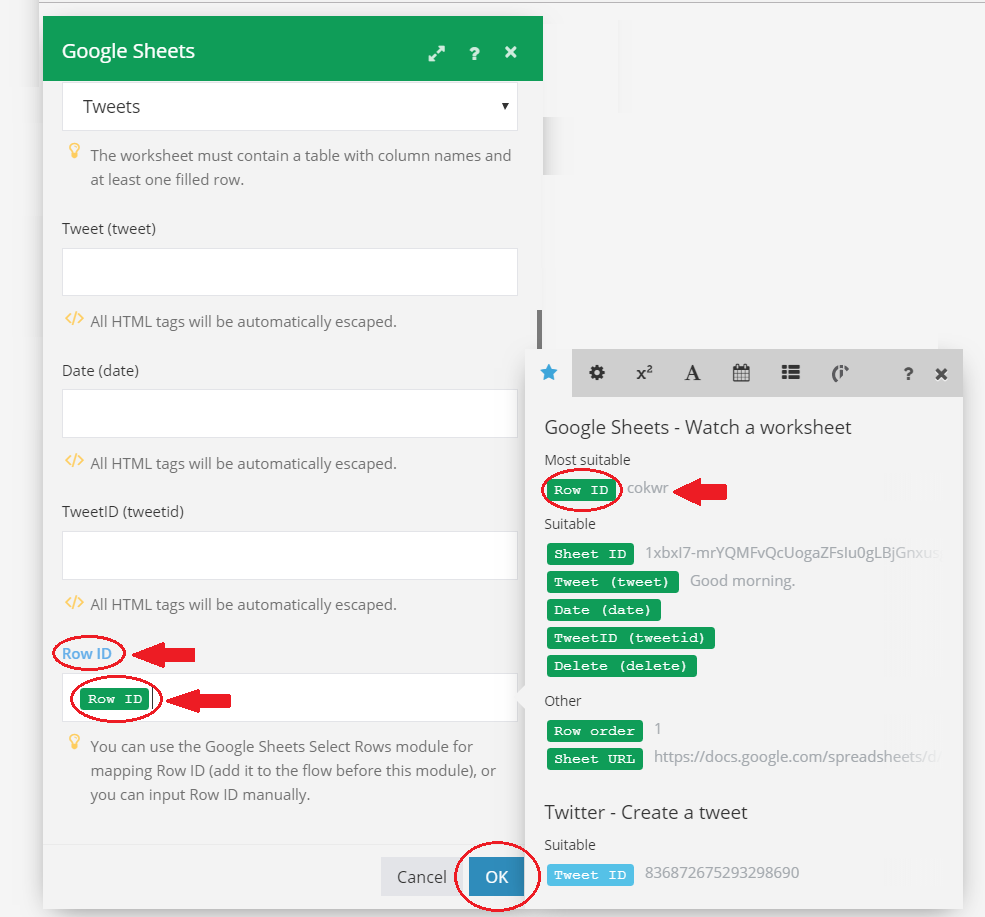
As you can see, the color of the variable is green that is because we grabbed the data from the first module and we are getting the row of the tweet from the Google Sheet.
After inputting all the variables, your tab should look like this:
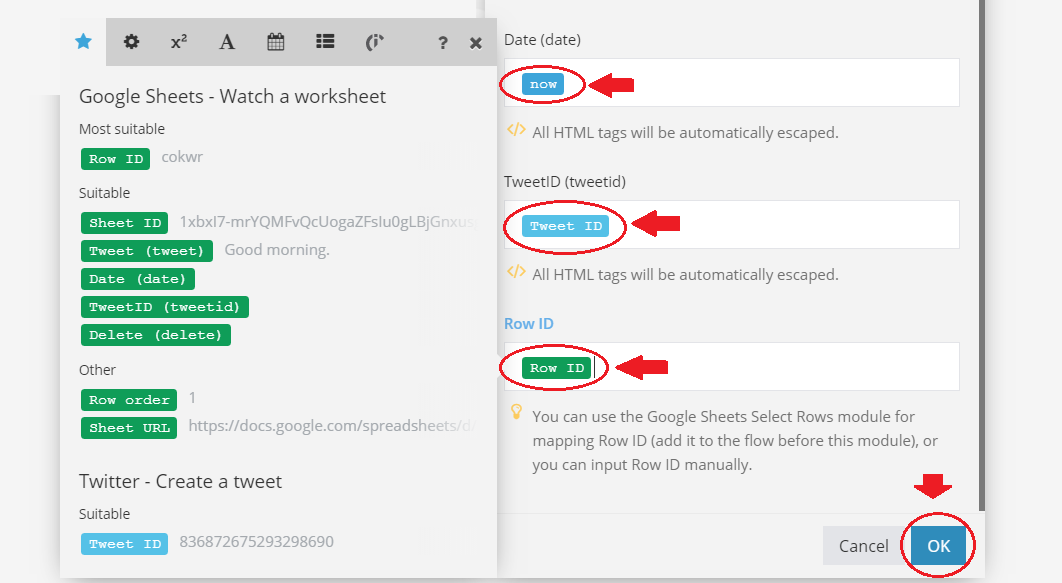
If your tab looks like this, then click the OK button.
Step 4
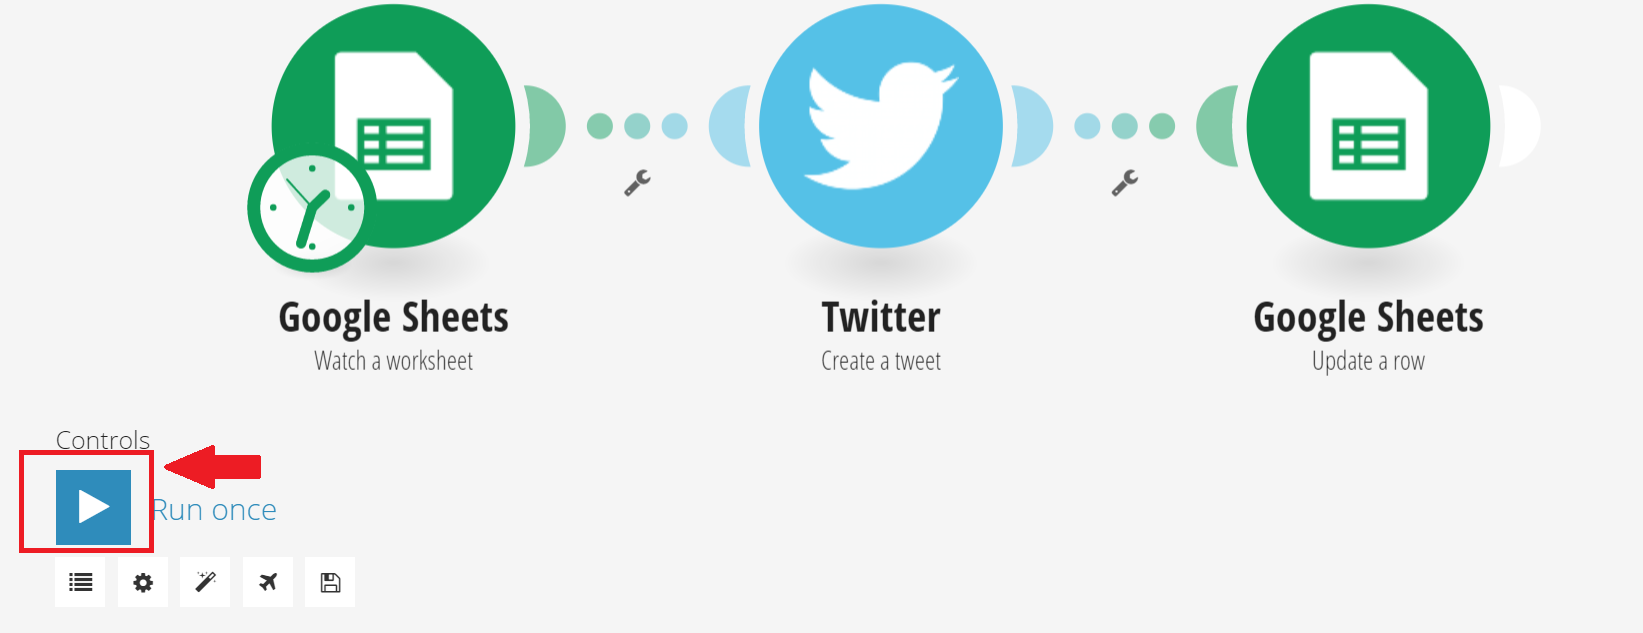
Now it is time to run and execute your scenario.
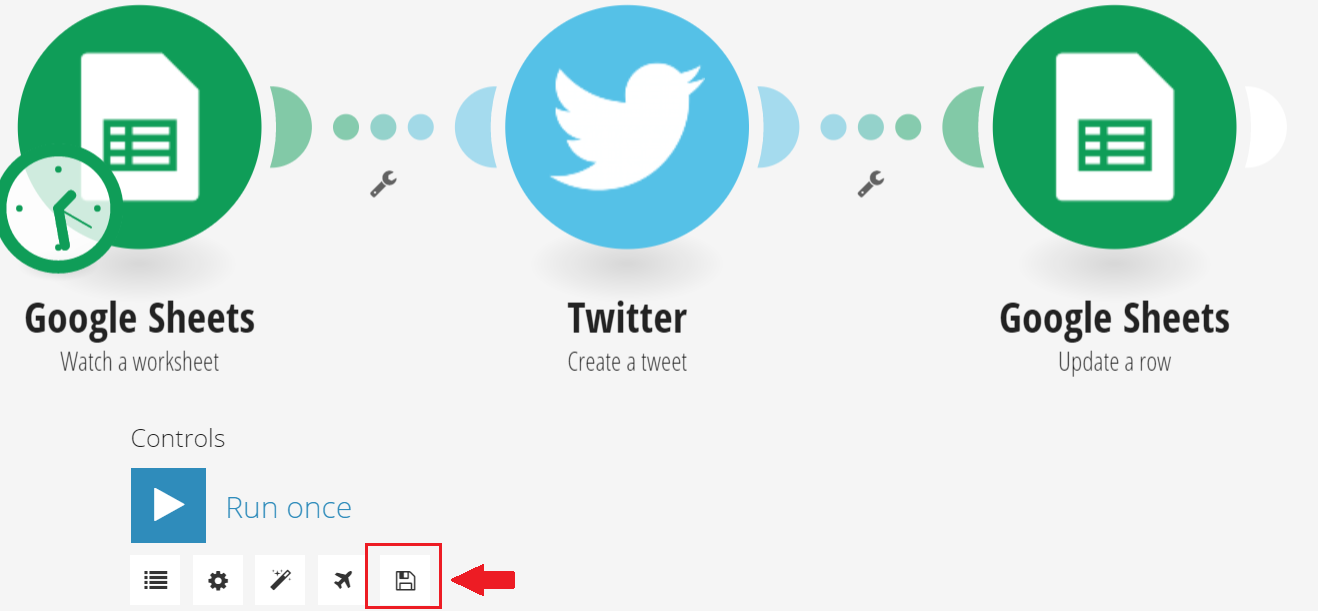
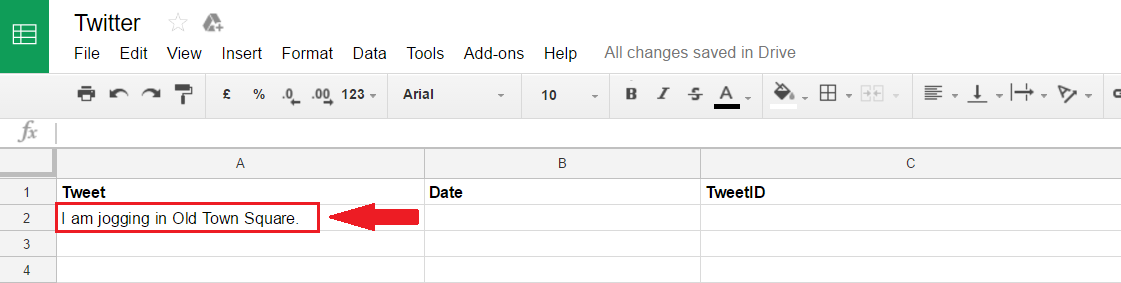
Now, to test your scenario, add a new tweet to your Tweets sheet.
Now run your scenario once to see the flow of your scenario.
After running the scenario, all of your modules should have a green letter as shown in the image below.
That means that all of our modules have run properly and the data was processed properly.
Now, check your Twitter account.
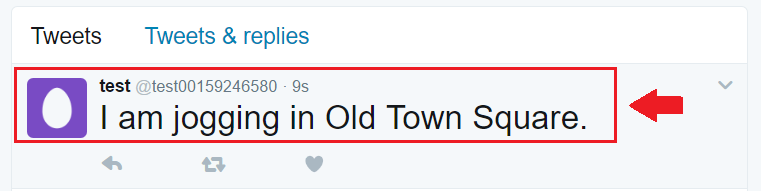
See that the tweet from the Google sheet was processed and automatically transported to your Twitter account.
And now, we check the Google sheet of the date and TweetID was added.
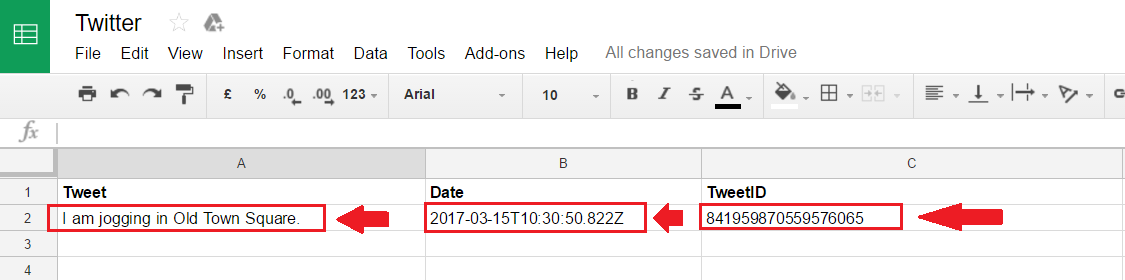
We can see that the date and TweetID value has been added and therefore our Google Sheet has been updated.
Step 5
Setting up your scenario for daily use.
Set up your scenario so that it runs every 15 mins. (Depending on your subscription plan).
See below.
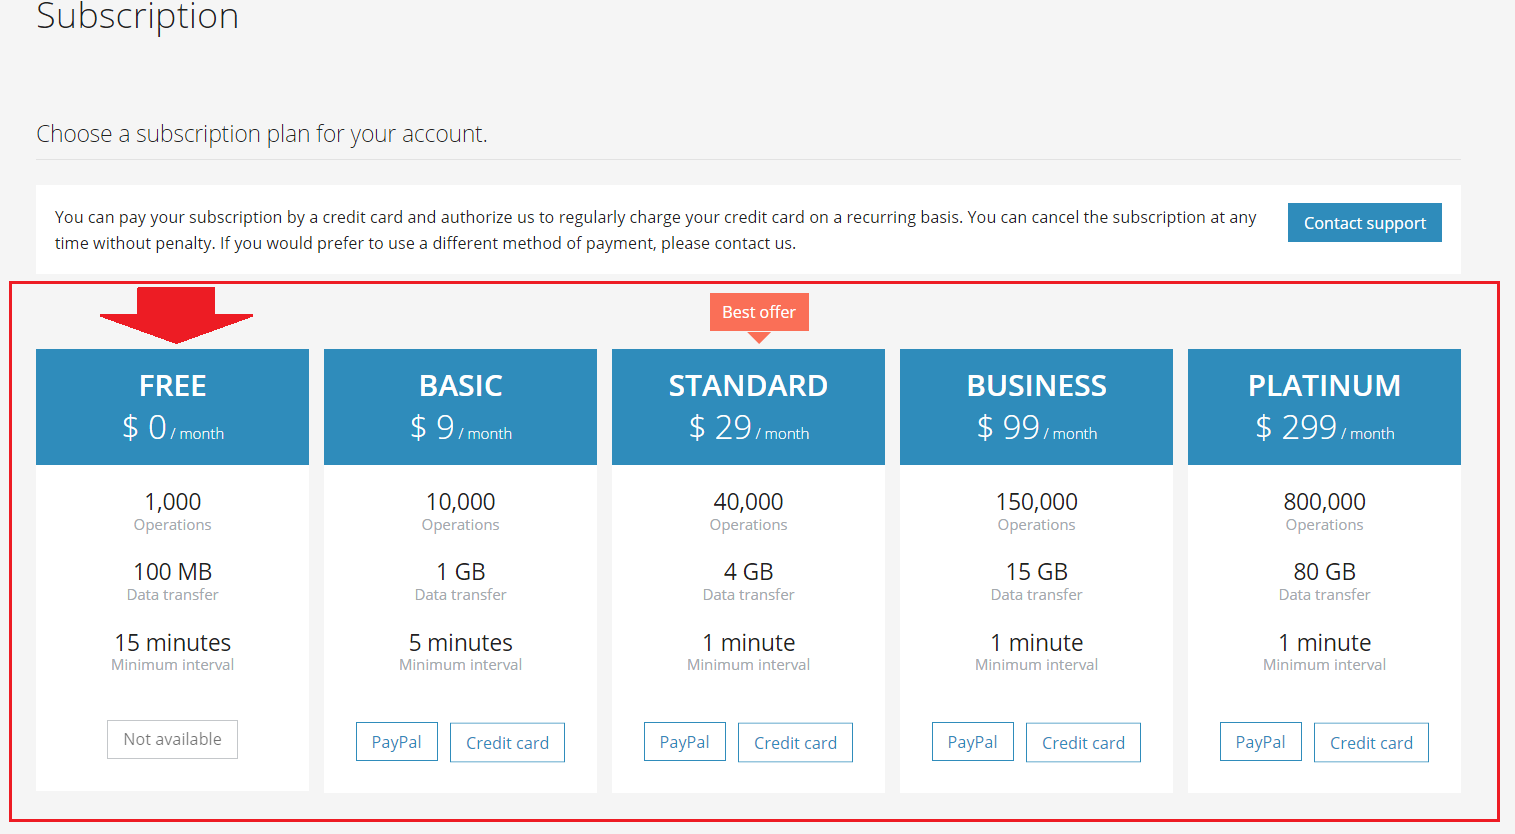
As a free member your minimum number of minutes per cycle is 15 mins. (Based on what we are using in the example).
Click on the clock that is under the Google Sheet app.
A new tab will open.
If you click the dropdown button in the Run Scenario field, you have these options:
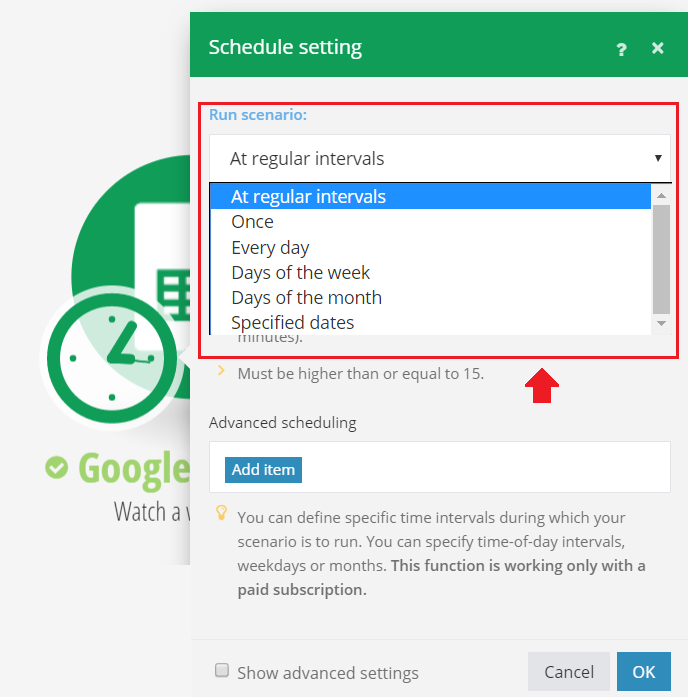
But in this case, you want to choose every 15 minutes, that is why you choose the At regular intervals option.
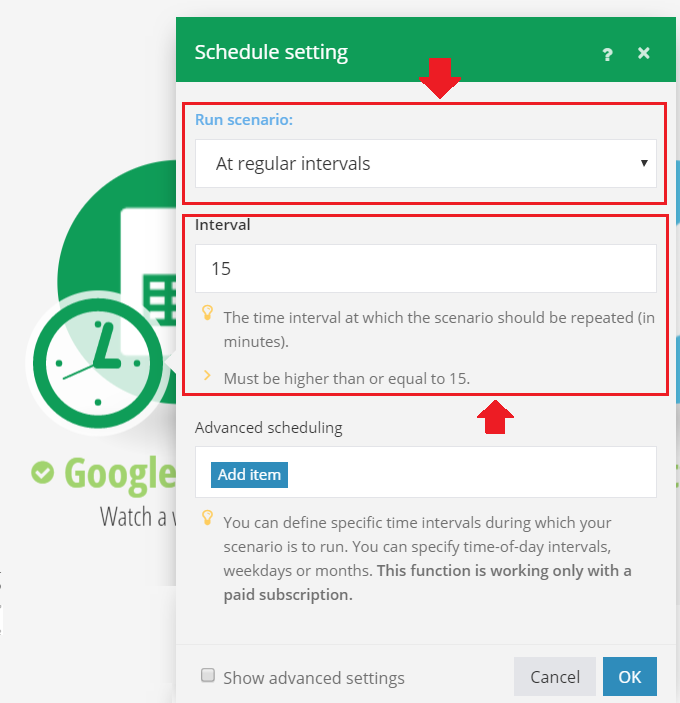
As for the interval of the Schedule Setting, we can set it to 15 mins, since that is the minimum limit set by the rules of Integromat.
Once we have that, click the OK button.
Step 6
The last thing we have to do is activating the scenario so we do not have to execute the scenario all the time, but it will run itself by the cycle that we have set which is 15 mins.
Click on the Exit Editing button.
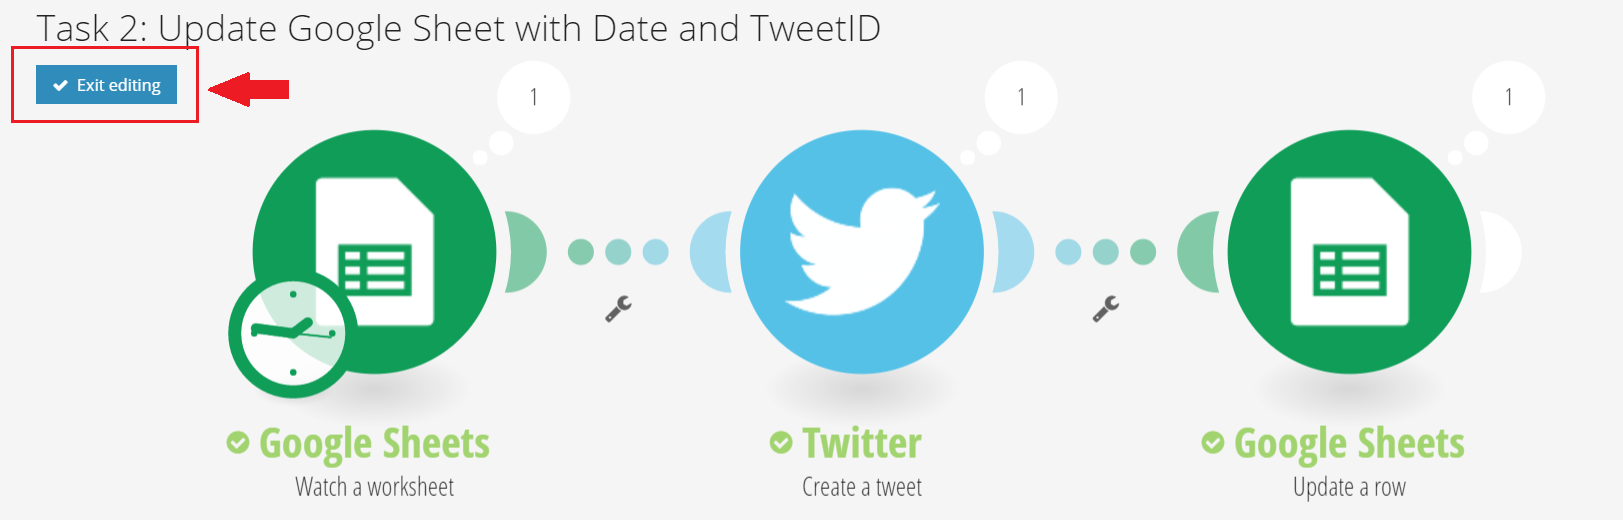
As you can notice, it will exit the editing mode.
After that, turn on your scenario to activate it.
Now, your scenario is done.
Everytime you input something new to the Google Sheet row, Integromat will get the current row that is filled every 15 mins and post it to your Twitter account and updates your Google Sheet row with the Date and TweetID automatically.


