Calling Microsoft Graph REST API via the "HTTP > Make a OAuth 2.0 request" module
This is a step-by-step guide on calling the Microsoft Graph REST API from Integromat:
- In Integromat, create a new scenario
- Insert the HTTP > Make a OAuth 2.0 request module.
- Open the module's configuration and click on the "Add" button next to the Connection field to create a new connection.
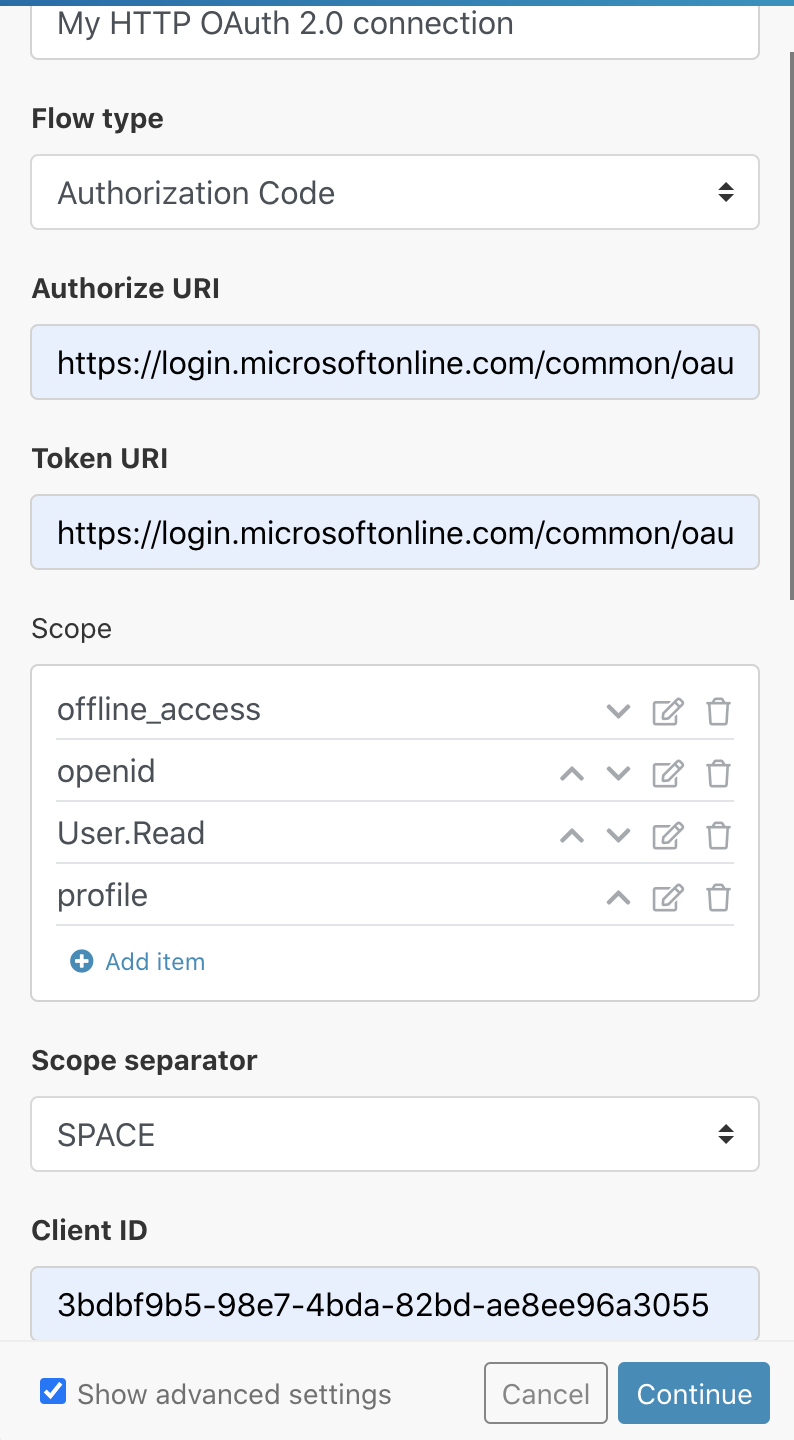
- Fill the connection setup as follows:
Authorize URI https://login.microsoftonline.com/common/oauth2/v2.0/authorizeToken URI https://login.microsoftonline.com/common/oauth2/v2.0/token - Open the Microsoft Application Registration Portal in a new tab/window and log in with your Microsoft account.
- Click on the "New registration" button or select existing MS Azure app.
- Enter a name (e.g.
My Integromat App). - Enter
https://www.integromat.com/oauth/cb/oauth2in the Redirect URLs field.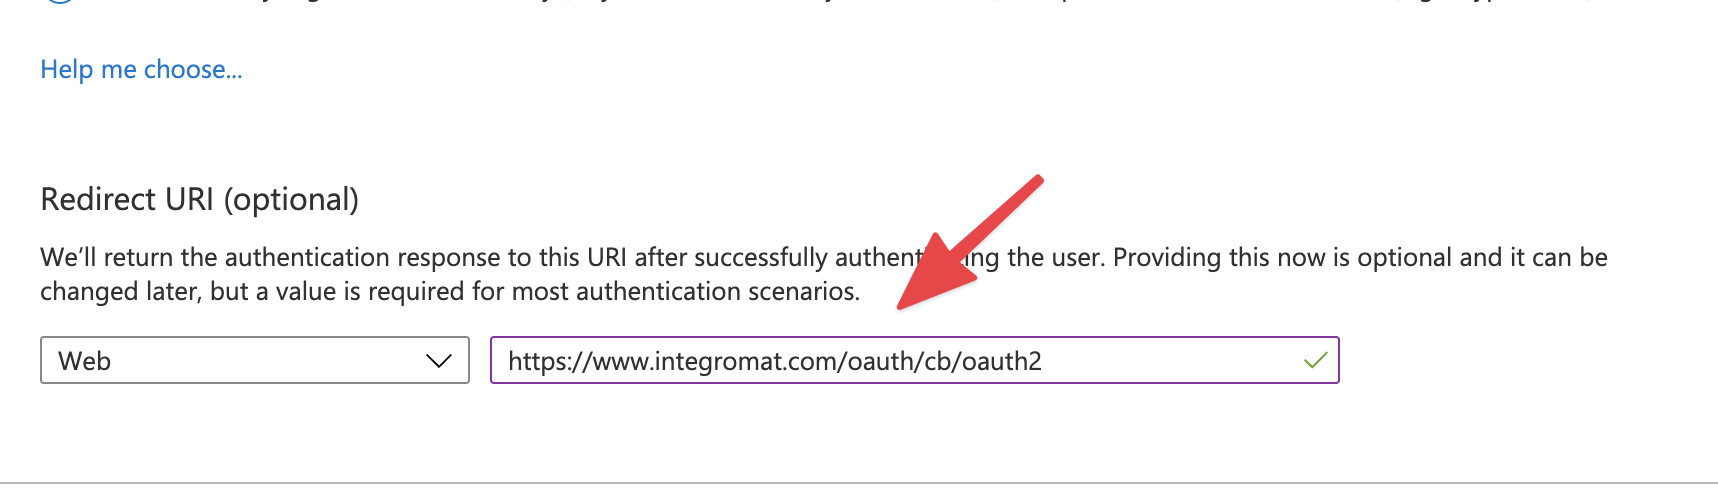
- Click "Register" button.
- Copy the Application Id under the "Properties" heading, switch to Integromat and paste it into the Client ID field.
- Switch back to the Application Registration Portal.
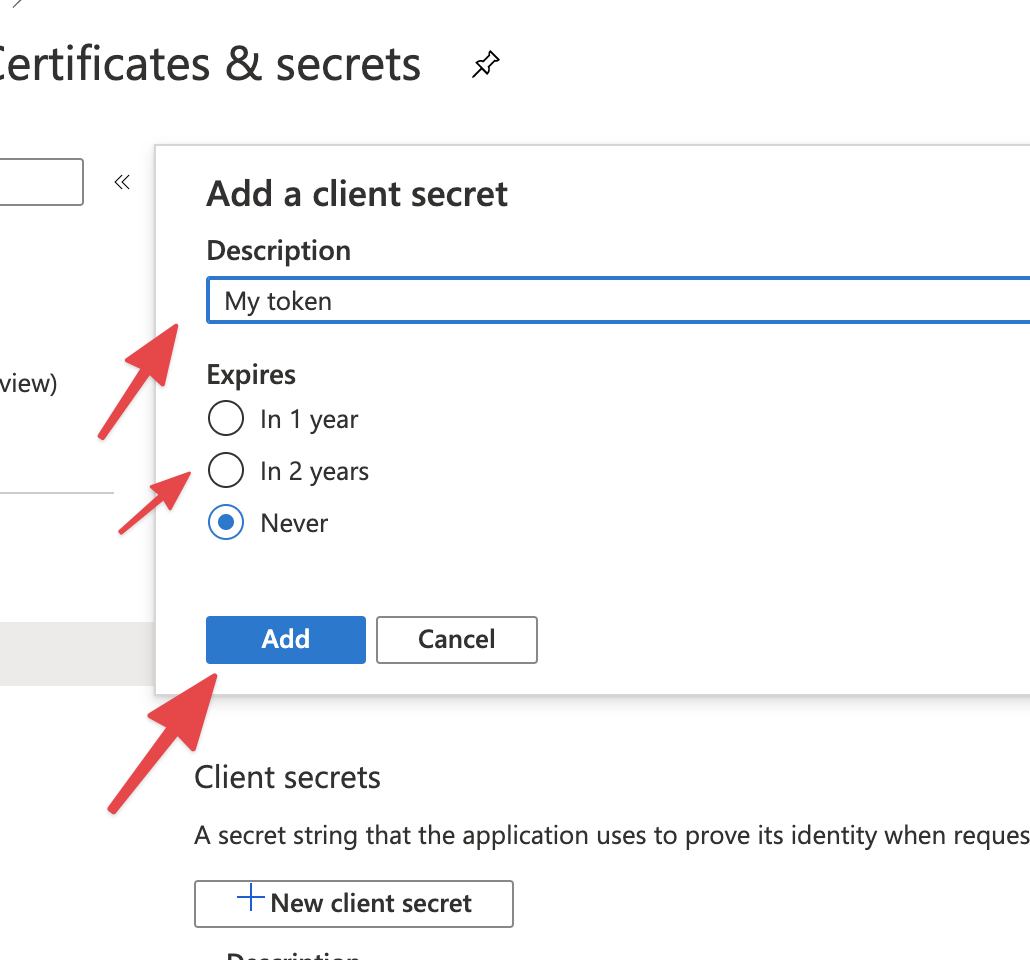
- Under the "Certificates & Secrets" heading, click on the "New Client Secret" button.
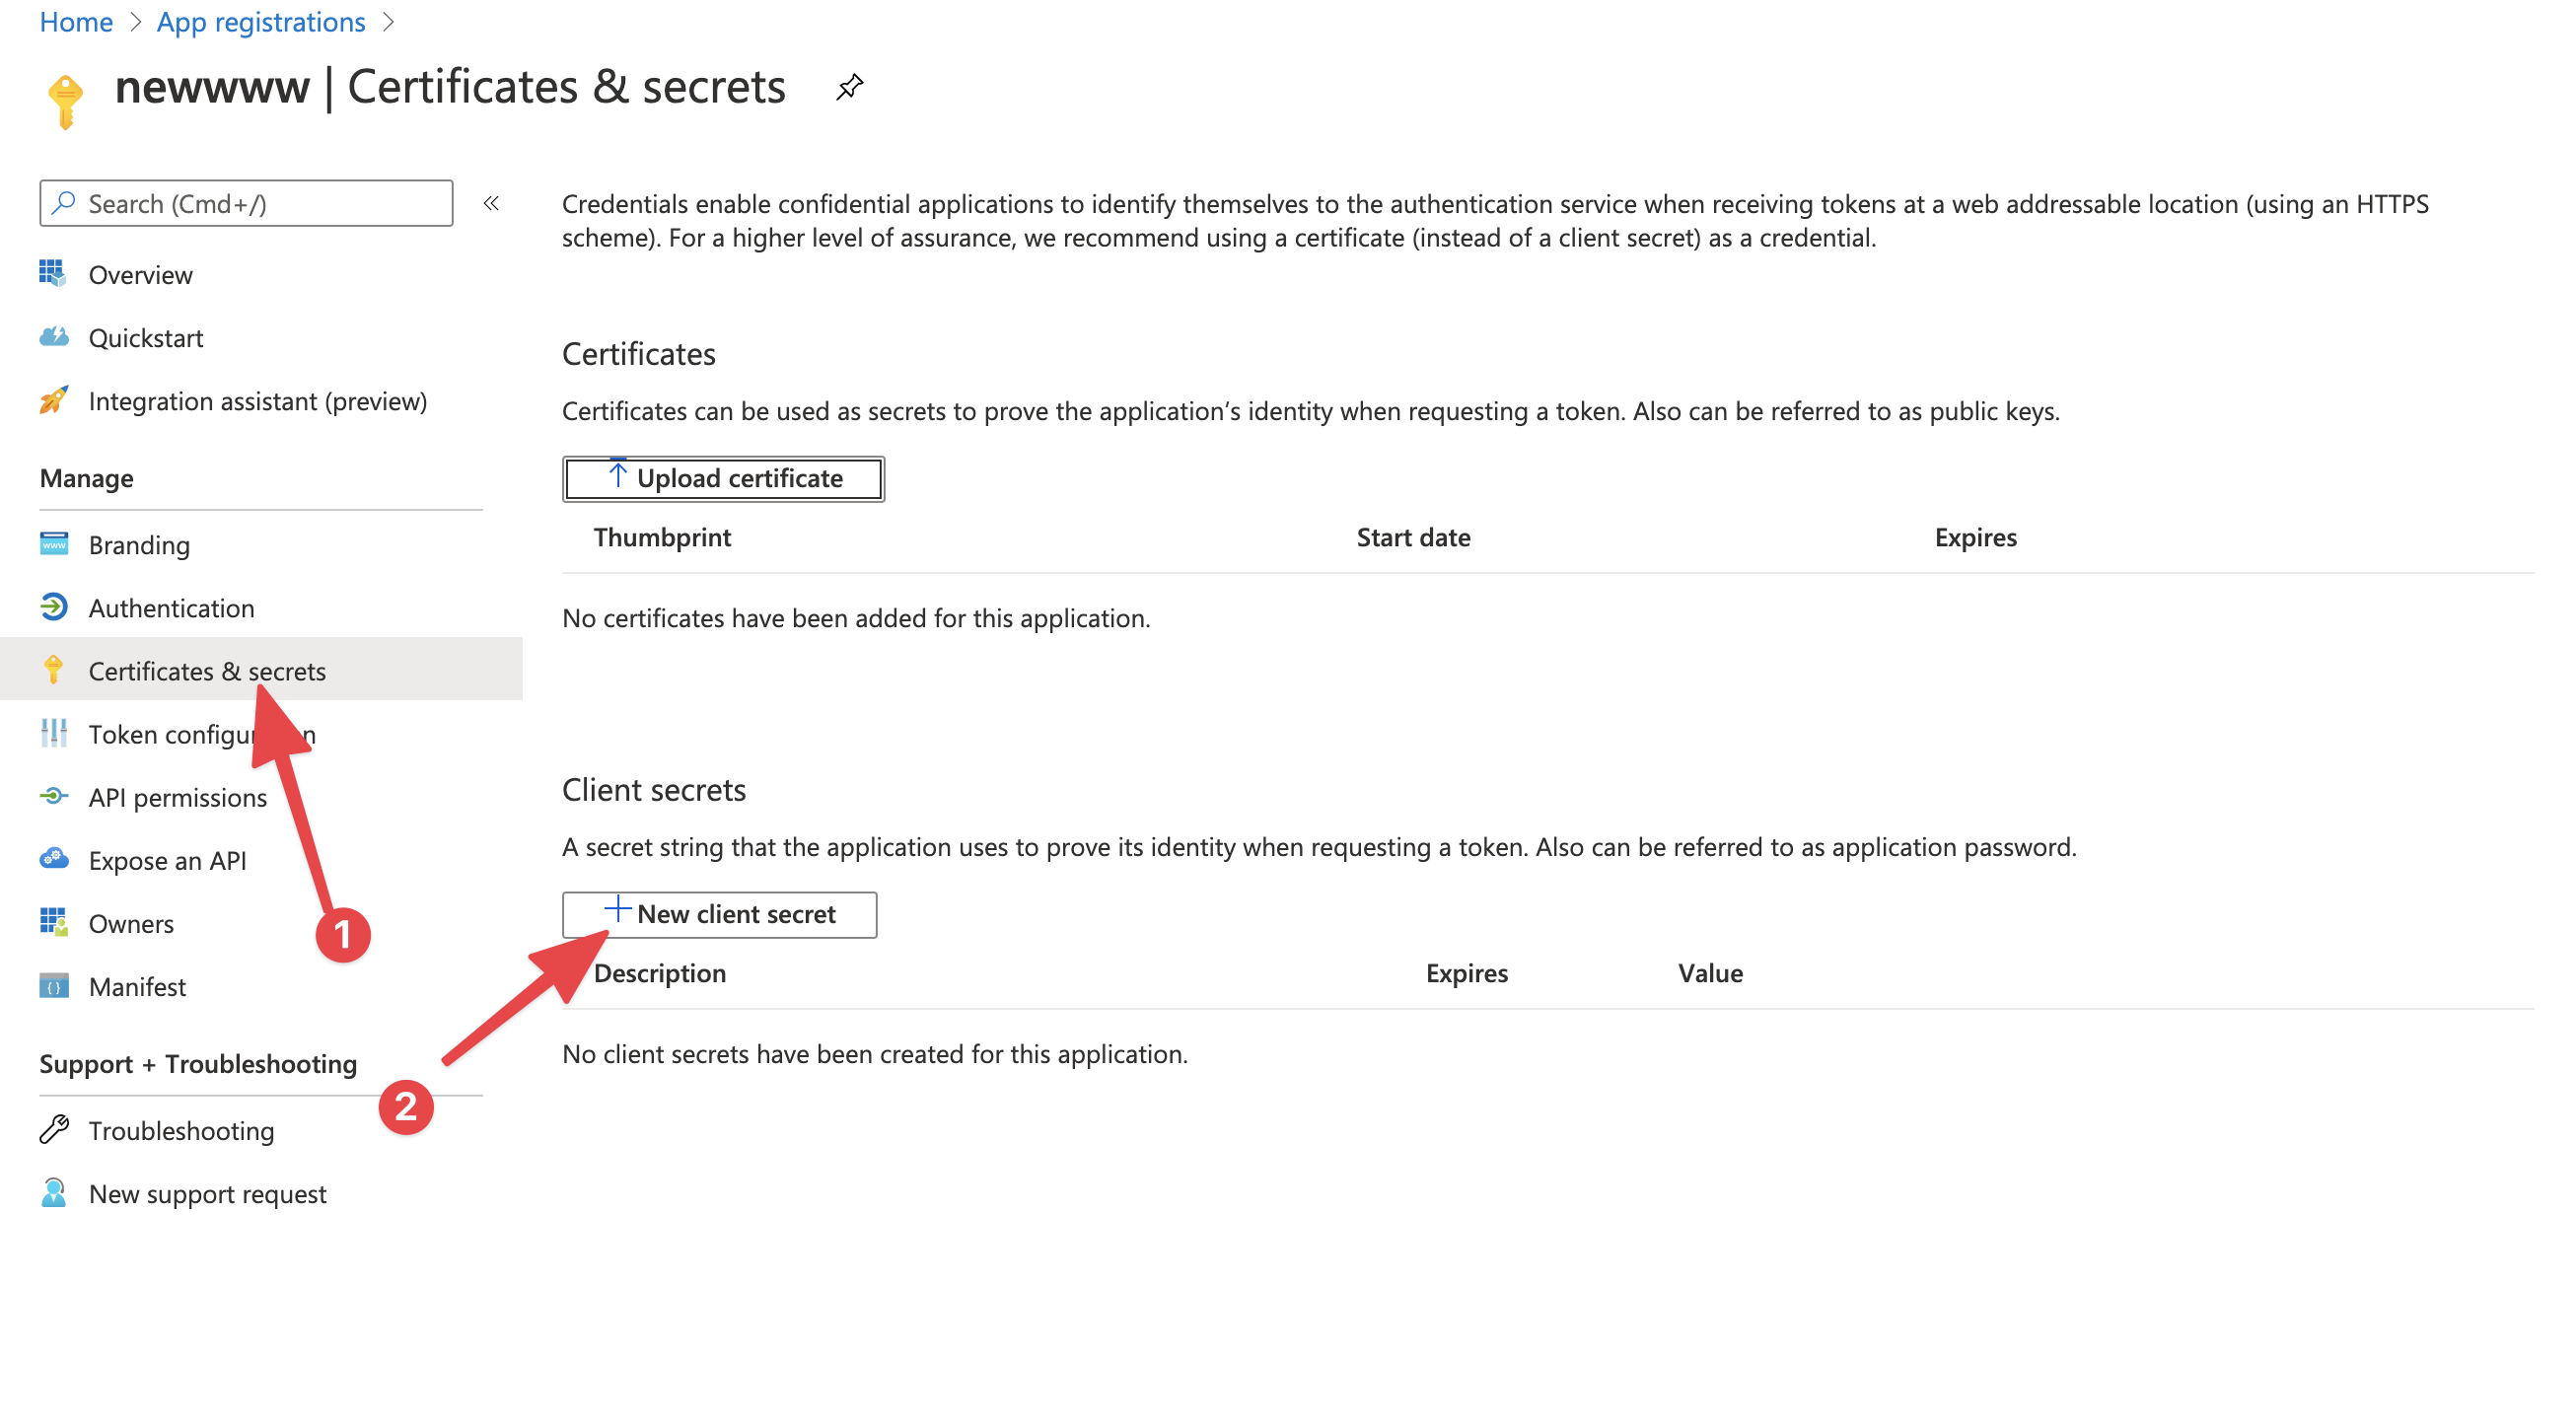
- Copy the generated toke Value, switch to Integromat, and paste it into the Client Secret field.
- Switch back to the Application Registration Portal.
- On the "Overview" section click button "API Permissions" OR select API permission section, click on the "Add a Permission" button,
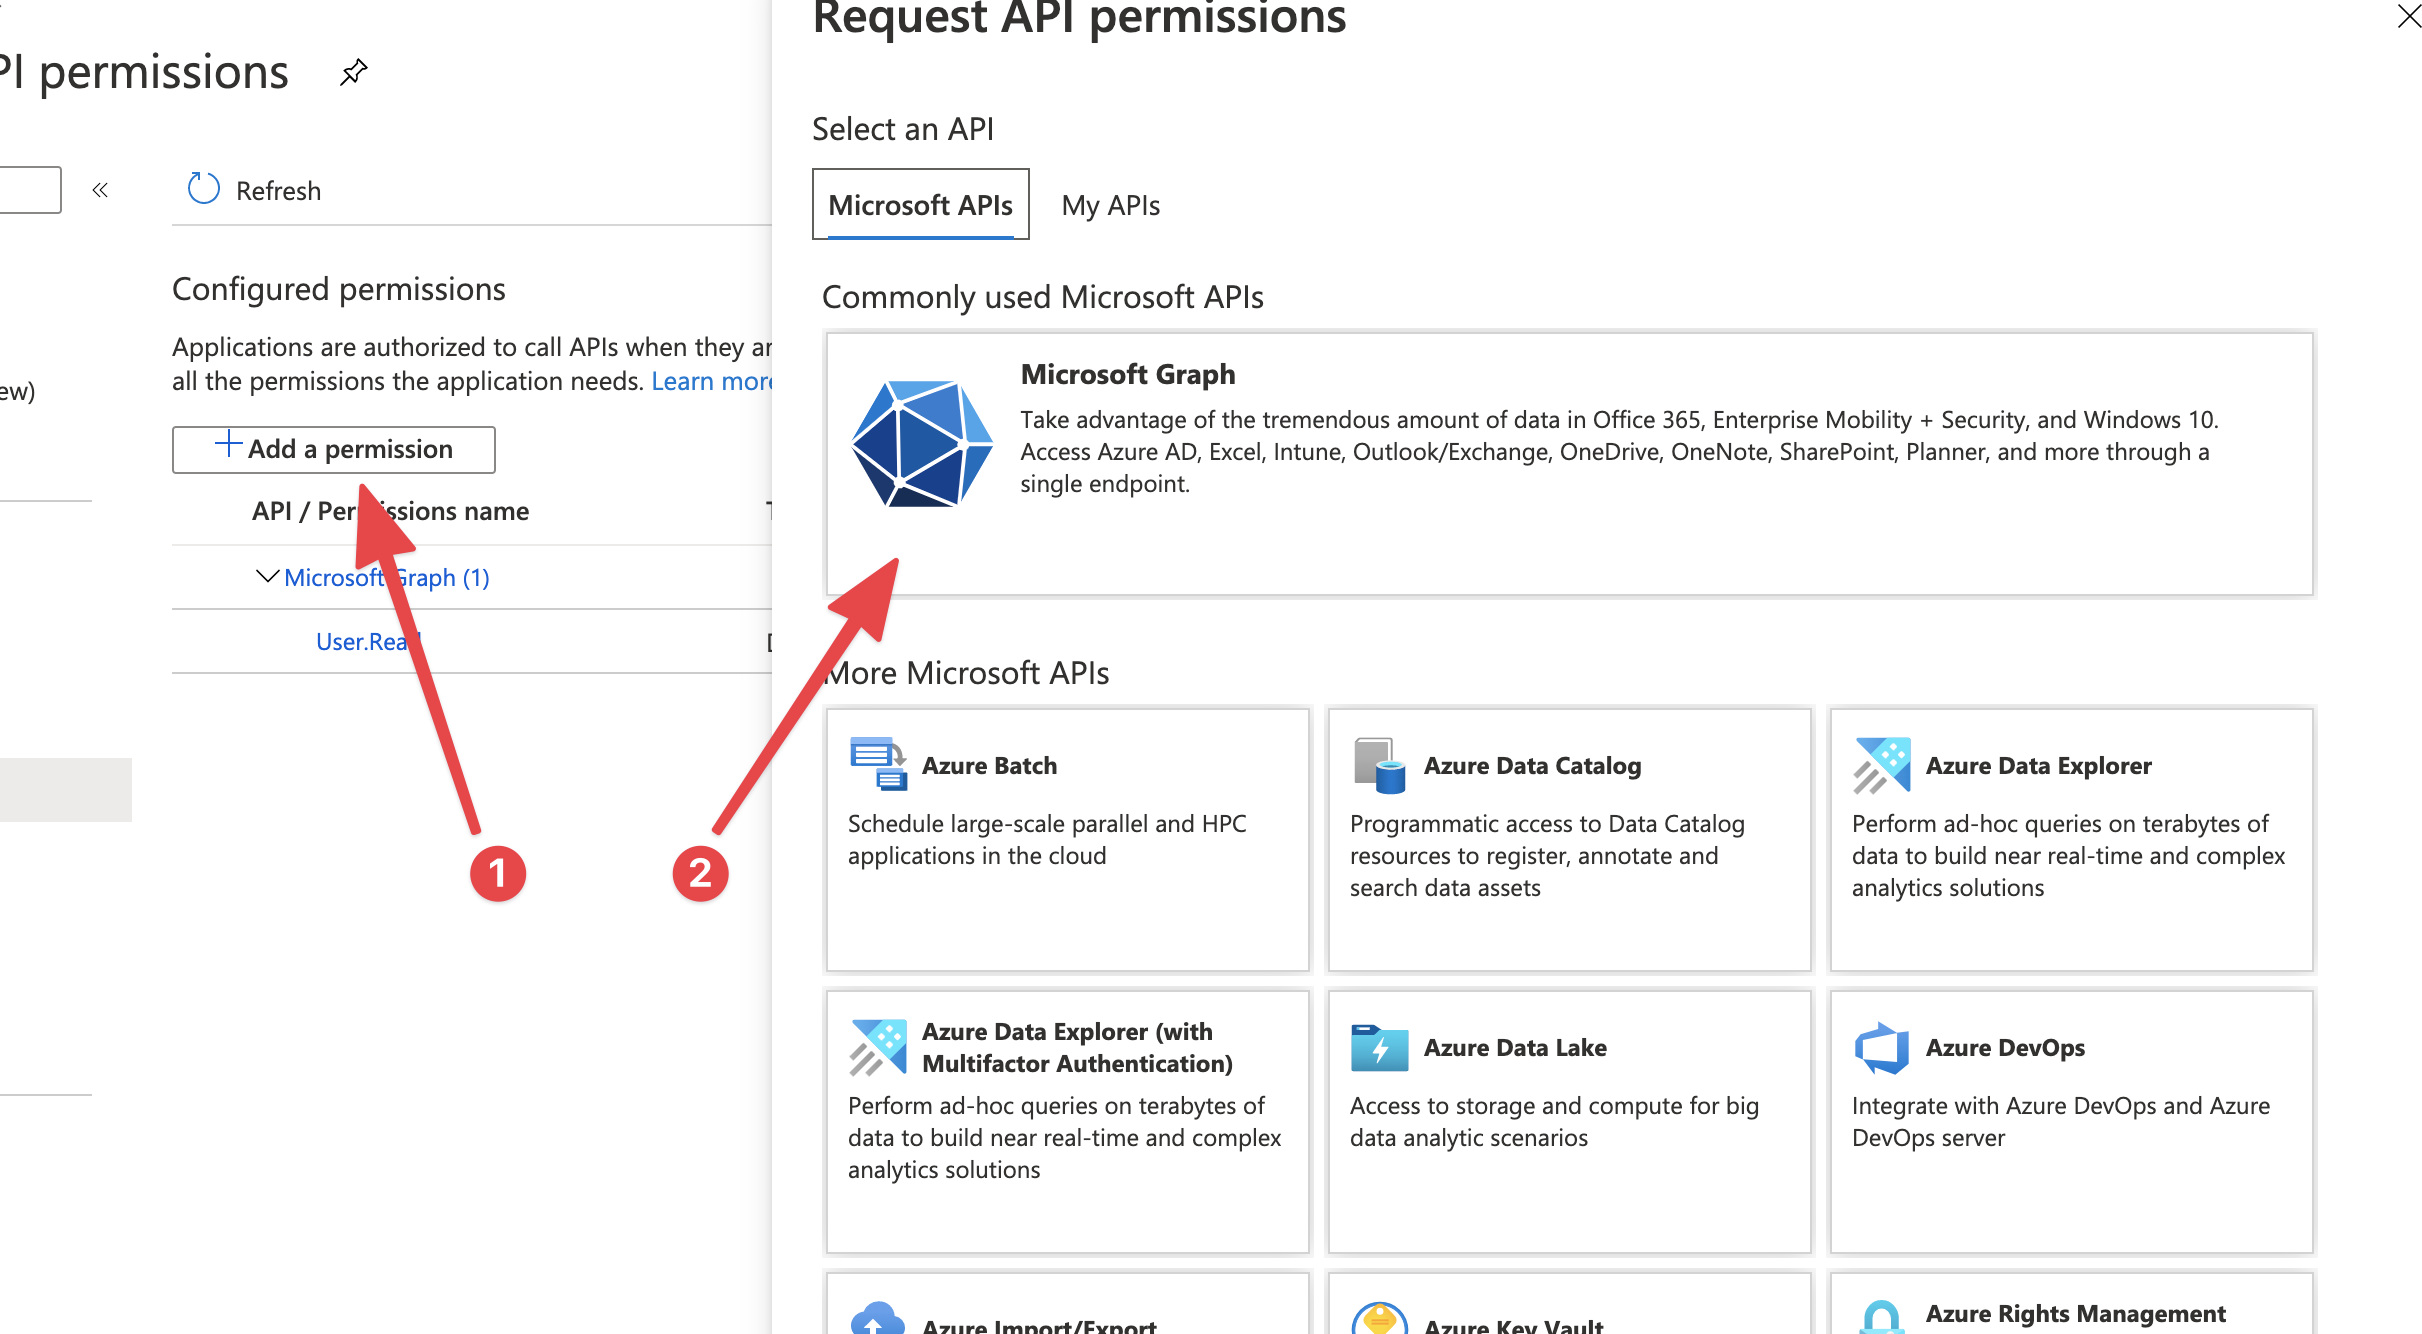
- Select Delegated Permissions and enable the required permissions (refer to the Microsoft Graph permissions reference for further details). Start with Offline_access and openid scopes they are required
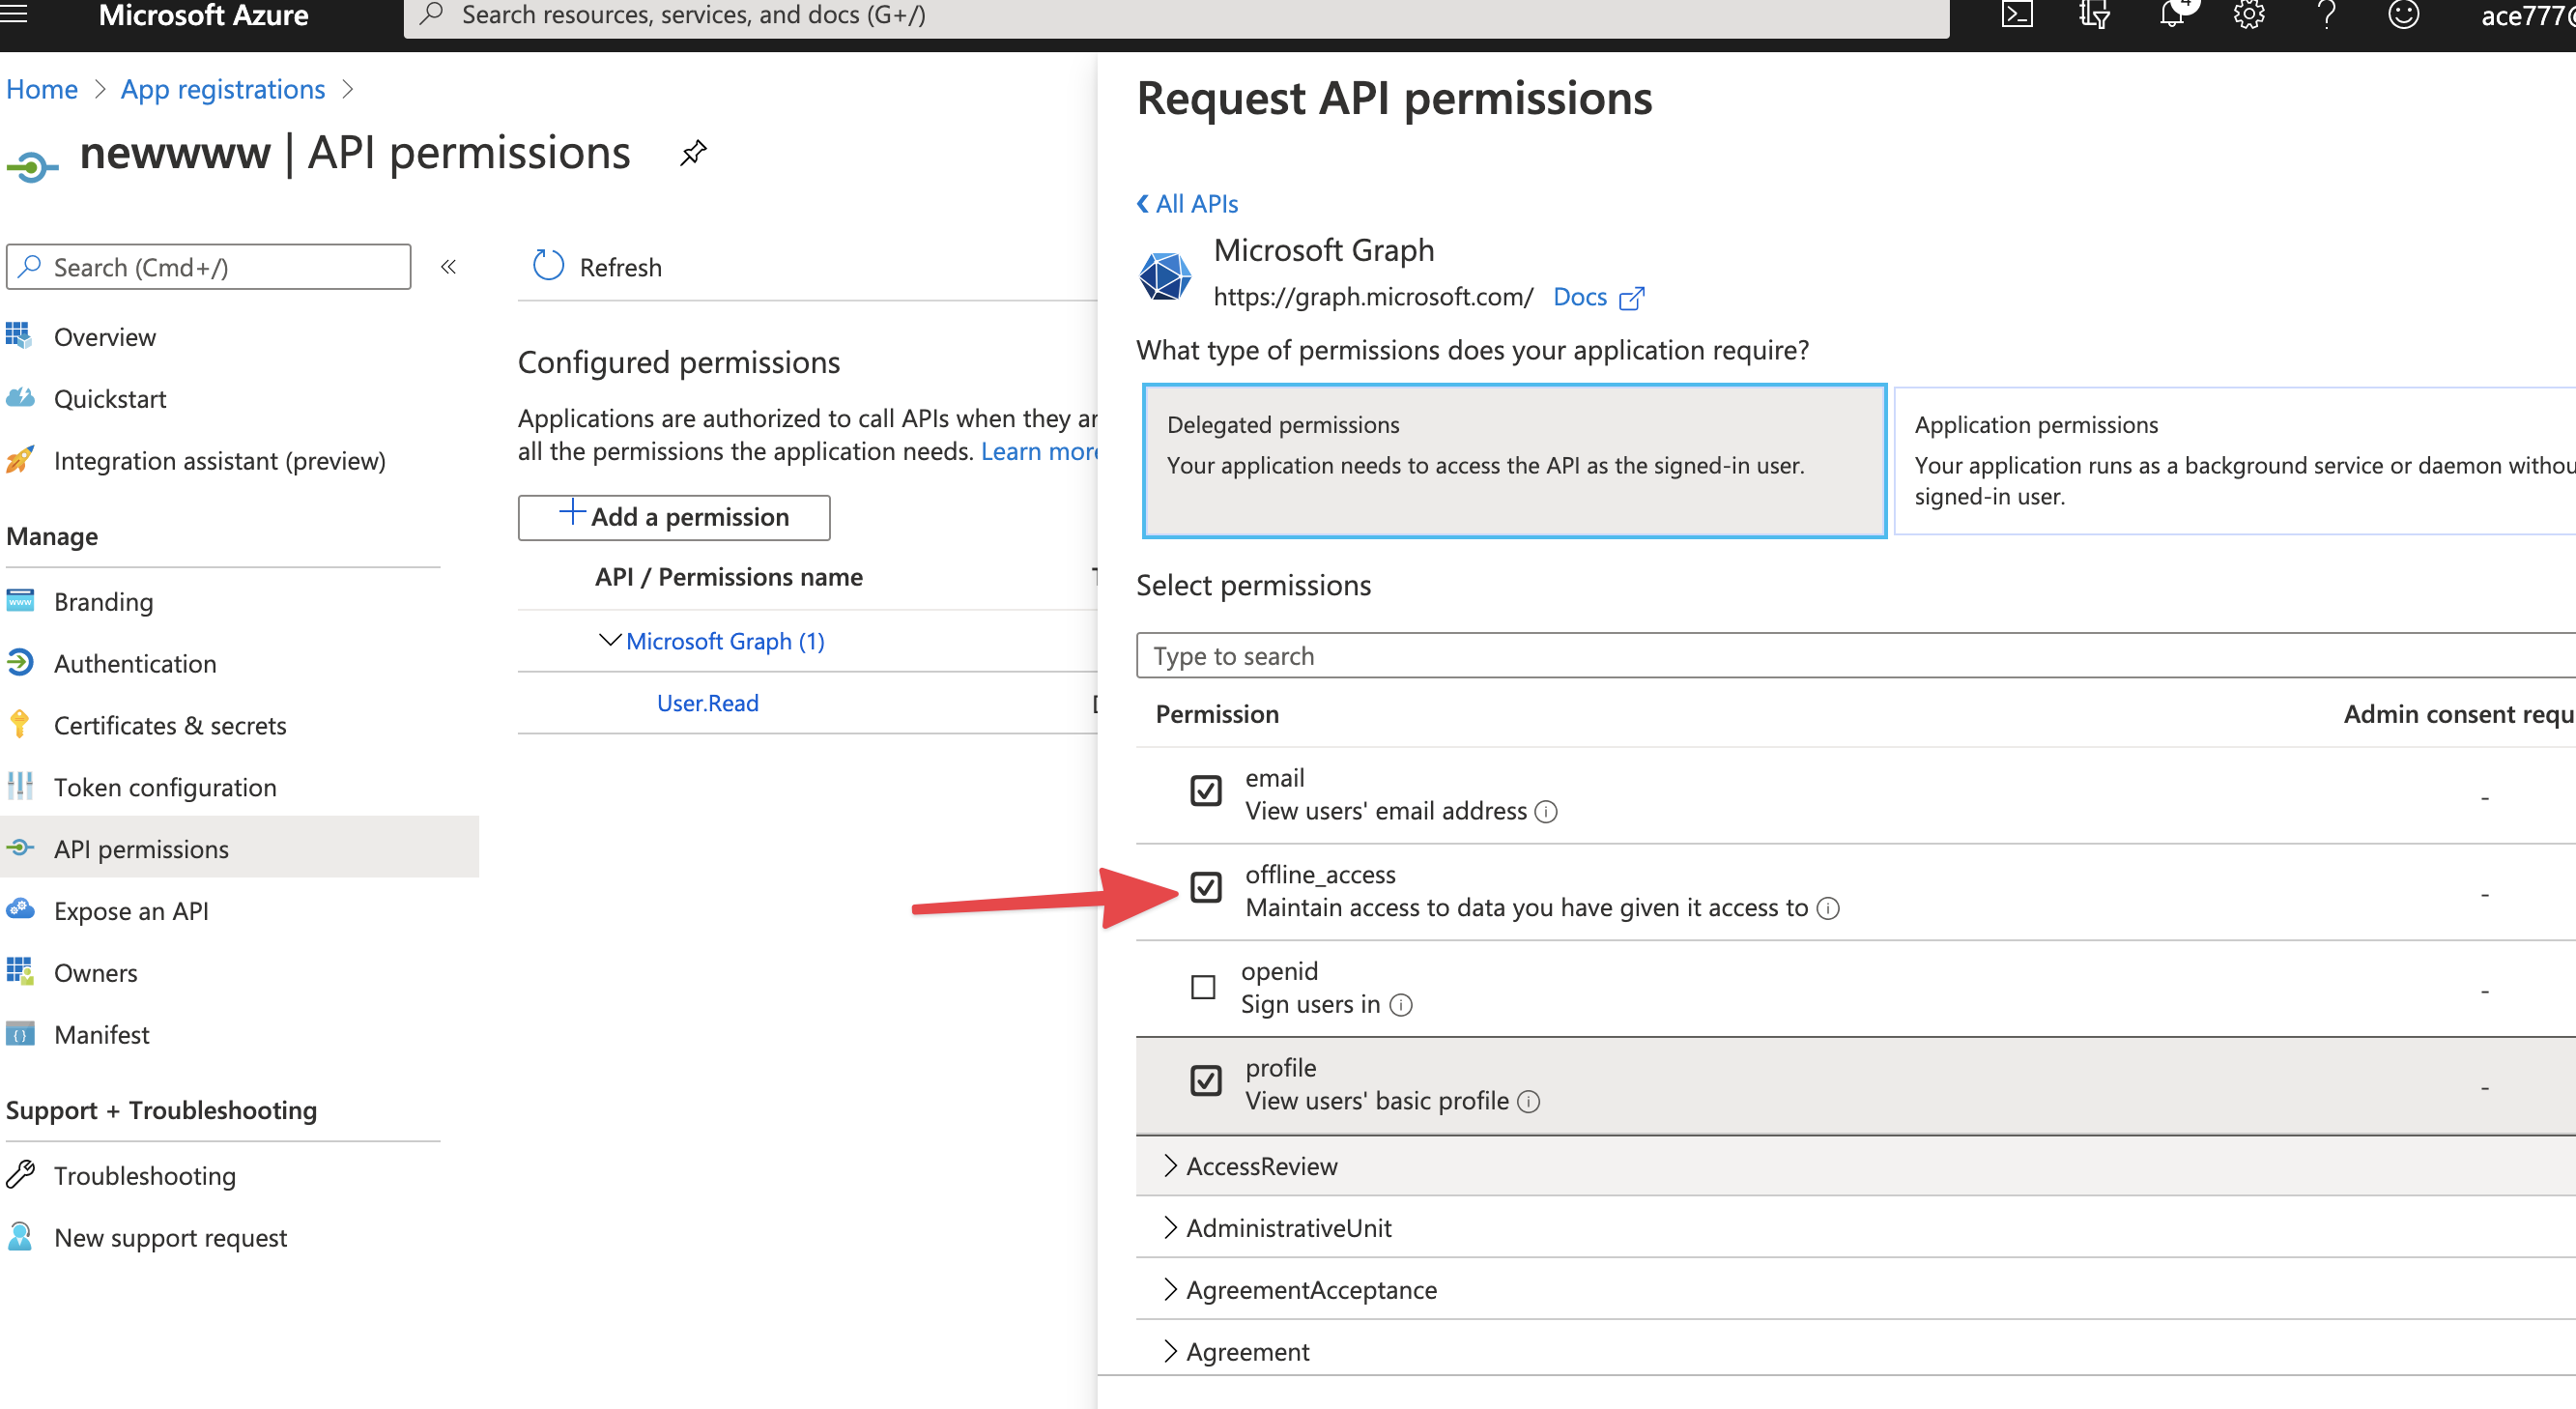 Then add additional needed in your integrations for example:
 User.Read,Files.ReadWrite.All. - Click on the "Add Permissions" button at the bottom of the page.
- Switch to Integromat.
- Add the scopes you added in the previous step into the Scope field.
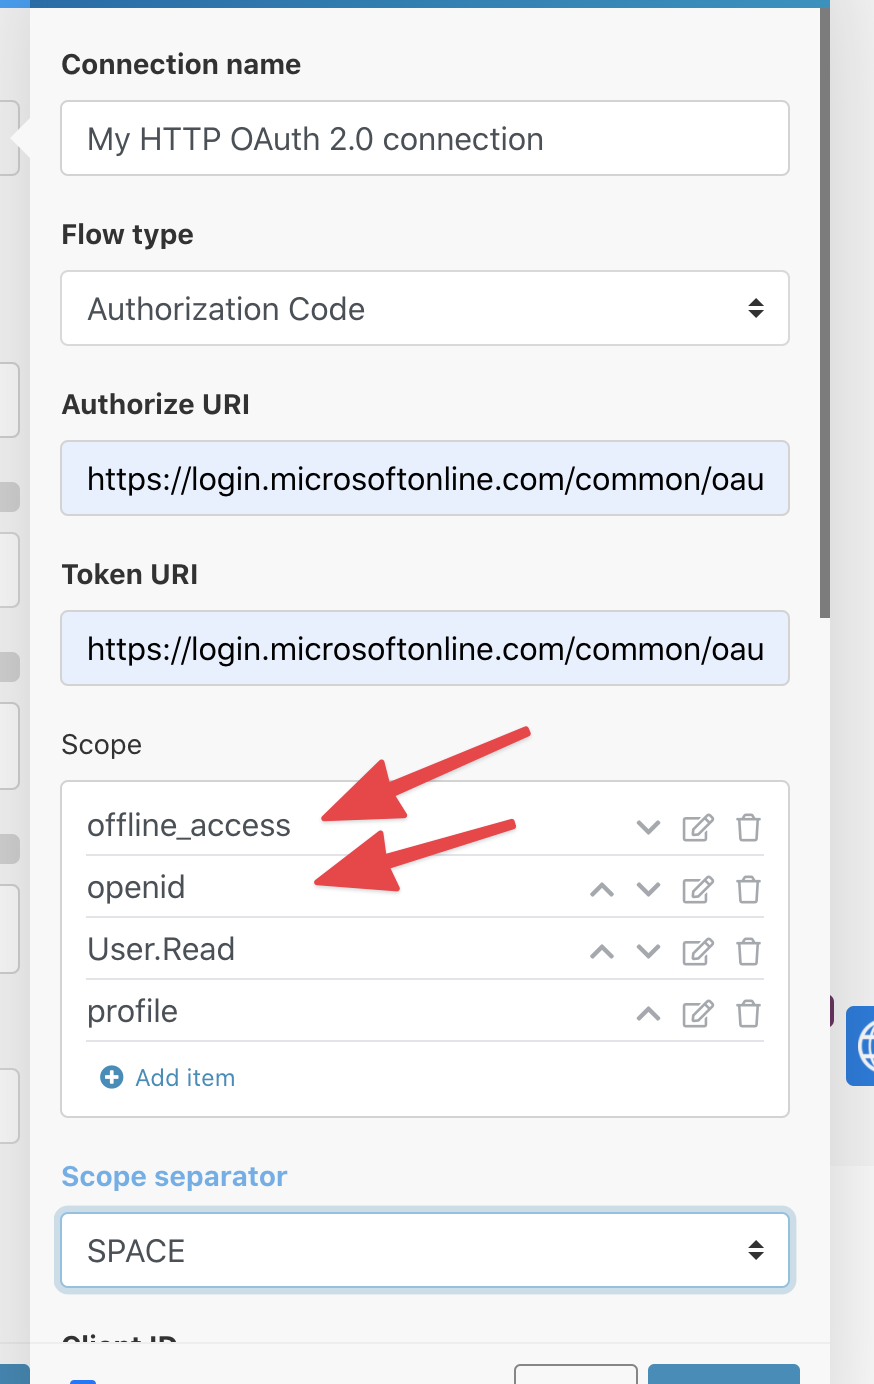
- Tick the Show advanced settings option.
- Set the Scope separator to SPACE.
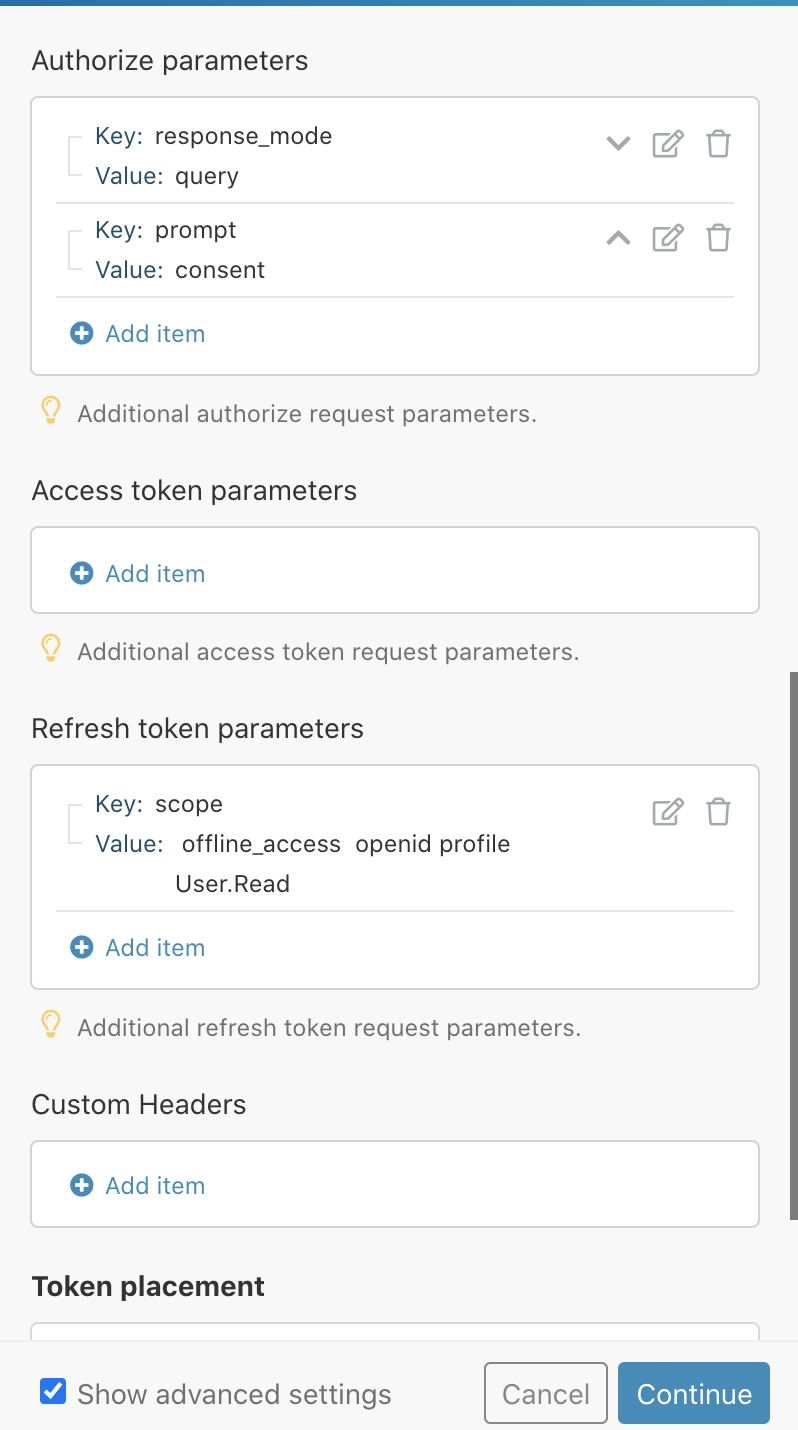
- Add additional Authorize parameters as shown below:
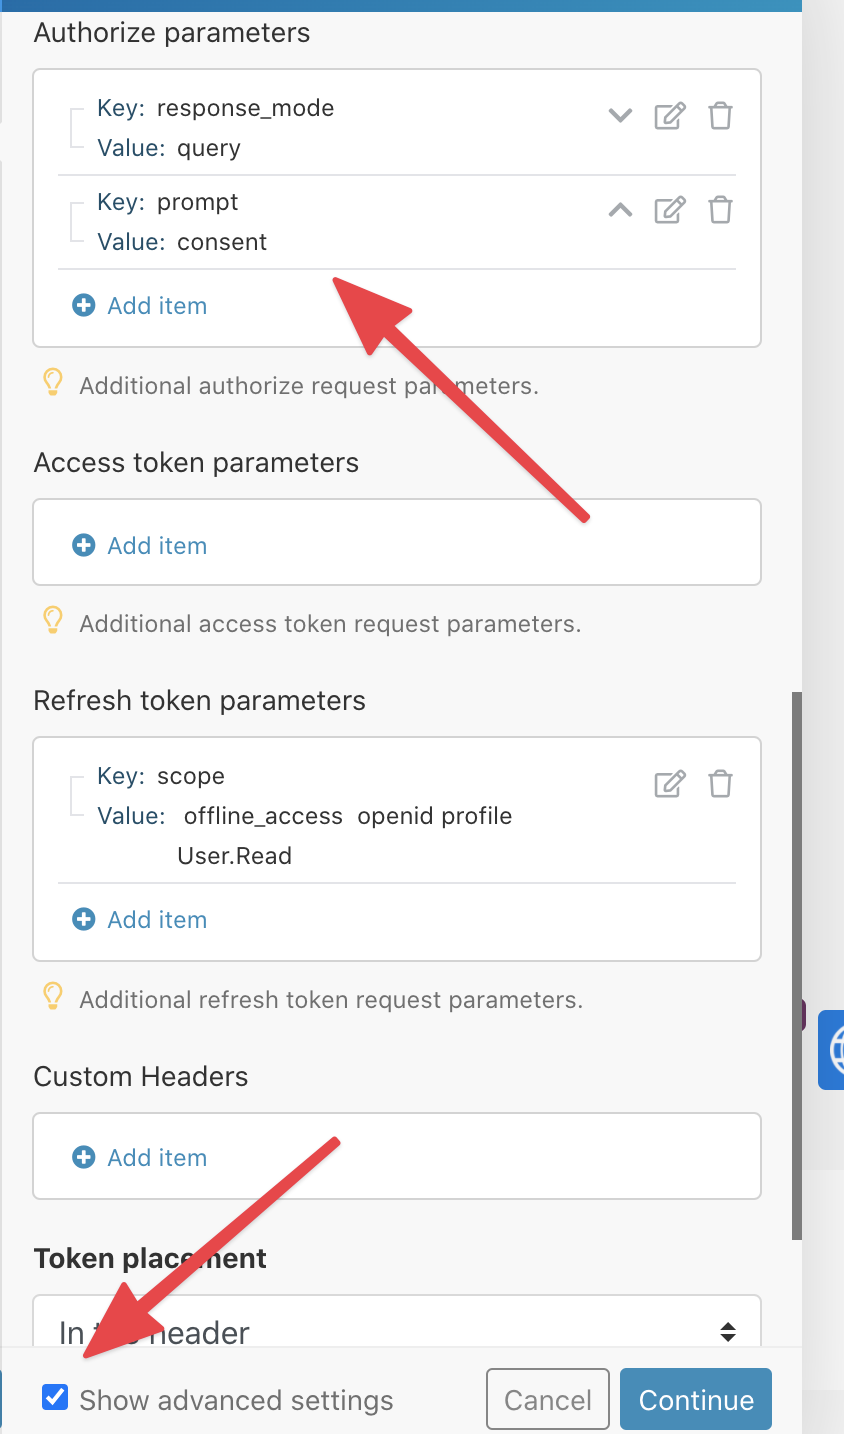
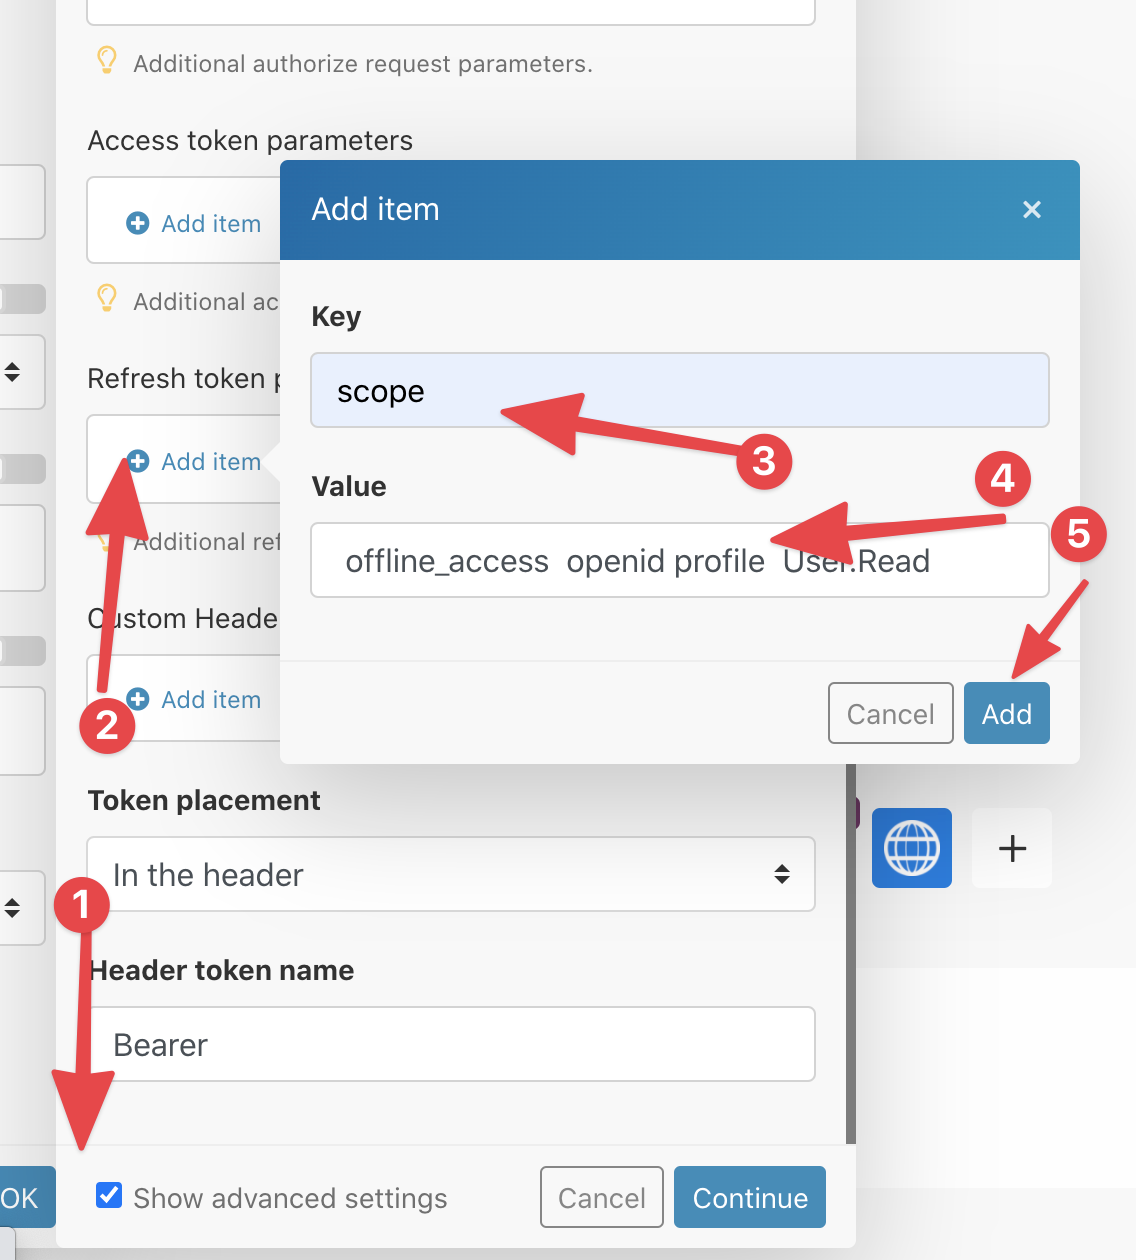
- Add the same scopes space separated to Refresh Token parameters. Create a new scope parameter for it:
- The connection setup should look like this:
- Click on the "Continue" button.
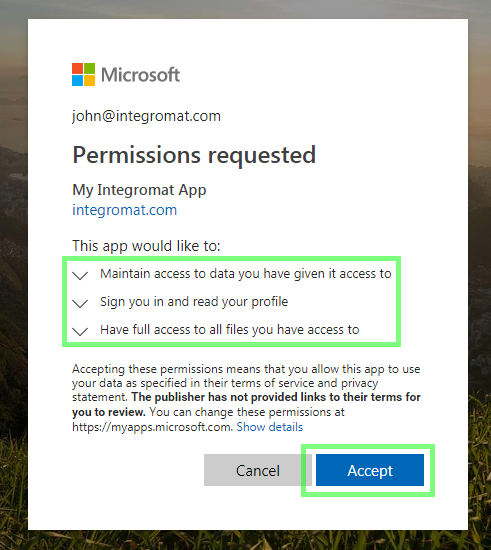
- A window will pop up. Review the permissions and click on the "Accept" button:
- The connection should be now successfully created.
- You can try to perform a test GET call to
https://graph.microsoft.com/v1.0/me - Configure the module to make an API call (refer to Microsoft Graph REST API v1.0 reference for further details).


