Calling Google APIs via the "HTTP > Make a OAuth 2.0 request" module
This is a step-by-step guide on calling Google APIs like:
- Google Drive API
- Google Tag Manager API
- Google Docs API
- Google Ads API Beta
- Google My Business API
- Google Cloud Pub/Sub API
- Google Search Console API
- G Suite Groups Settings API
- G Suite Directory API
- BigQuery API
- Google Cloud Natural Language API
- G Suite Reseller API
- Google Sites
- Google Apps Script
- Gmail API
- and many others
from Integromat:
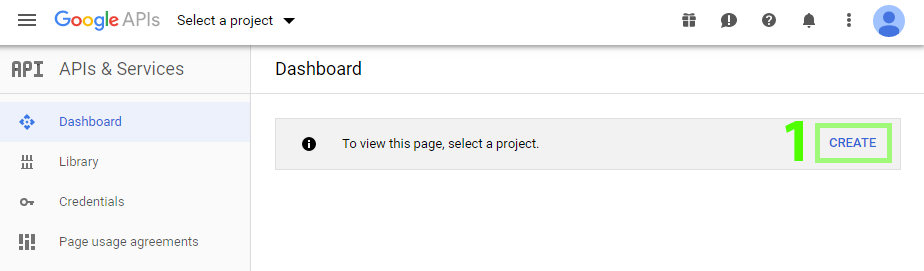
- Open the Google Cloud Platform APIs & Services dashboard and login with your Google account.
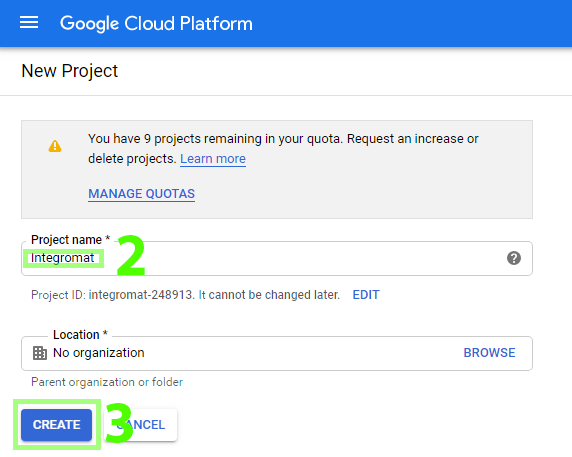
- If you have not created any project yet, create one by clicking on the "CREATE" link, fill the Project name field and click on the "CREATE" button:
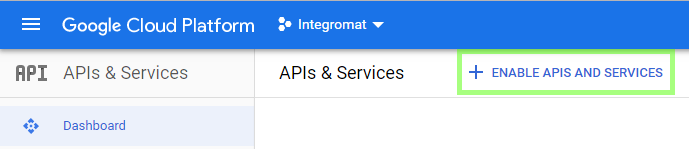
- Click on the "ENABLE APIS AND SERVICES" button:
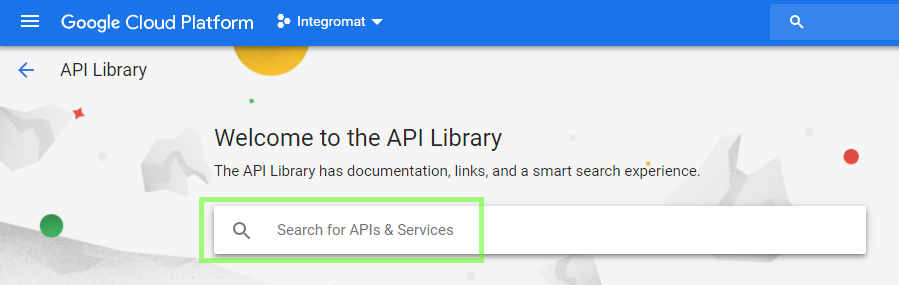
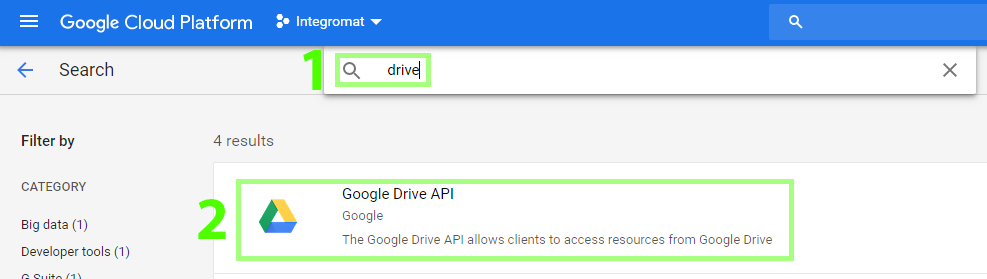
- Type the name of the API you would like to call in the Search for APIs & Services field and click on it:
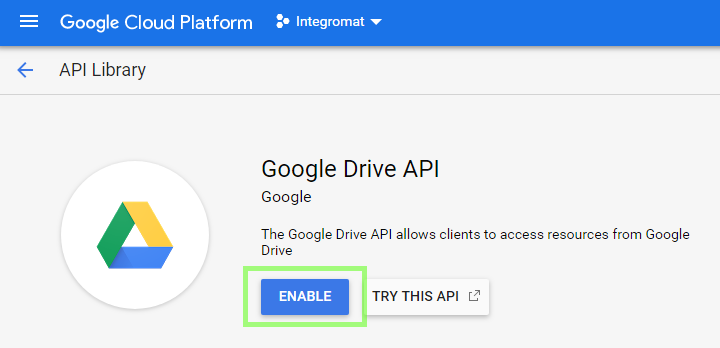
- Click on the "ENABLE" button to enable the API:
- Open the Google Cloud Platform APIs & Services Credentials OAuth consent screen tab.
- Fill the form as follows and then click on the "Save" button to save the settings:
Application name e.g. IntegromatAuthorized domains integromat.com - Open the Google Cloud Platform APIs & Services Credentials.
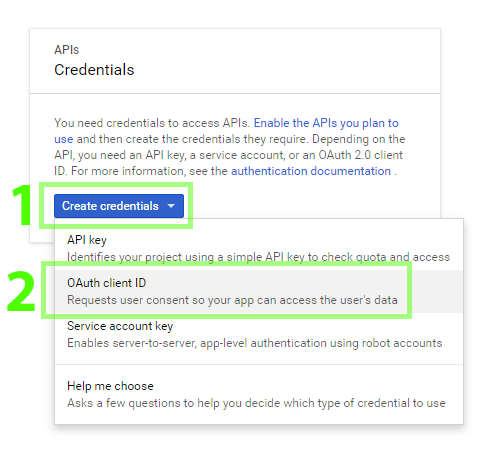
- Click on the "Create credentials" dropdown button and choose the "OAuth client ID" option from the menu:
- Fill the form as follows and then click on the "Create" button to create the app:
Application type Web applicationName e.g. IntegromatAuthorized redirect URIs https://www.integromat.com/oauth/cb/oauth2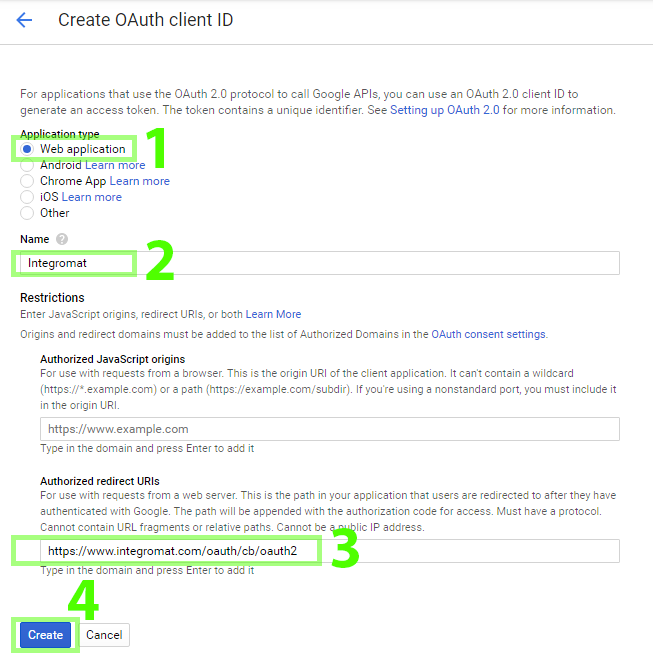
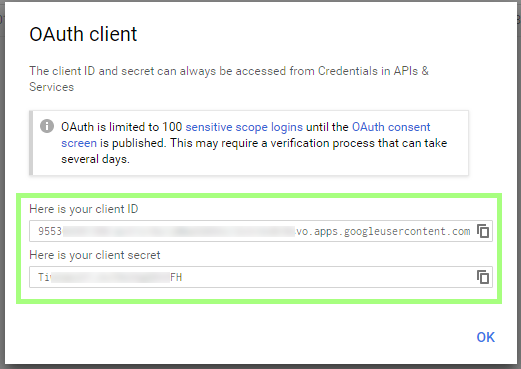
- A dialog containg app's Client ID and Client Secret will pop up:
- In Integromat, create a new scenario.
- Insert the HTTP > Make a OAuth 2.0 request module.
- Open the module's configuration and click on the "Add" button next to the Connection field to create a new connection.
- Tick the Show advanced settings option.
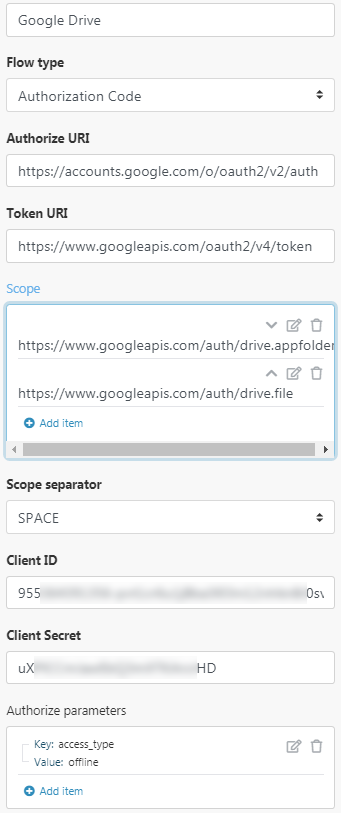
- Fill the connection setup as follows:
Flow type Authorization CodeAuthorize URI https://accounts.google.com/o/oauth2/v2/authToken URI https://www.googleapis.com/oauth2/v4/tokenScope Add all the scopes the API call requires (check also OAuth 2.0 Scopes for Google APIs for a complete list of scopes): - Google Drive API
- Google Tag Manager API
- Google Ads API Beta
- Google My Business API (step 6.)
- Google Cloud Pub/Sub API - see Cloud Pub/Sub reference for per-method OAuth scopes (e.g. Method: projects.topics.publish)
- Google Search Console API
- G Suite Groups Settings API
- G Suite Directory API
- BigQuery API
- Google Cloud Natural Language API
- G Suite Reseller API
- Google Sites
- Google Apps Script
- Gmail API
Scope separator SPACEClient ID The content of the Here is your client ID field from step 11. Client Secret The content of the Here is your client secret field from step 11. Authorize parameters Add access_type-offlinekey-value pair: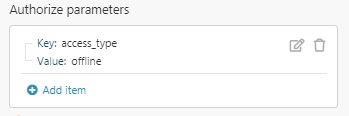 Should you experience authentication issues e.g. with token refreshing, try adding also the
prompt-consentkey-value pair. - The connection setup should look like this:
- Click on the "Continue" button.
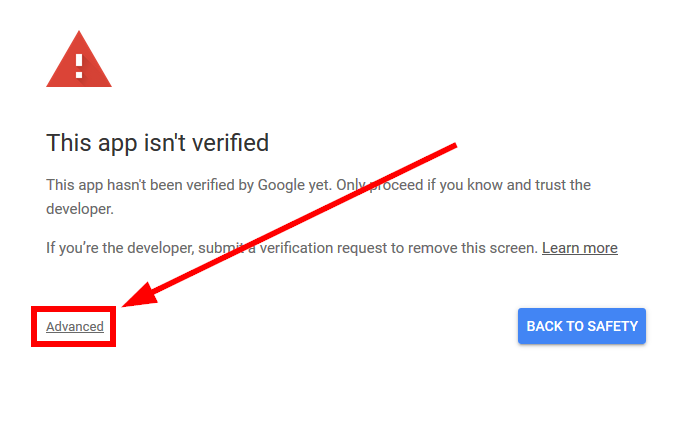
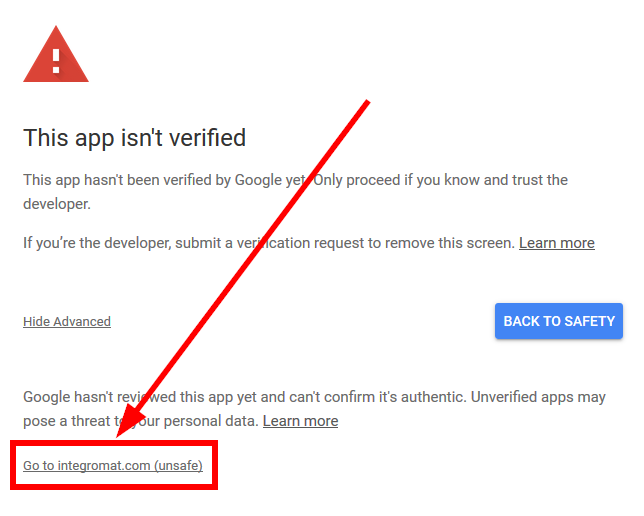
- Should a popup titled "This app isn't verified" appear, click on the "Advanced" link and then on the "Go to Integromat (unsafe)" link:
- A window will pop up. Review the permissions and click on the "Allow" button. The connection should be now successfully created.
- Configure the module to make an API call:


