How to connect Airtable and Google contacts and synchronize contacts between these services
One of the many great features of Integromat is the ability to interconnect services. In the following guide, we will show you how to connect Airtable to Google Contacts and synchronize a list of contacts between these services.
Adding Google Contacts
First, you have to "Create a new scenario" in your dashboard. Then add the Google Contacts Watch contacts module. Then, in this module, to the right of the Connection field press the Add button. A dialog will pop up asking you to name your connection. You can enter whatever name you like, but we recommend to use names from which you can derive which Google account the connection relates to, in case you forget it. Your Google email or name is a good choice.
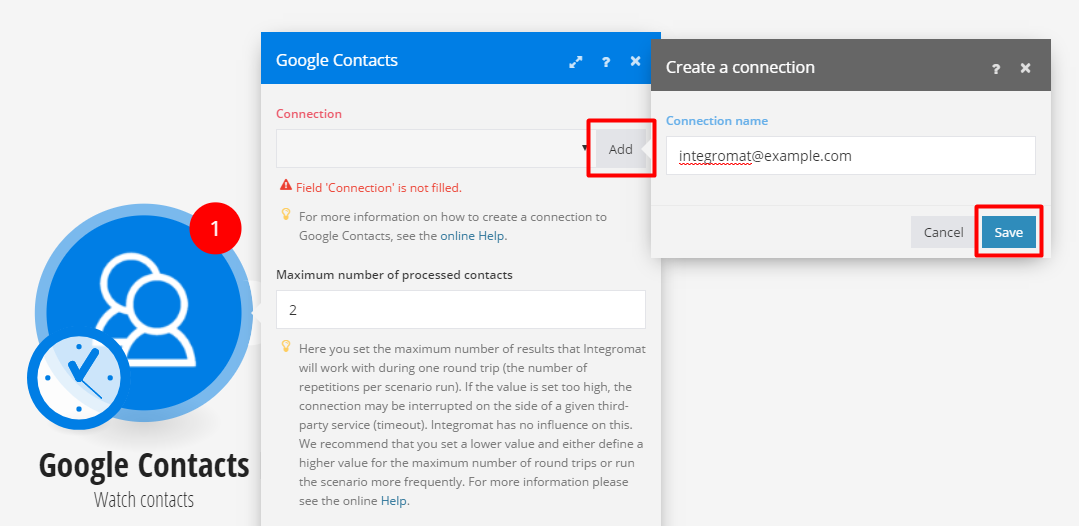
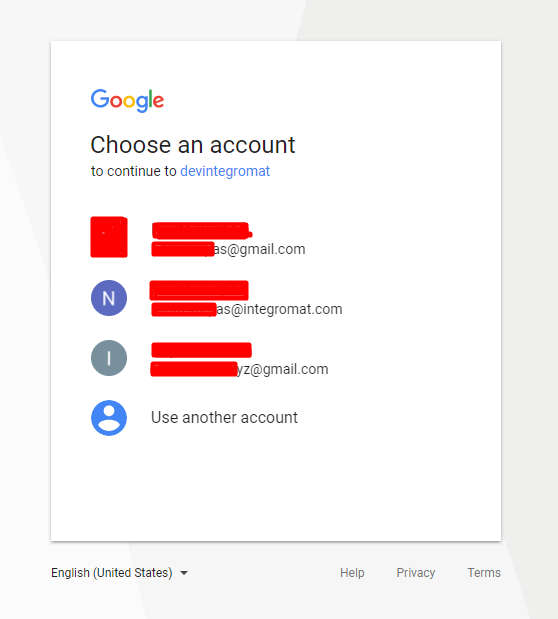
After you click the Save button, a window will pop up asking you to select which Google account you want to use. Select the appropriate account and approve access for Integromat.
Adding Airtable
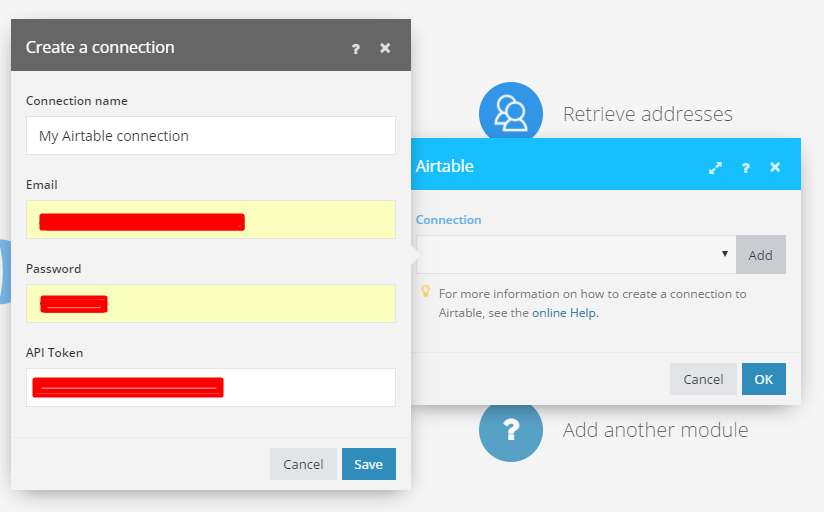
In the next step, add a new module to the scenario, select Airtable and the Create a record module. Now, add a connection to Airtable in the same way you did with the Google Contacts module. After clicking the Add button, you will be prompted to enter your Airtable email, password, and API token.
In order to get your API token, head to https://airtable.com/account, scroll down a bit and there you will see the API token field. If you haven't used Airtable's API before, you will not have an API token. But it is easy to generate one - just press the Generate token link and your API token will be generated by Airtable. If you already have a token, there is no need to regenerate a new one.
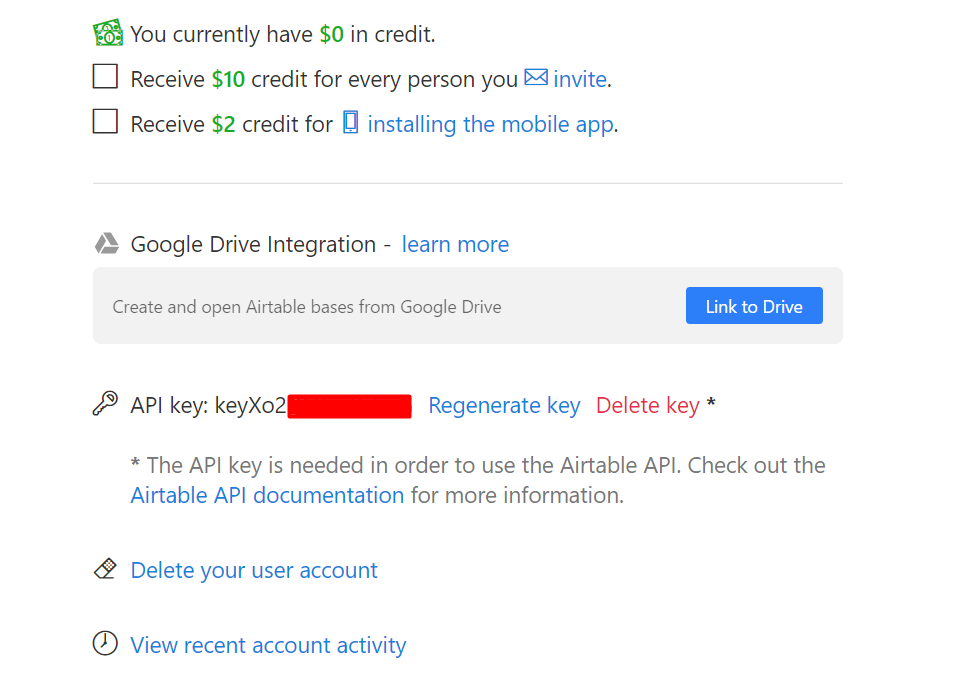
Now that you have your API token, just copy it over to the API token field in Integromat and click the Save button.
Configuring the scenario
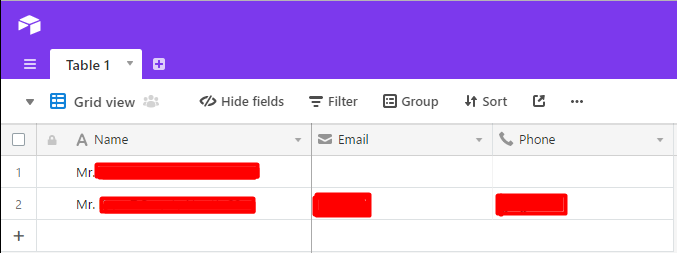
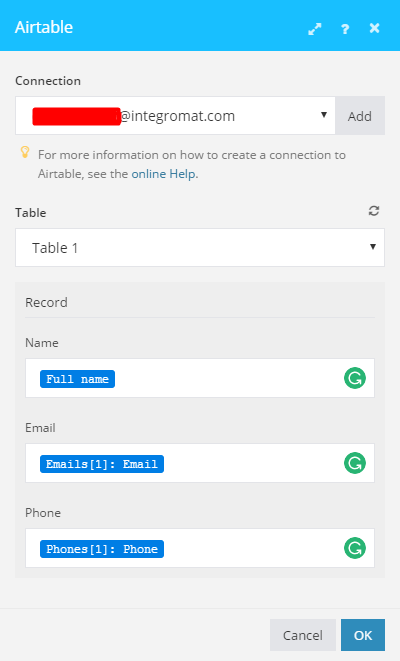
After the account has been linked to Integromat, you can continue setting up your scenario. First, you have to select a table that will store your contacts. After you select your table you will be presented with fields that are preset in this table. In our example, we have just 3 fields: Name, Email, and Phone. When you click on the field, you will be presented with a number of options on how to fill this field. For the Name field, you can use Google Contacts' Full Name field. Since Google Contacts allows you to store multiple emails for a single contact, we will select only the first one. Press the Airtable Emailfield, then, in the newly opened dialog find the Emails[] field, click a little triangle to the right of Emails[], this will expand the Emails[] field, and click on Email. Fill in the Airtable Phone field the same way.
Your Airtable module configuration should now look like this:
Press the Ok Button to save and close the configuration dialog.
In the end, your scenario should look like this:
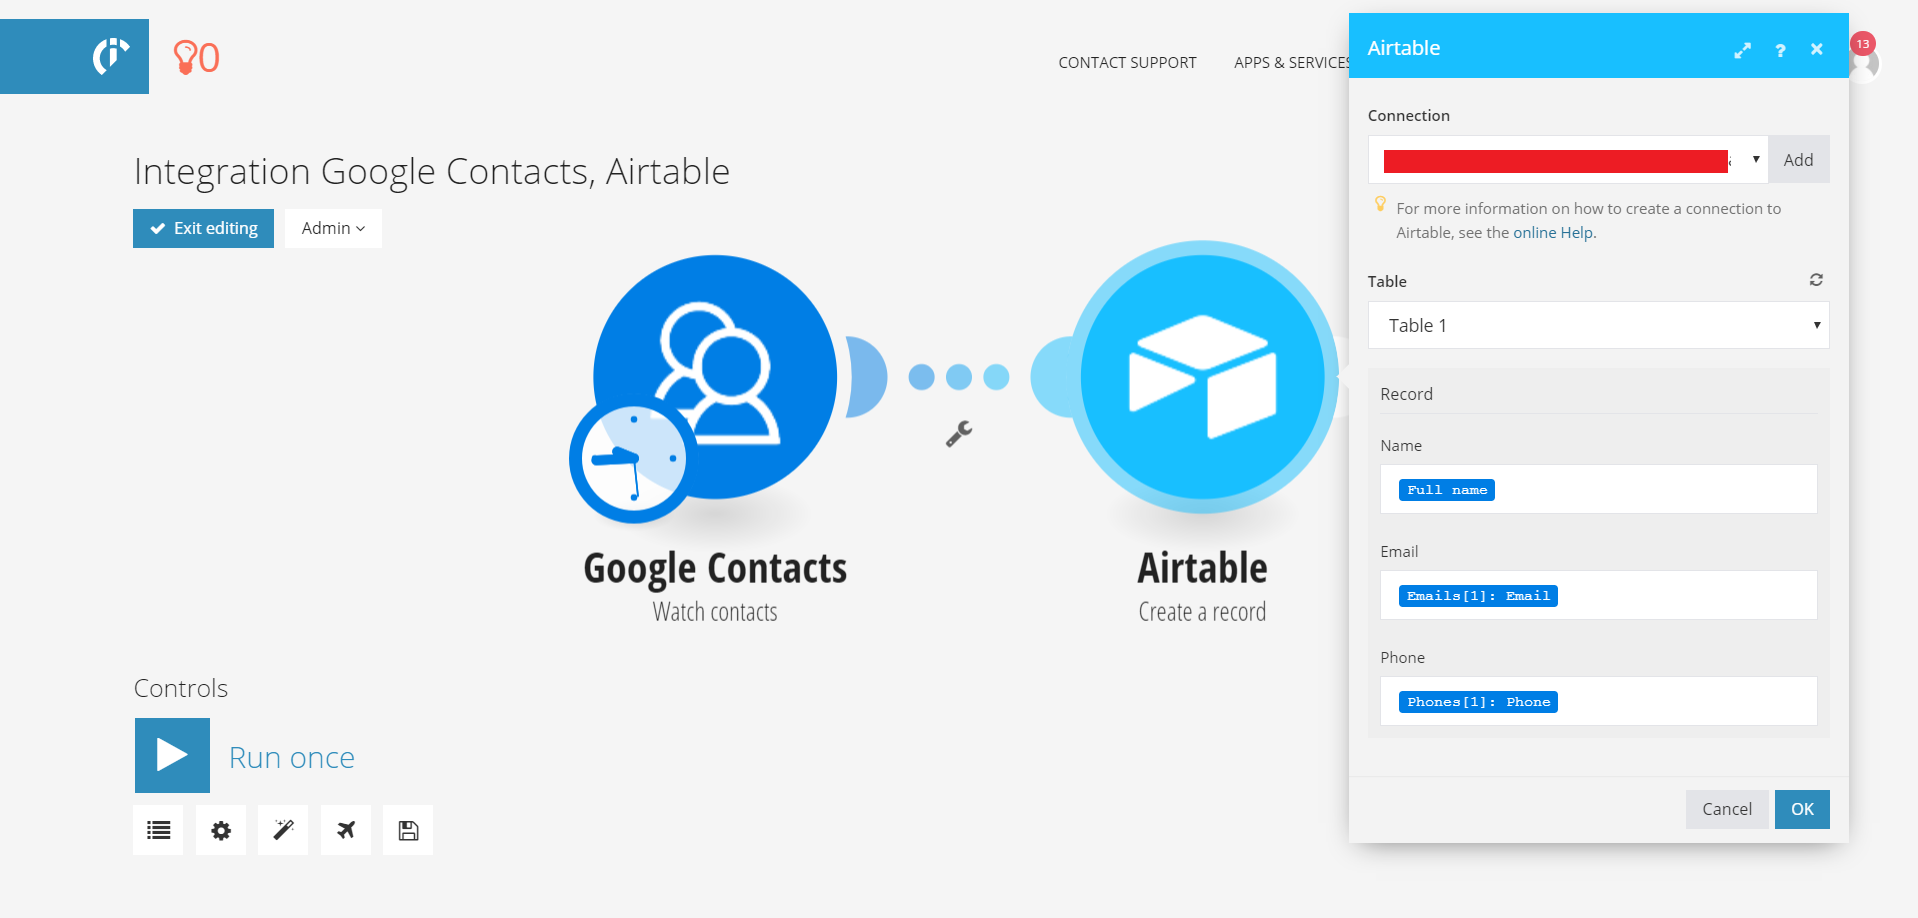
The integration is now ready and you can run the scenario. If you have some contacts in Google Contacts and if everything has been processed without errors, you will see that the Watch contacts module has generated some bundles and that the Create a record module has successfully created new records out of the bundles generated by the Watch contacts module. Now, you can go to your Airtable table and verify that the data is there.